How to Draw Hands
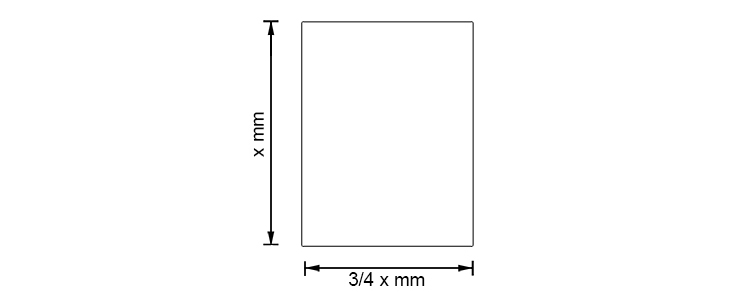
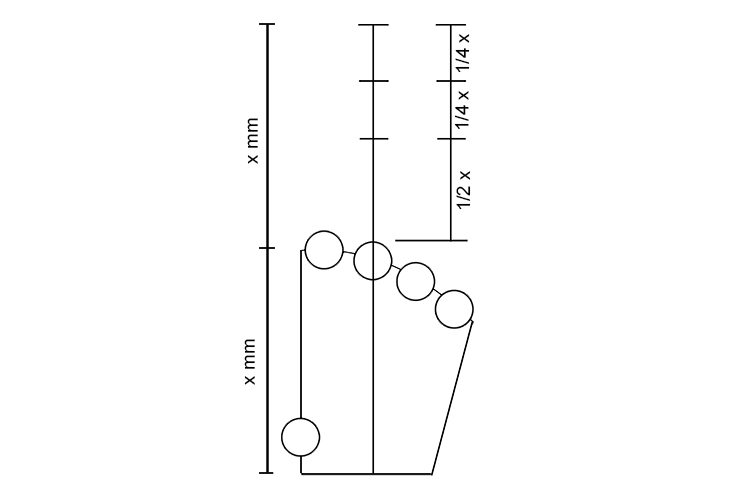
For this project, we will be drawing the back of the right hand. Start by drawing a rectangle – the base should be 3/4 the length of the vertical side.
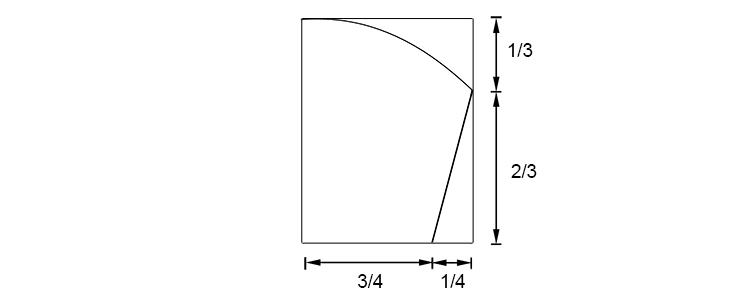
Then, measure 3/4 along the bottom and 1/3 from the top. Draw a curved line from the top left corner to the 1/3 point and a straight line from the 1/3 point down to the 3/4 point.
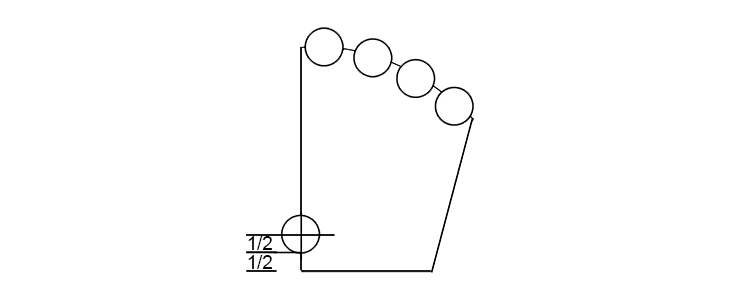
Draw 4 circles, equally spaced along the curved line, and one just up from the bottom of the left side. This last circle should be half the diameter of itself above the baseline.
These will be the knuckles.
The length of the middle finger is the same length as 'x'. Halfway down the middle finger, draw a line for the first finger joint, then another line 1/4 of the way along for the second joint.
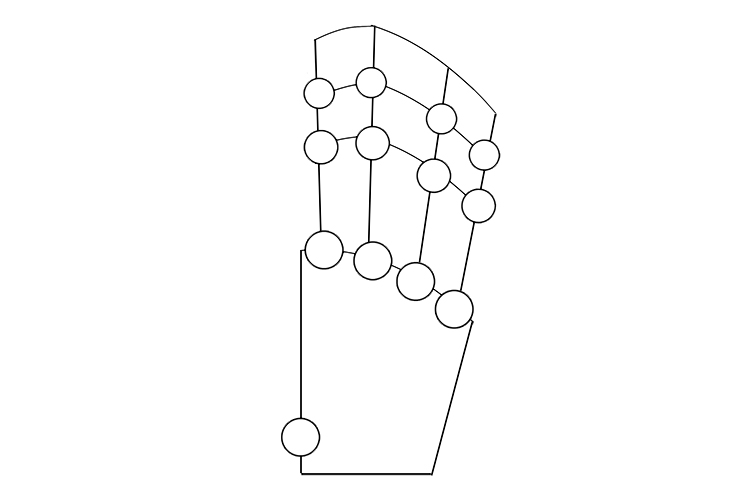
Draw three curved lines on the three marks on the finger, roughly the same as the curve for the knuckles, but sloping down a little more on the left side.

Draw 4 lines coming from the knuckles up to the top line and draw circles where the lines intersect.
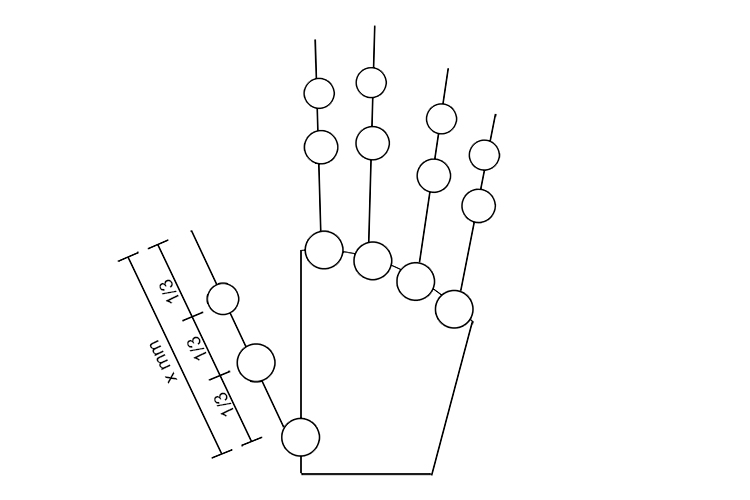
The thumb will be the same length as the palm length. When the hand is covered with flesh, the thumb appears to be one of the shortest fingers but it is actually connected much further down the hand.
Draw around the hand! Humans have some webbing between the fingers so the skin won't go all the way down to the knuckles. Similarly, be sure to think about the muscle around the thumb. The gap in between the fingers isn't a V shape, it is more rounded like a U.
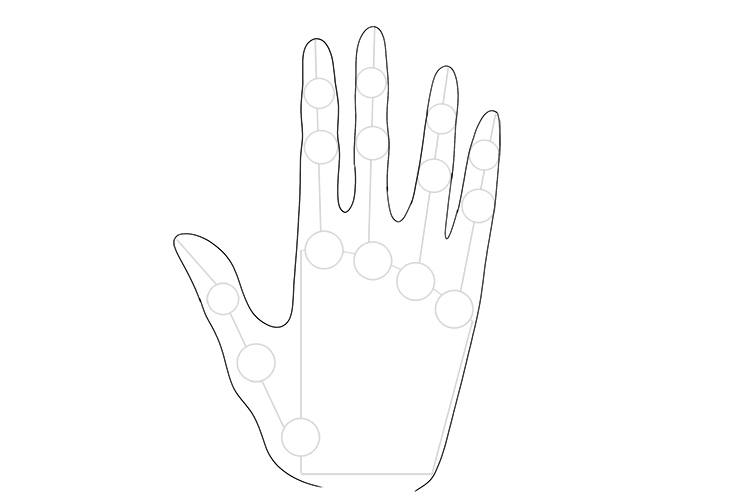
Add some details to the hand, such as the wrinkles on the finger joints, lines for the knuckles and hand bones, and fingernails, which usually start halfway between the last finger joint and the tip of the finger.
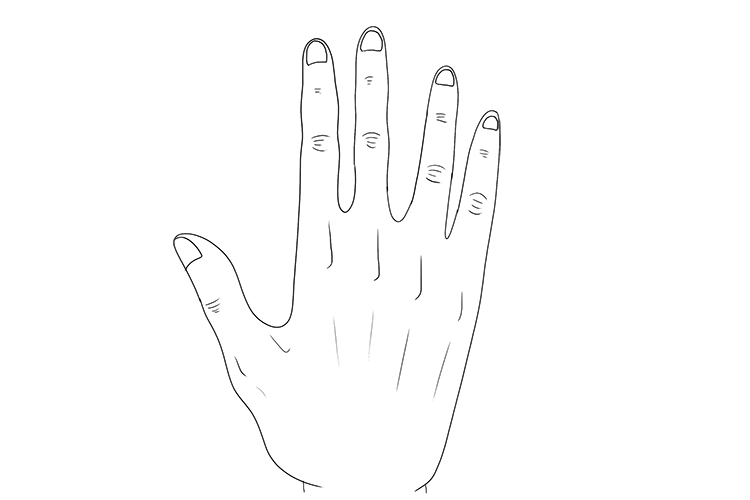
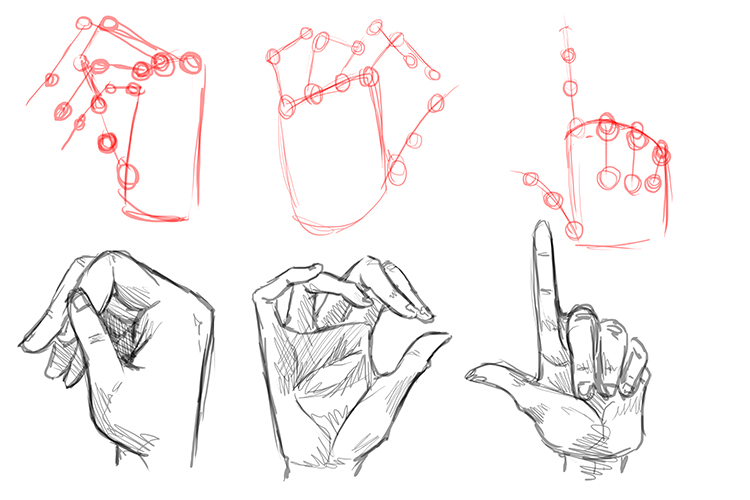
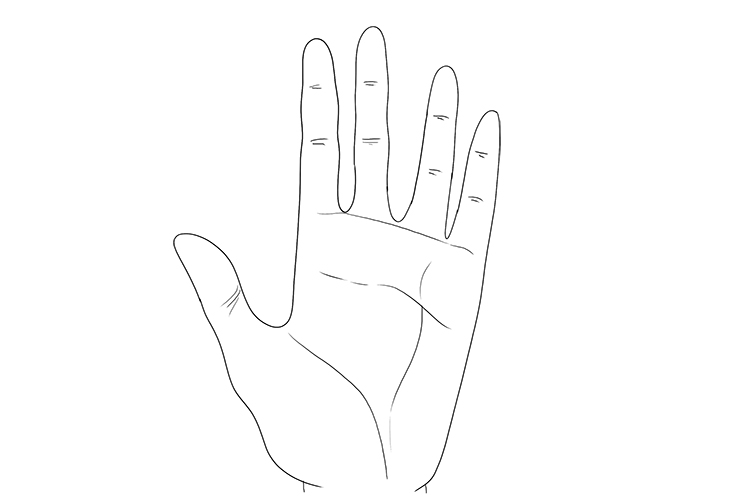
To draw the hand palm side up, get to the following position:
And then add details such as the creases where the fingers and thumb bend, a line under where the knuckle joints would go and a line down from in between the little finger and ring finger.
You can now use this technique to draw hands in any pose!