Summary of method for drawing ray diagrams – Convex mirror
Below is a simplified version of the last section that you will see in most text books.
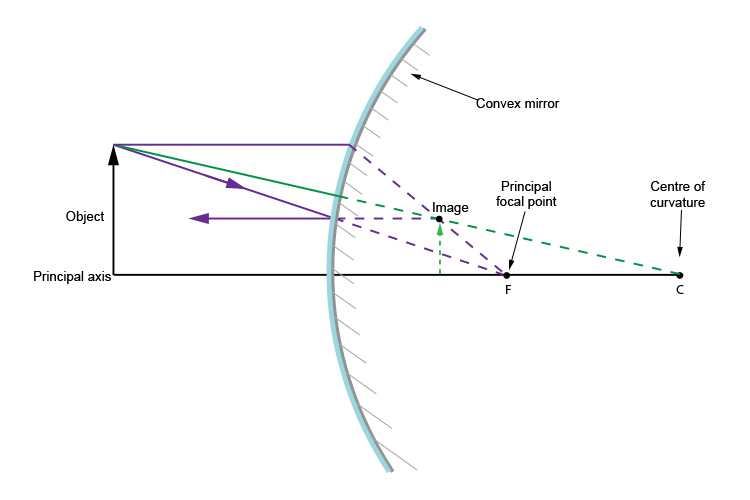
To draw a ray diagram and find the location of the virtual image (not real) you only need to draw two ray lines. This is sometimes referred to as "the two rules of reflection for a convex mirror". But you really don't need to remember this, the only thing to remember is:
From the object
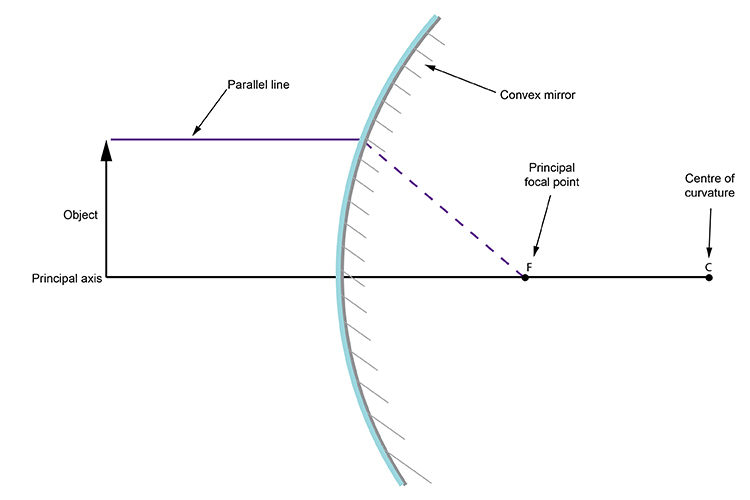
1. Pass a parallel line through the principal focal point
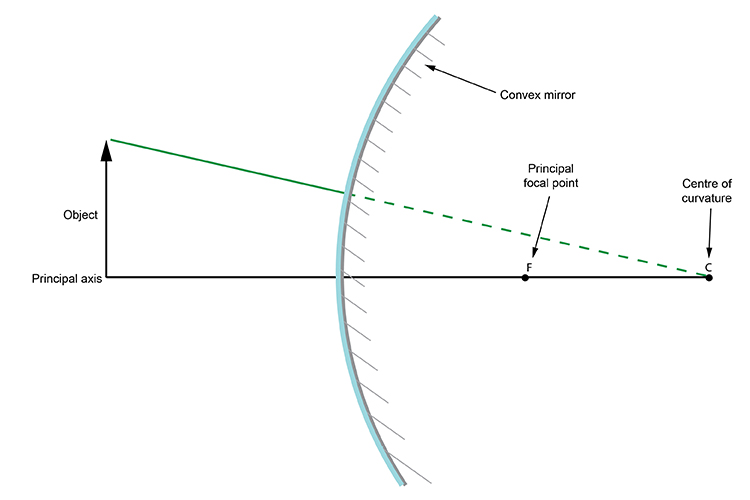
2. Pass a ray line through the centre of the convex mirror
Here is each stage:
1. From the object pass a parallel line through the principal focal point. We usually choose the top of the object:
2. From the object pass a ray line through the centre of the convex mirror.
Where these two lines intersect is the top of the object. Drop a line vertically down to the principal axis and you have your complete image. The rest of the object has an image as well and it can be found by applying the same rules.
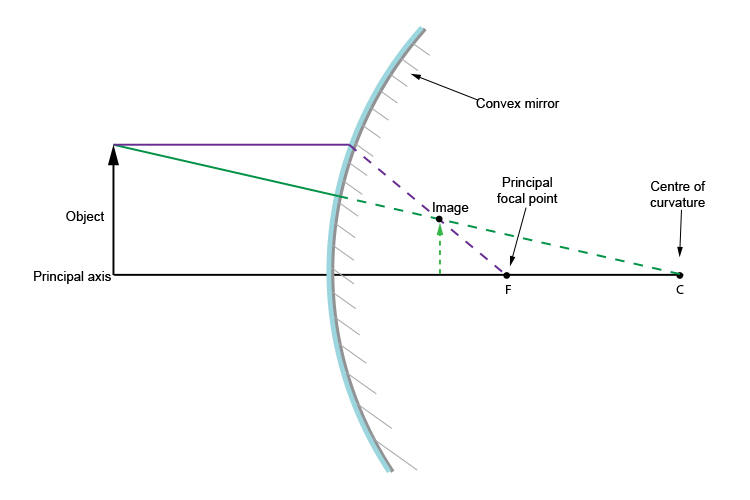
And that is it. It's that easy.
We could finish the lesson there but Mammoth Memory wants to show you that you could in fact apply the same idea at any point on the object and the same ray diagram would work for finding where the point appears virtually behind the convex mirror.
Let's try a ray diagram from the middle of the object.
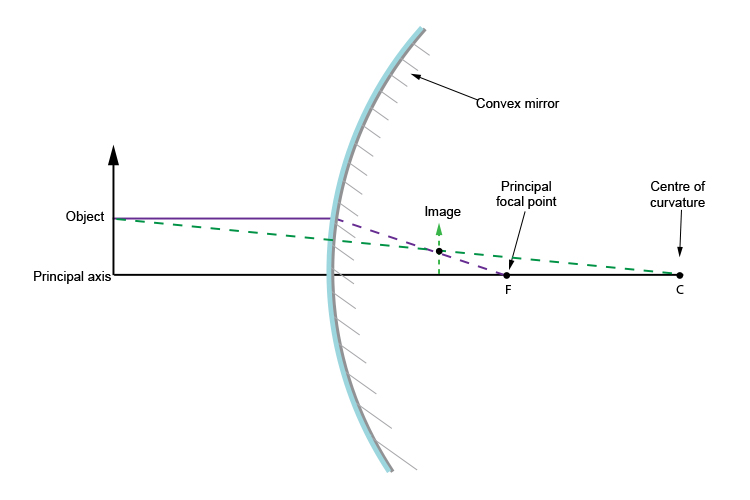
You can see we could carry out this ray diagram method anywhere on the object but again we emphasise that this is normally carried out from the top of the object.
Please NOTE: Some books inform you that there is one more rule for drawing convex mirror ray diagrams.
This rule would be:
An incident ray which is directed towards the virtual focus `F` of the convex mirror is reflected parallel to the principal axis.
This is useful to know but not necessary in order to work out the image position. Only the first two are needed.


