
Greenware – Clay which has not yet been fired
Ware means pottery.
To help you remember what greenware is, recall the following mnemonic:
If it's green (greenware) in the forest then there's been no fire (not been fired) here yet.

So green and ware can now be combined - no fire and pottery. Greenware is pottery that has not yet been fired.
This pot is at the "workable" stage, which means you can still mould and move the clay without it breaking or cracking. Designs have been etched into each side to give a beautiful look.
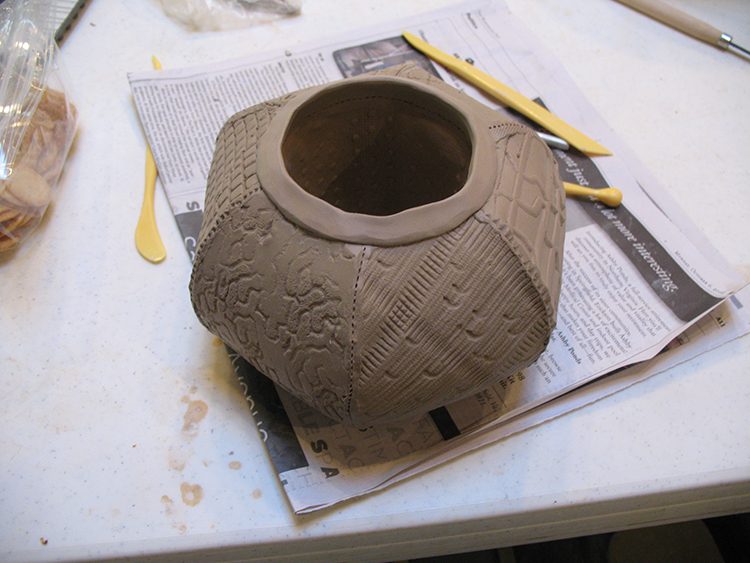
"IMG_5708" by bptakoma is licensed under CC BY 2.0.
In the picture below it shows lots of greenware pieces, all waiting to be glazed and fired. Pottery shops where you can paint your own pottery are very popular for children and adults alike. You can paint your own pottery and then the professional potter will fire it for you so you can pick it up when its ready.
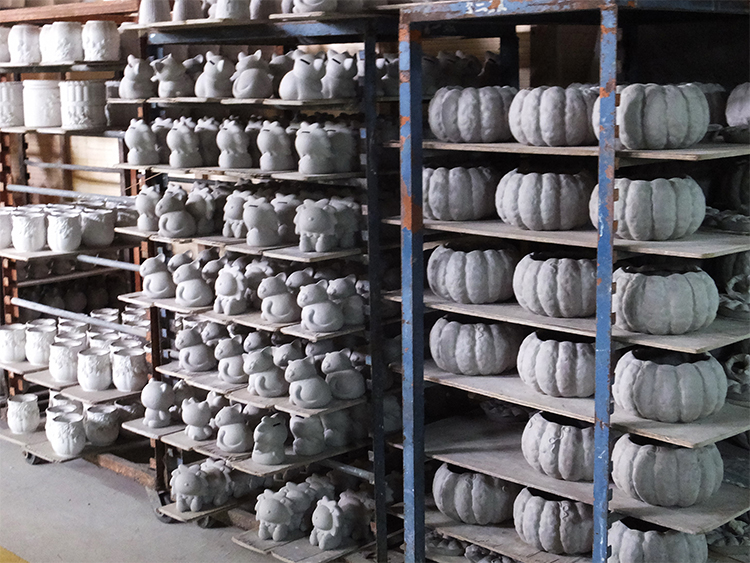
"File:Greenwares 陶坯 - panoramio.jpg" by lienyuan lee is licensed under CC BY 3.0.
Greenware Project
For this project you will need: clay and clay carving tools.

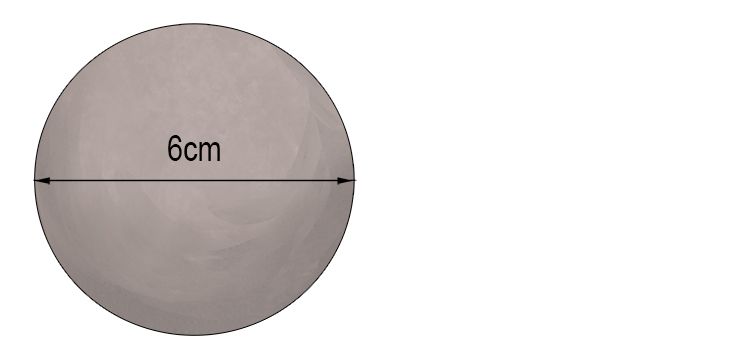
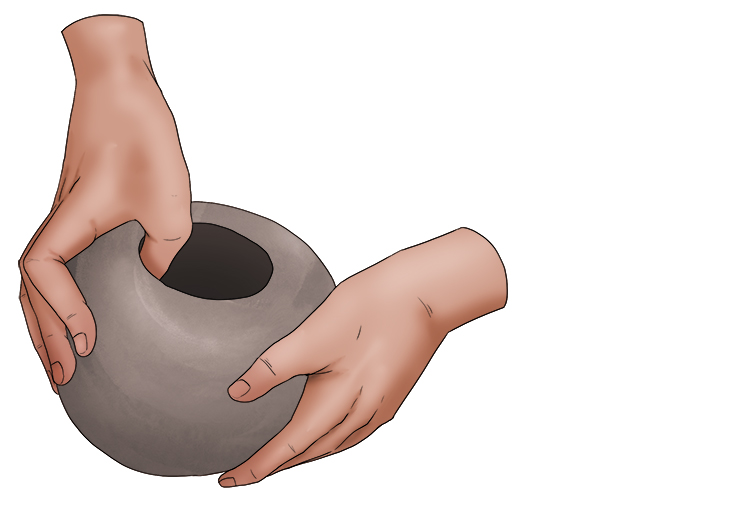
Start with a ball of clay with a rough diameter or 6cm.
Push your thumb into the clay until you reach just further than half way through.
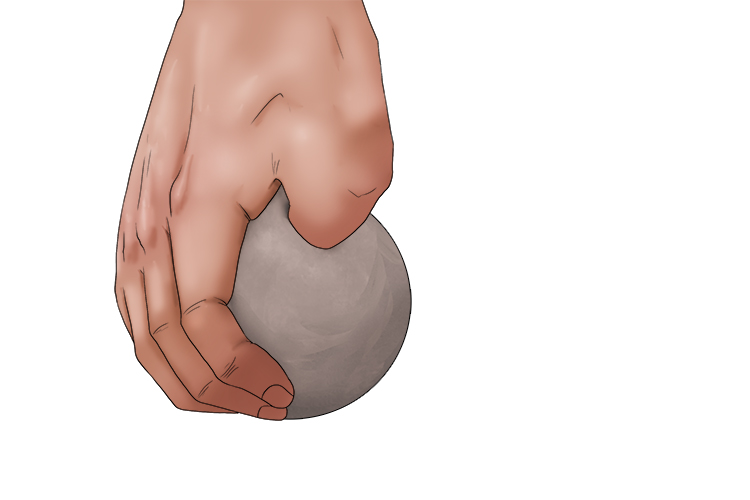
Then, use your fingers and thumb to pinch the clay, turning it as you go, until you have a sphere with a hole in the top. The walls of the sphere will need to be no more than 1cm thick.
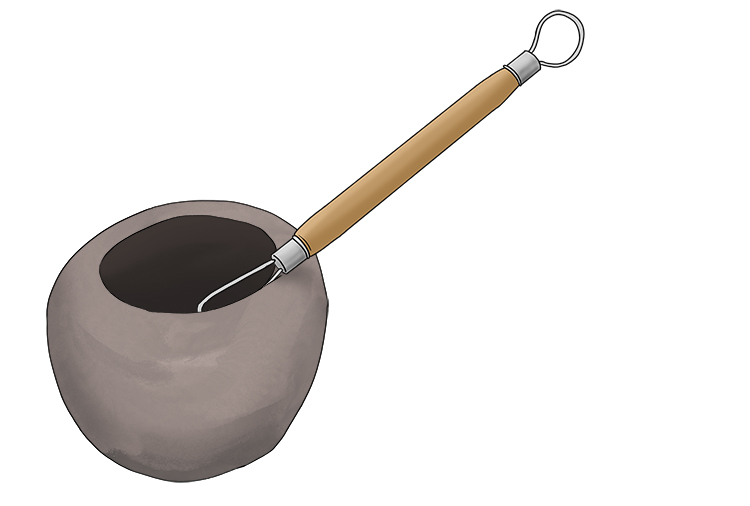
Use a wire carving tool to widen and smooth the edges of the hole in the top slightly. The average tealight is 4cm in diameter, so the hole will need to be a minimum of 6cm in diameter, so you can easily put the tealight in the holder and take it out again when it is finished.
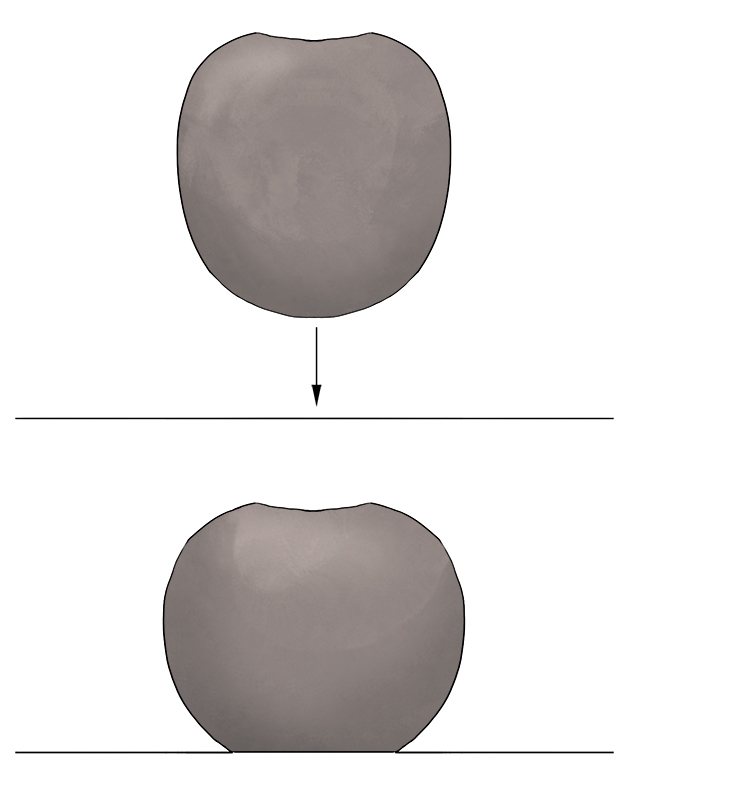
The bottom of the tealight holder will need to be flat so it doesn't roll around with a candle inside, so tap the bottom of the sphere against the table until it's flat enough to be stable when in use.
Leave your tealight holder in a safe place overnight to become leather hard. Larger tealight holders may need up to three days, but overnight should be fine for this. The colour should become slightly lighter and sturdier, but still workable. If left to become bone dry, it becomes to fragile to work with.
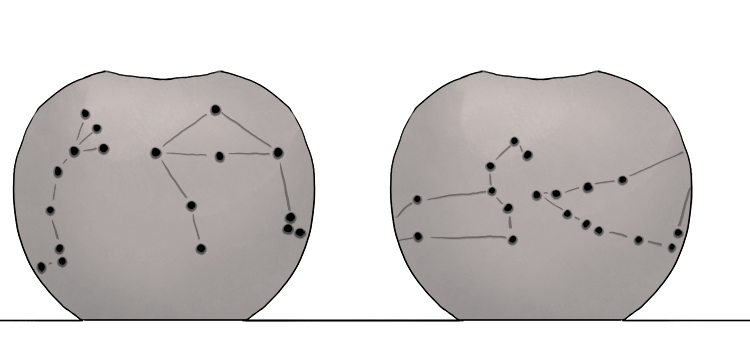
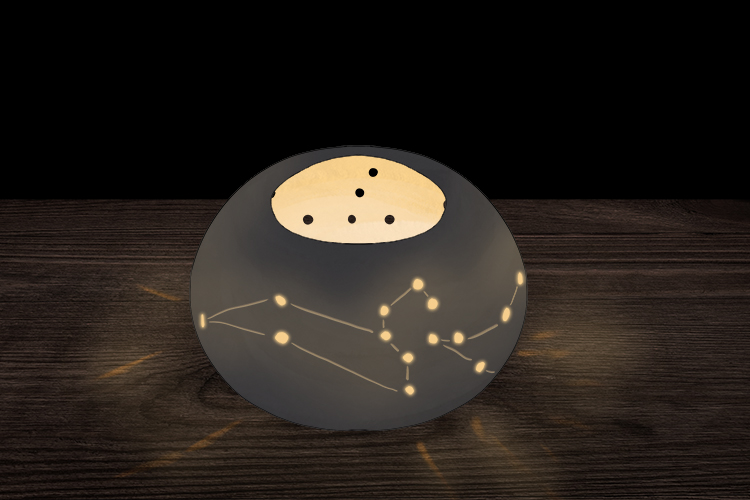
Your tealight holder could have been decorated when it was still very soft, but the risk is by poking holes it would cause the clay to collapse. When the clay is leather hard, it will keep its shape. So, use your carving tools to create a design on your tealight holder. We have chosen a pointed tool to carefully poke holes in the sides and connect those with lines. This will allow the light from the tealight to shine through and will look beautiful in the dark. The holes aren't random, they're constellations which can be seen in the night sky!
Once all the moisture has dried from your tealight holder and it has become bone dry, you can test it out, even before it's been fired. Place a tealight inside and turn off the lights to see how it looks.
Greenware.


