
Slip – Clay particles suspended in water
Note: Slip is used to bond pieces of clay - a sort of potter's glue. Slip can also be used for decorating and casting.
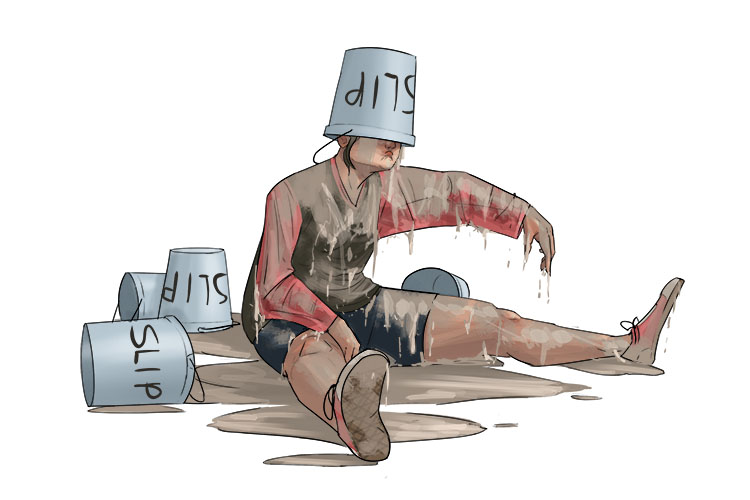
She slipped (slip) and fell into a watery clay glue.
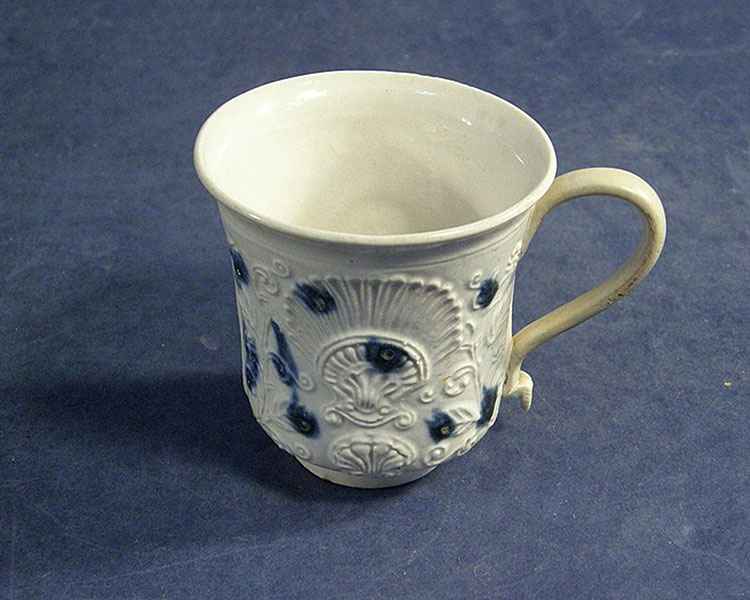
"File:Cup (AM 1968.136-1).jpg" by Staffordshire potteries district is licensed under CC BY 4.0.
Slip casting was widely used in European porcelain factories the 1700s to produce expensive porcelain wares. It is now the most common means of mass producing commercial pottery as it can produce precise and consistent results. Slip casting can be used to create pottery with more complex shapes than with other techniques such as throwing. The technique involves pouring slip into a mould which sets on the inside walls and allows for the production of pottery with much thinner walls.
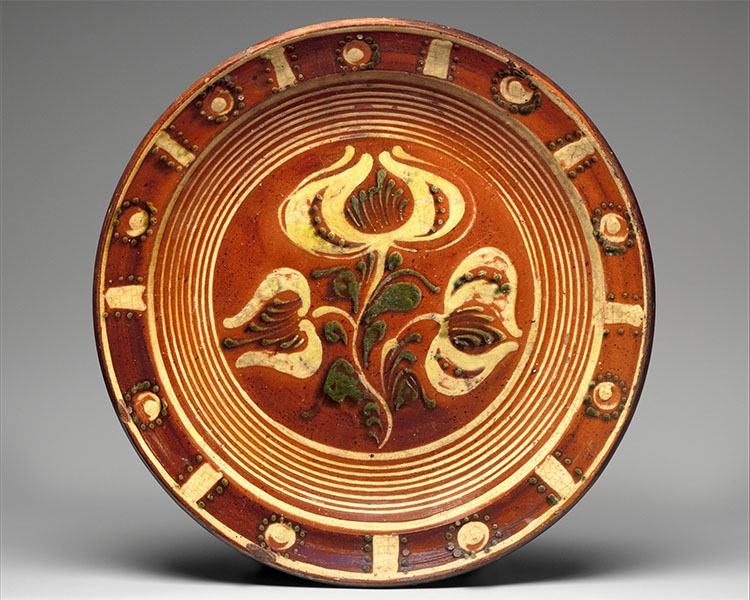
"File:Redware Slip-decorated dish MET DP335286.jpg" by Creator:Dennis Family Potters is marked with CC0 1.0.
Slipware refers to any ceramics that are decorated using slip. There are various techniques for applying slip for decoration such as slip painting where the slip is applied like paint, as well as slip trailing where thick slip is piped on using a slip trailer which functions much like a piping bag. Many cultures throughout history have used slip to decorate their pottery, for example, most ancient Greek and Roman pottery were decorated with slip. Slip decorating was widely replaced by glazes which offered more protection and more choice in colour, however slip decorating techniques have seen a resurgence in recent history.
Slip Bonding Project
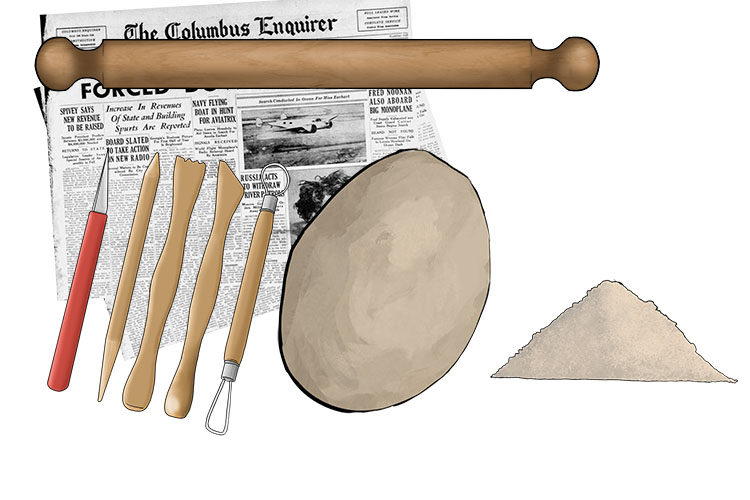
For this project we will be creating a decorative clay mask.
You will need clay, a rolling pin, some clay carving tools, some fully dried clay reduced to a powder and some newspaper.
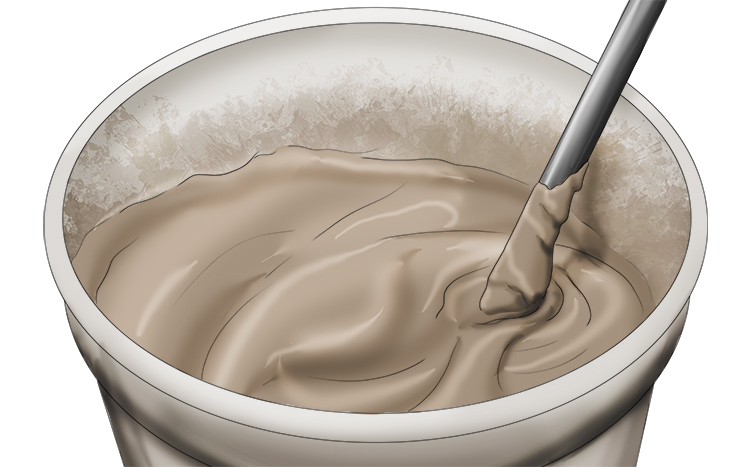
To start we will need to make some slip, start by taking some fully dried clay powder and mixing it with water. You're looking for something as thick as double cream.
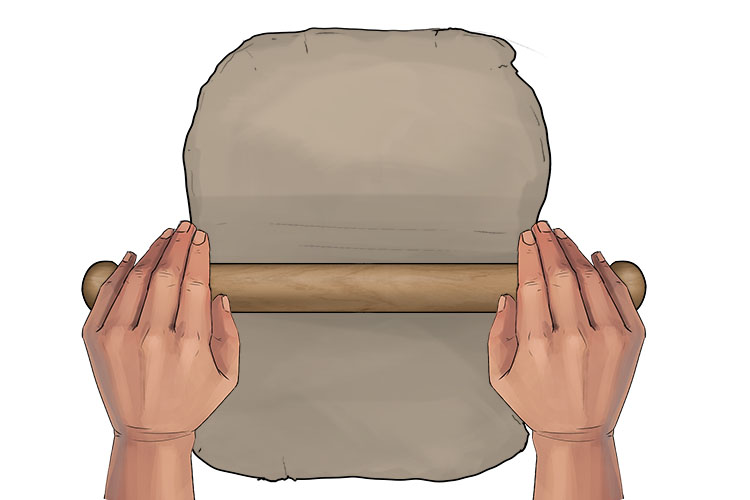
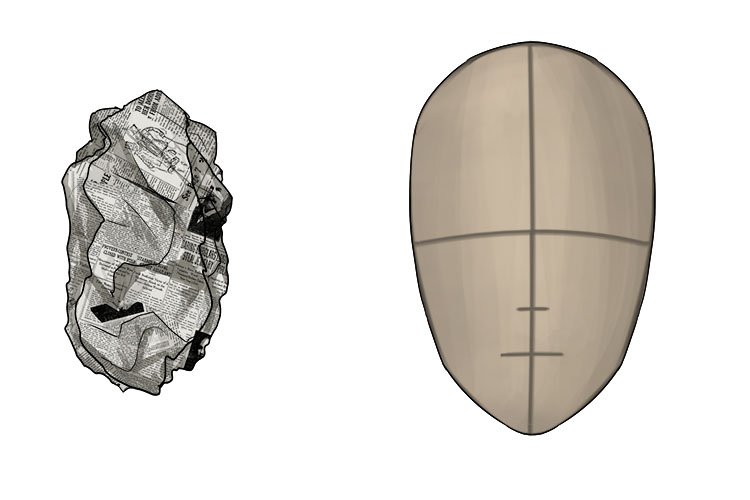
Roll your clay out so it's roughly 1/2" thick.
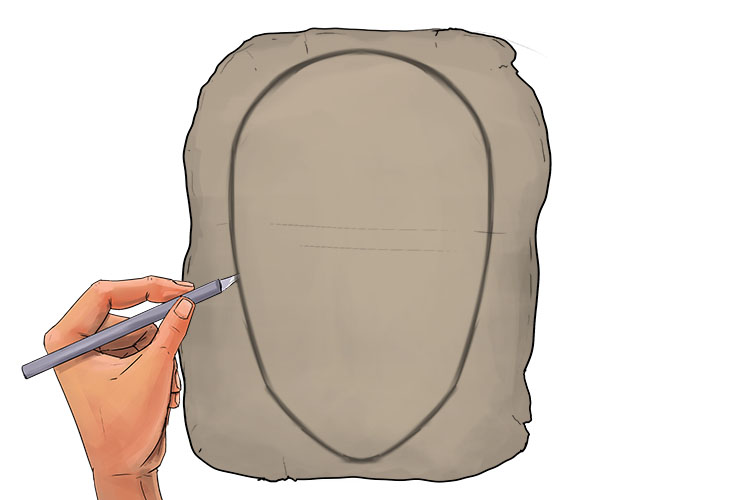
Trim your clay into a mask shape.
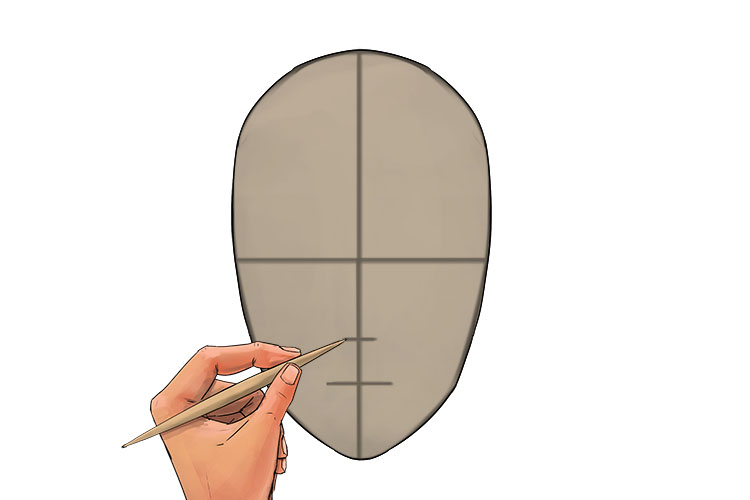
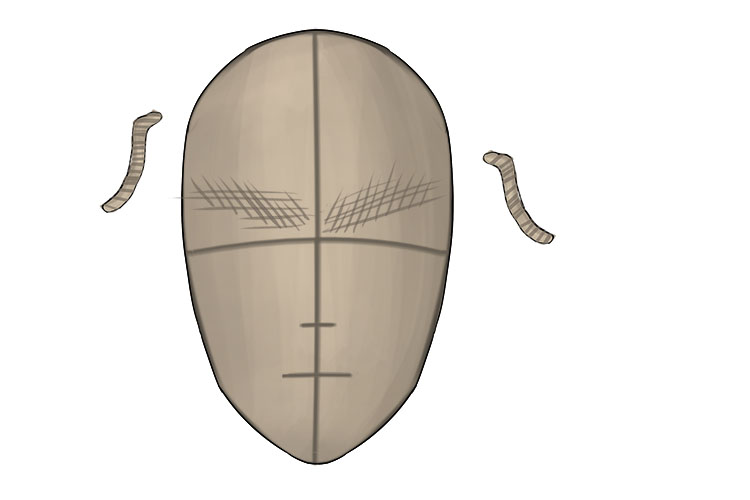
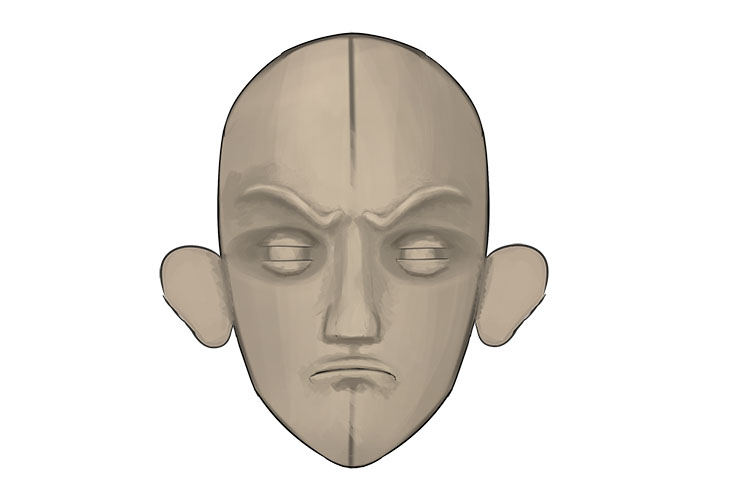
Score a vertical and horizontal line to roughly mark out the centre of the clay. This will help position your facial features.

Now mark out where the bottom of the nose will be and where the mouth will be.
Scrunch some newspaper into a rough oval shape that you can place under your clay to curve it into a more face-like shape.
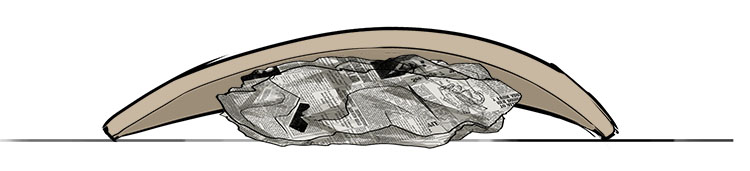
Below is a cross-section of the mask after it has been shaped over the newspaper.
Roll out a separate piece of clay into a log and cut it into two pieces. This will be used to create the eyebrows of your mask so make it roughly as thick and as long as you'd like the eyebrows to be.

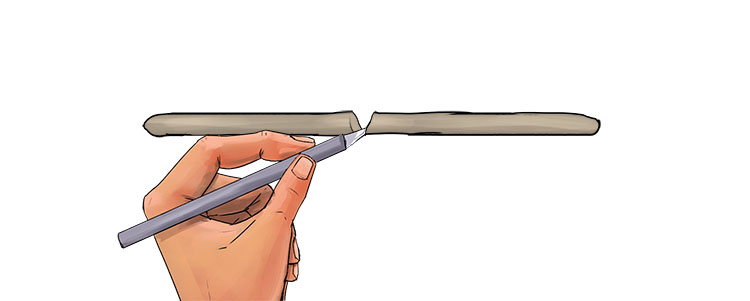
Bend the eyebrow pieces into whatever expression you would like on your mask.
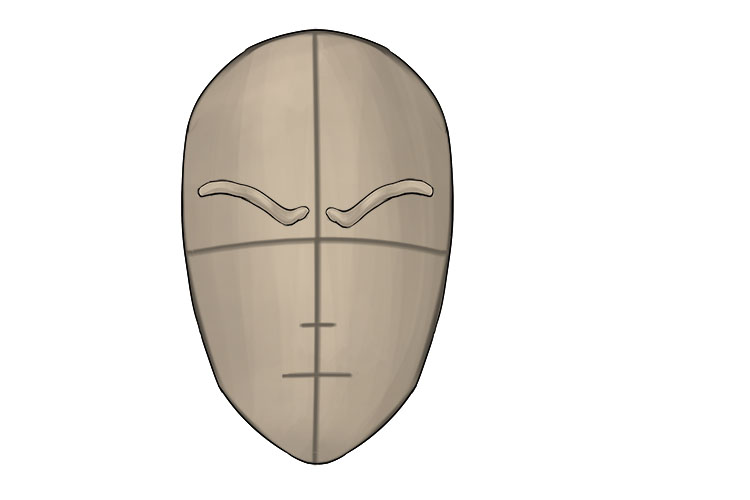
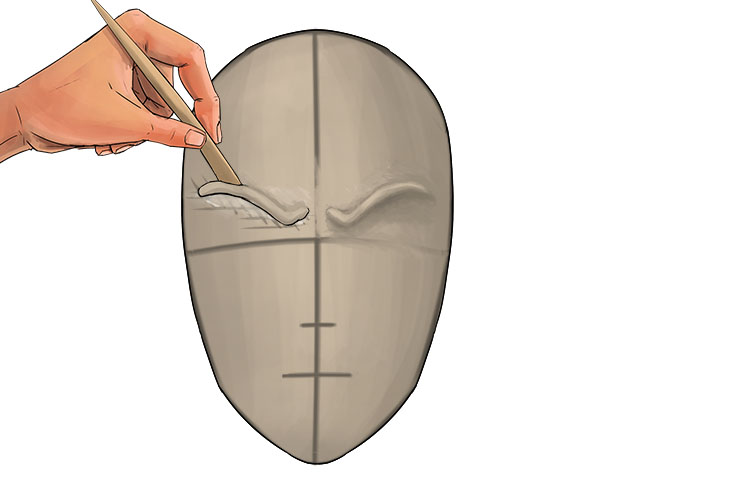
Score the back of the eyebrows and the location on the mask where they are being stuck down.
Brush some slip on to the scored area on the mask.

Stick the eyebrows in place and smooth out the edges. This process we've used to attach the eyebrows is how you will join two pieces of clay in most projects and is how we will attach the rest of the masks facial features.
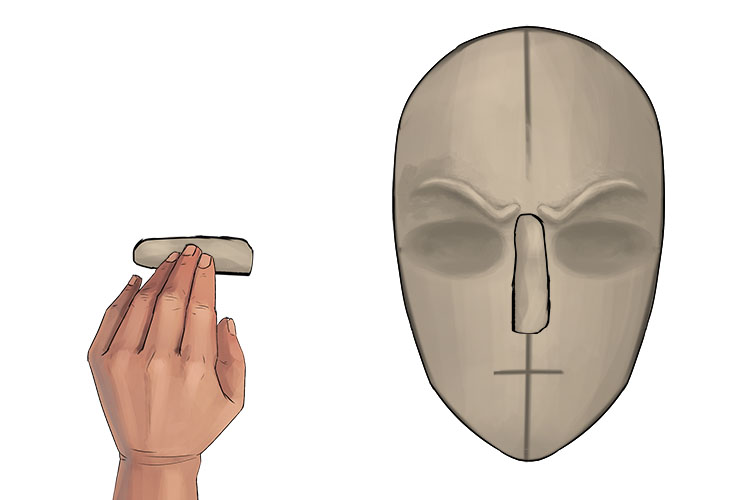
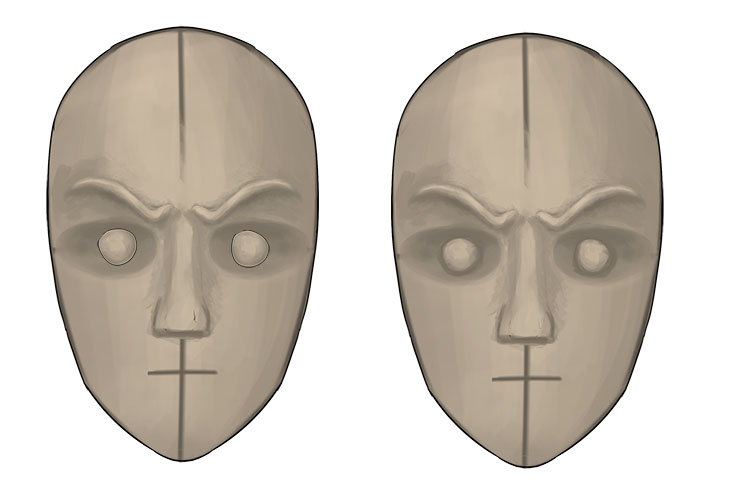
Now press your thumbs into the mask where you would like the eyes to create the eye sockets. Make sure not to press too far as you don't want to make a hole in the clay.

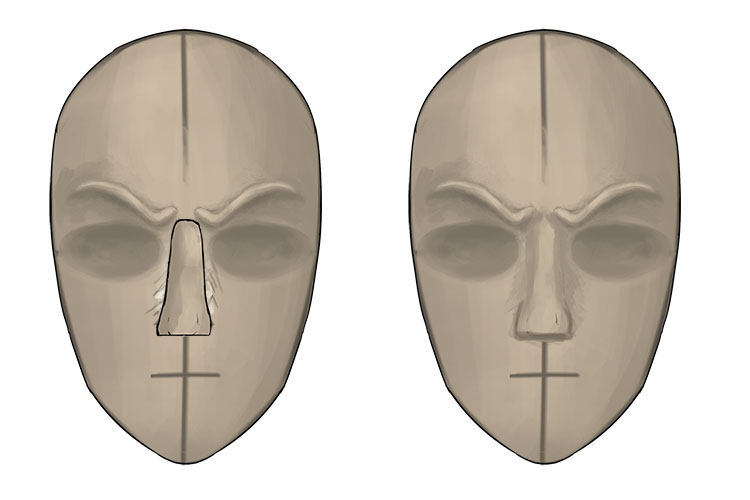
Make another clay log the size you'd like the nose to be.
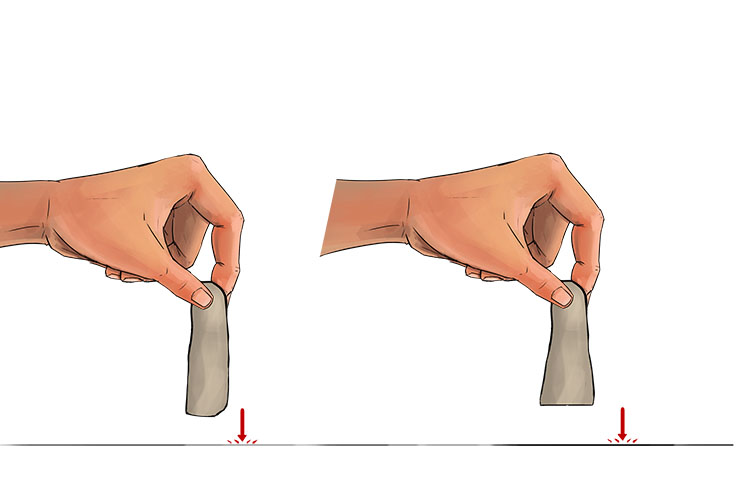
Flatten out the bottom of the nose by tapping it on your table.
Make any minor adjustments you'd like to the shape of the nose then attach it to the mask using the same technique used for the eyebrows.
Roll a small ball of clay and cut it in half, these will be used for your eyes.
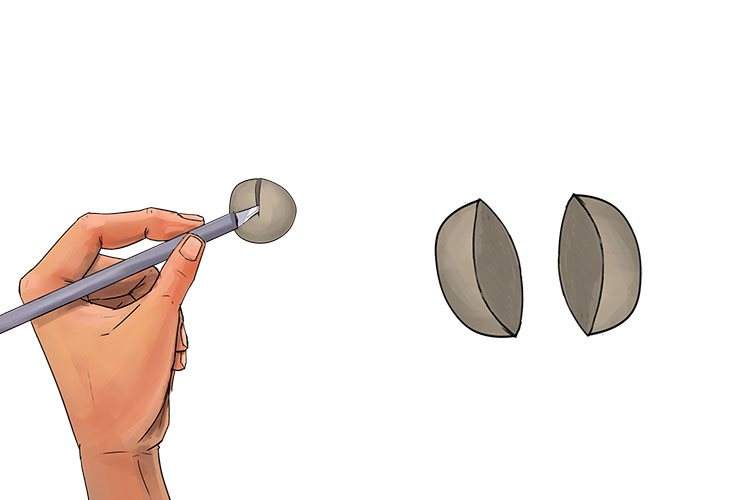
Attach the eyes to your mask.
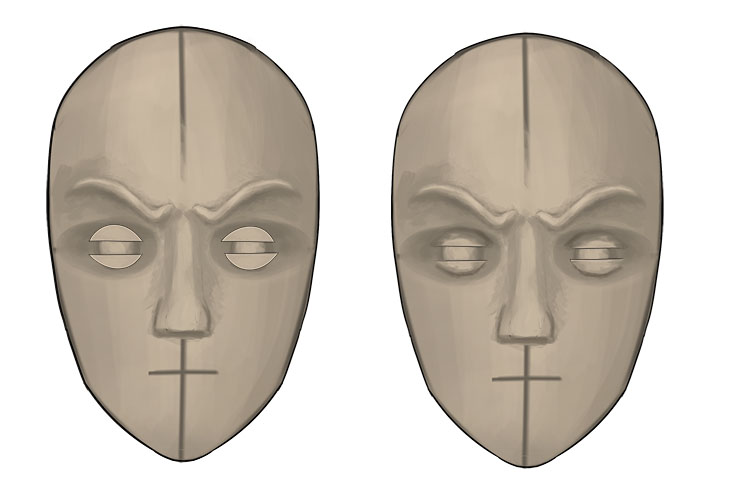
Make four thin semi-circles of clay to use as eyelids. These semi-circles should be slightly wider than the eyes.
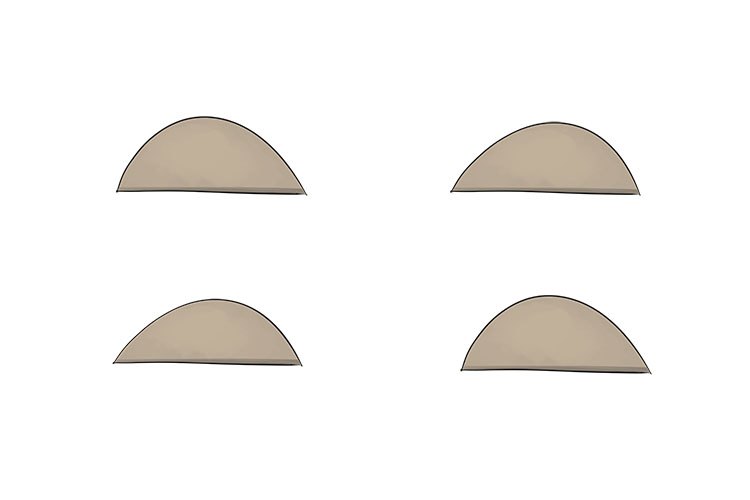
Attach the eyelids to your mask making sure not to smooth down the edges that make up the opening of the eye.
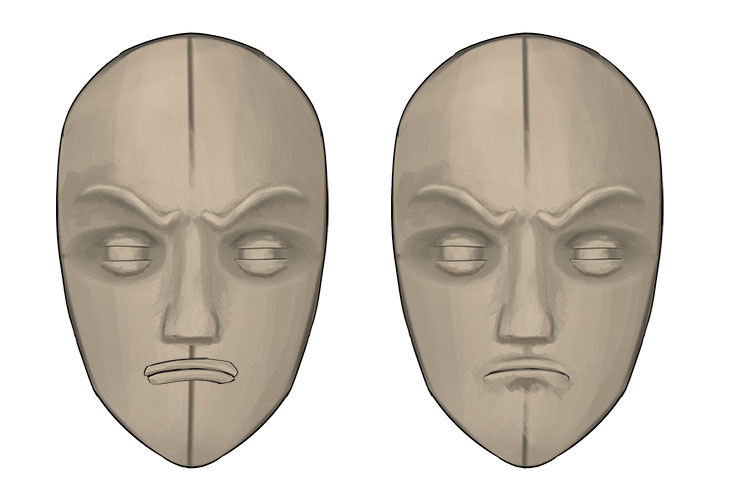
Make two thin logs of clay to use as lips.
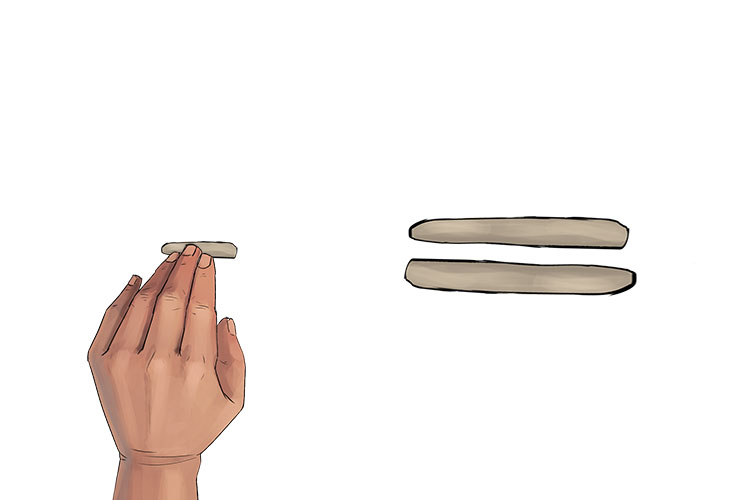
Shape the lips into the expression you'd like for your mask and attach them on the horizontal line you marked out for the mouth earlier.
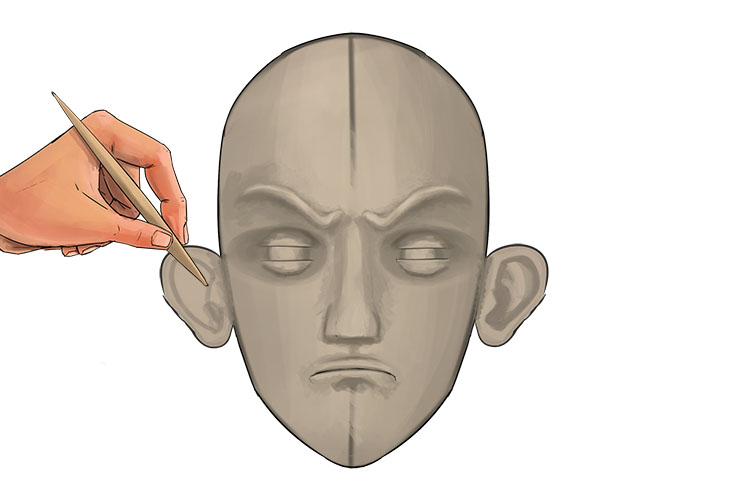
Create your ears rolling out more 1/2 inch thick clay and cut out two ear shapes.
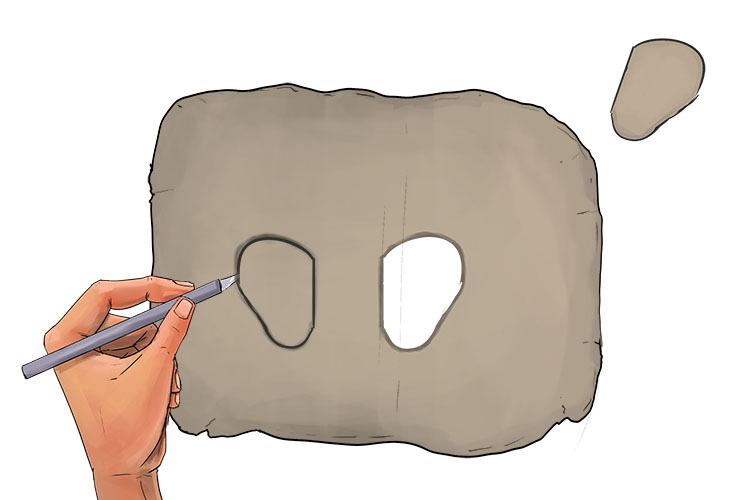
Attach your ears using the same method of scoring, applying slip and smoothing.
Add some inner details to the ears.
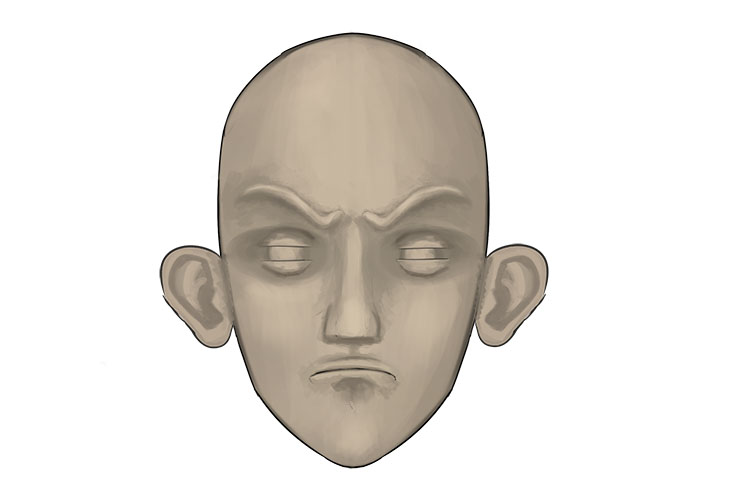
Make any final adjustments to the shape of the mask and facial features as well as smoothing out any guide lines still visible before leaving it to dry.
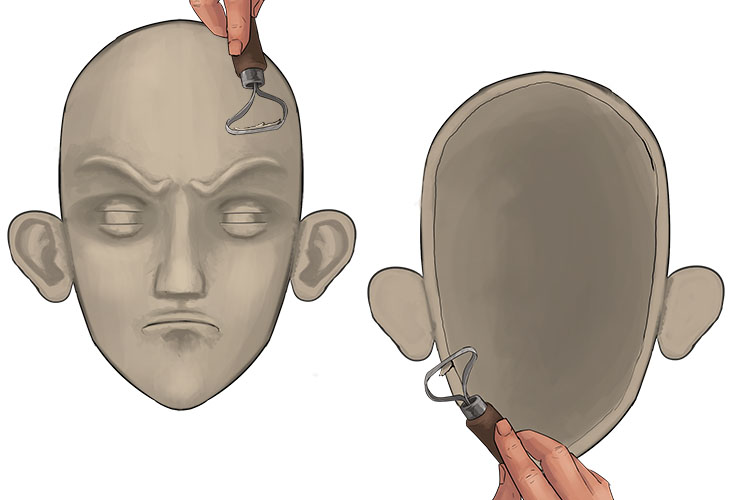
When the clay is leather hard (dry enough to hold it's shape when handled but still has enough moisture to be trimmed, carved, smoothed and scored) you can use a trimming tool to smooth out any rough areas.
Next carve the iris and pupil into each eyes. You can also add any other small details like wrinkles at this stage.

Slip bonding can still be used while the clay is leather hard so you can also add new features. We've decided to add facial hair to our clay mask.
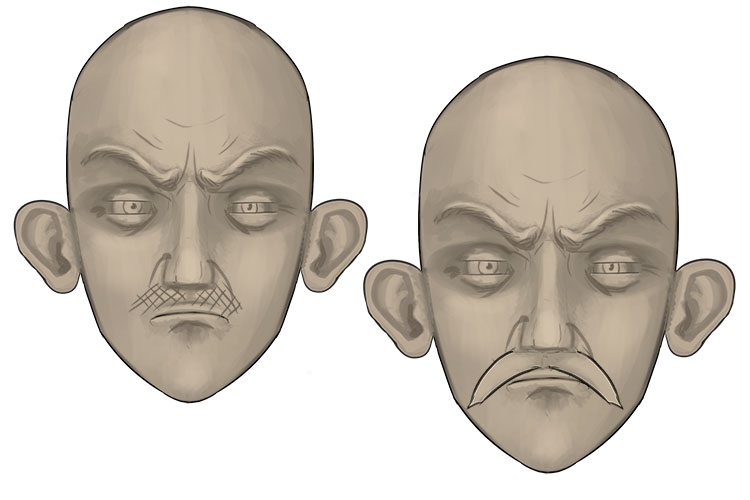
Once you're happy with the mask leave it to dry completely before firing.

Slip Decoration Project
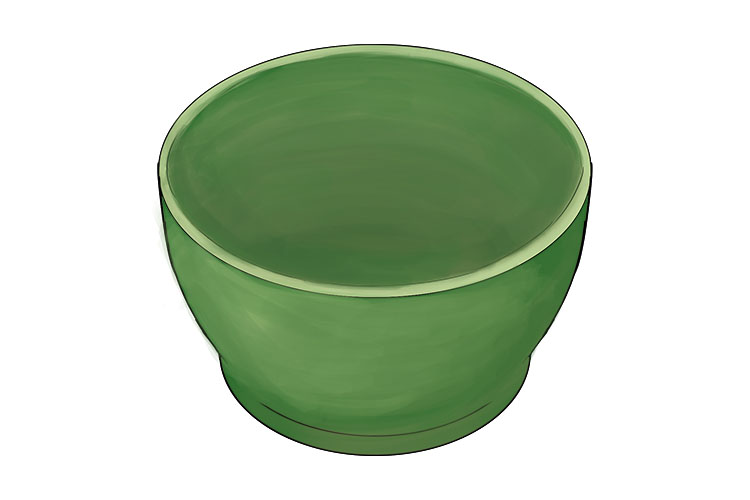
For this project we will be slip decorating a clay bowl. To see how to make a clay bowl see our Mammoth Memory Throw project.
You will need a leather hard clay bowl, a slip trailer, powdered fully dried clay, ceramic pigments, a pencil, a clay carving tool and a paint brush.
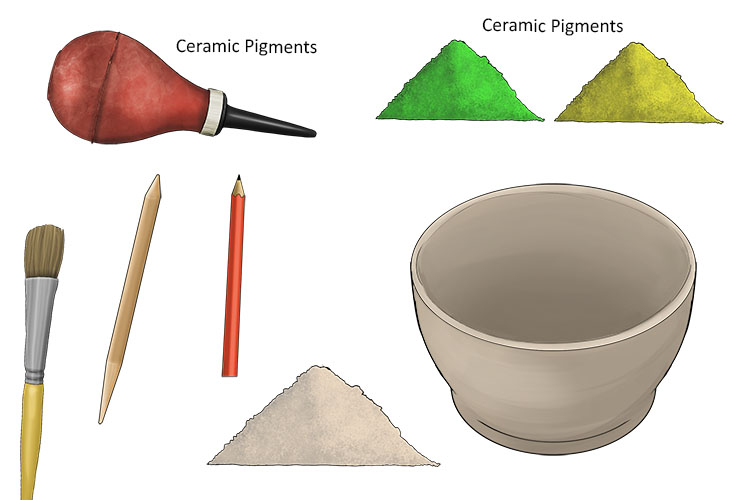
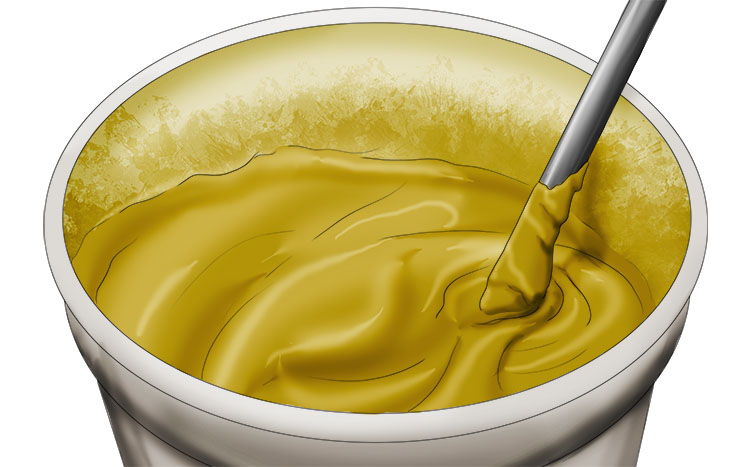
To start we will need to mix our slip like we did with the previous project. However this time you will also need to include some of your ceramic colourant. Repeat this step for as many colours as you will need for your design, for ours we're just using green and yellow.
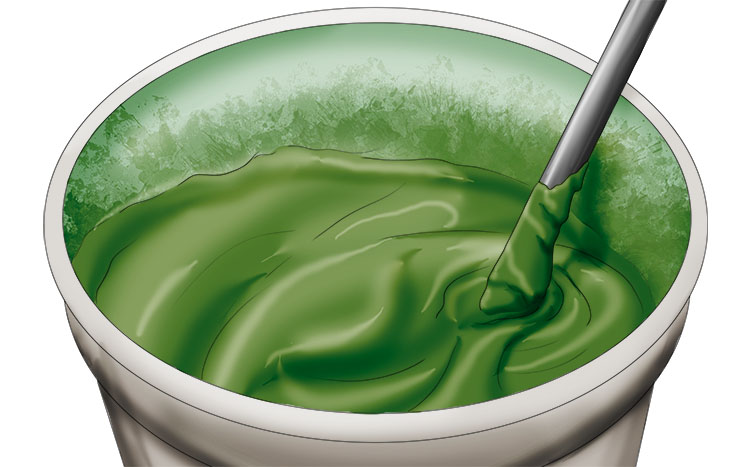
You should start slip decorating your bowl when it is leather hard. We've started by painting on an even layer of green slip over all of our bowl. Like most forms of paint, you will need to leave your first layer to dry before adding any more colours on top.
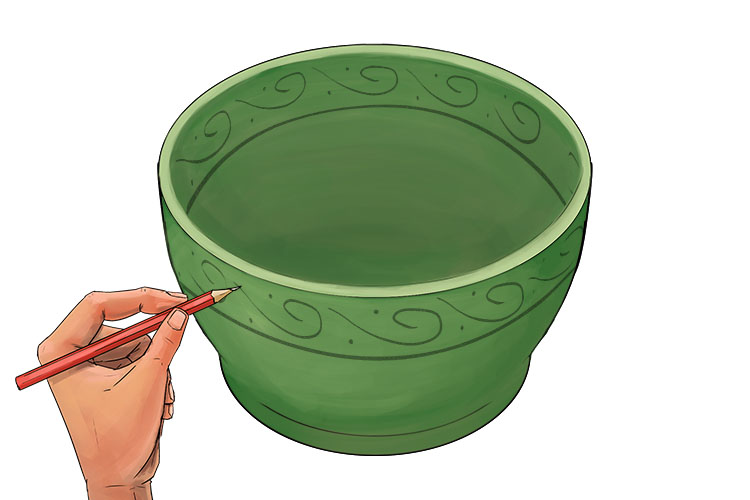
Once the base colour is dry you can use a pencil to lightly draw out the design you will be painting with your other colours.
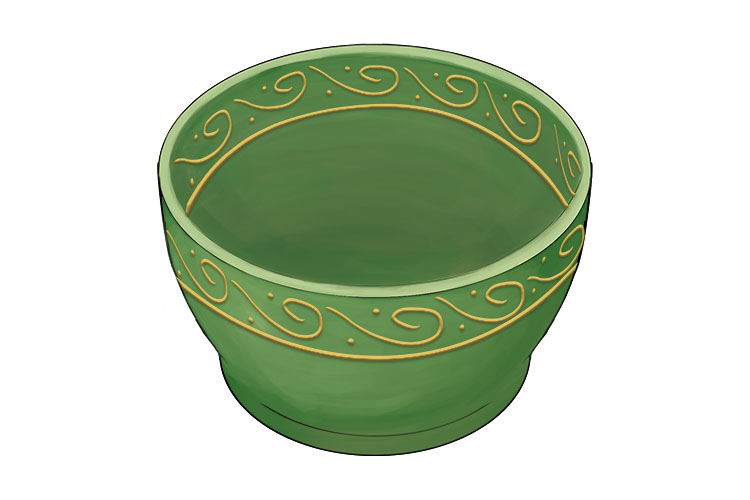
Apply your next layer of paint using your slip trailer, this will allow you to add a thick layer of slip that will appear raised on the finished bowl.
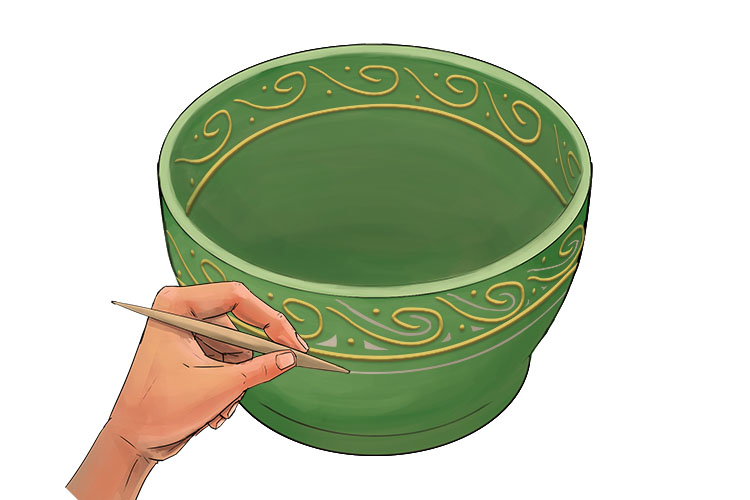
When slip decorating you can also use sgraffito by carving away the slip you've applied once it has dried.
Once you're happy with your slip decorations you can leave the bowl to dry completely ready for firing.

Slip Casting Project
For this project we will be using slip casting to create a mug.
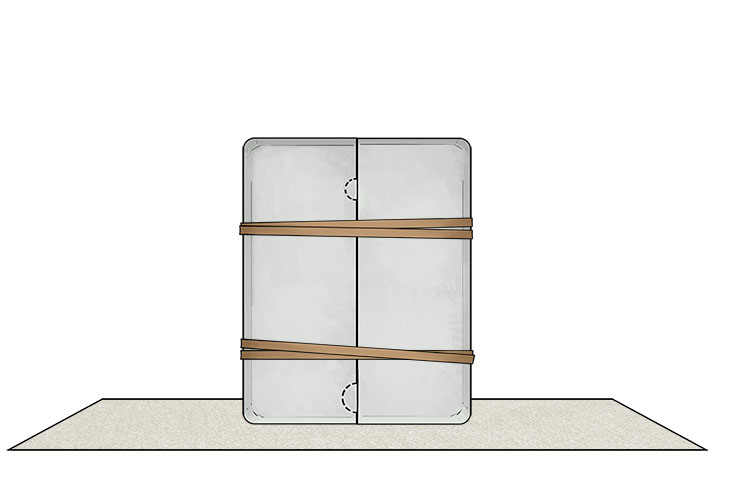
You will need some rubber bands, a clay cutting knife, a sponge, slip (for this project we are using store bought slip as the process of making slip for casting can be quite complex), and a casting mould. Casting slip and moulds can be purchased from pottery suppliers and craft stores.
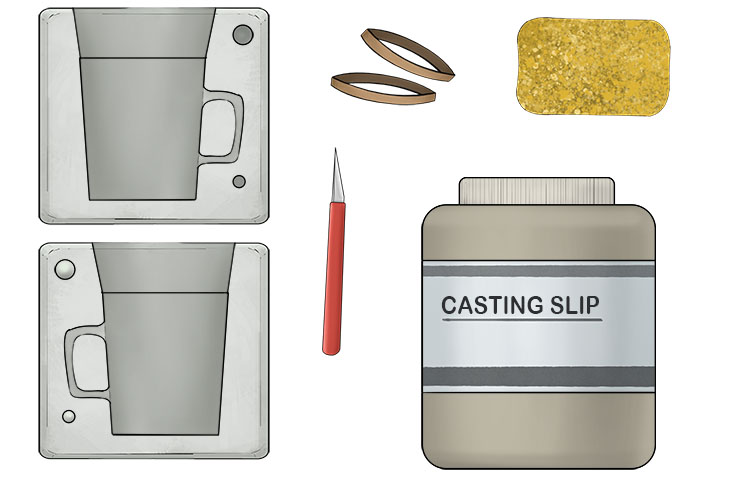
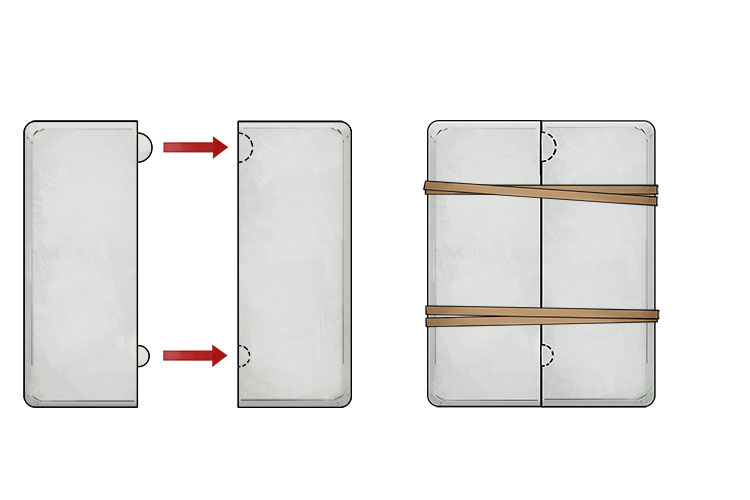
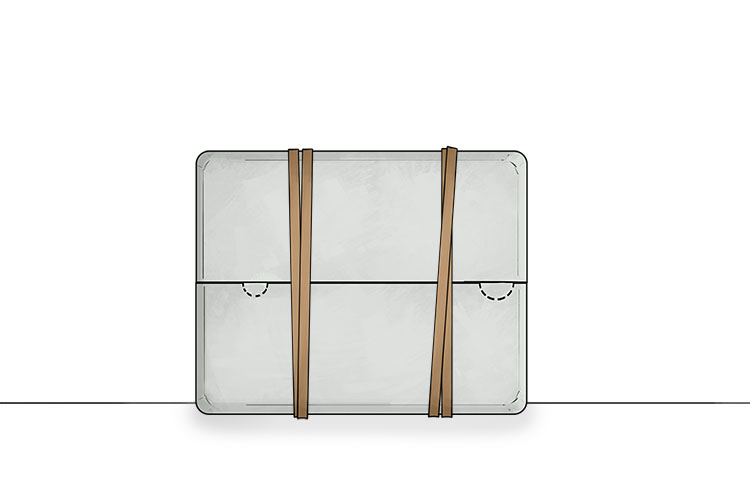
Start by matching both halves of your mould together and securing them with rubber bands. Most moulds will have protrusions on one half and corresponding indents on the other half to help align the two halves.
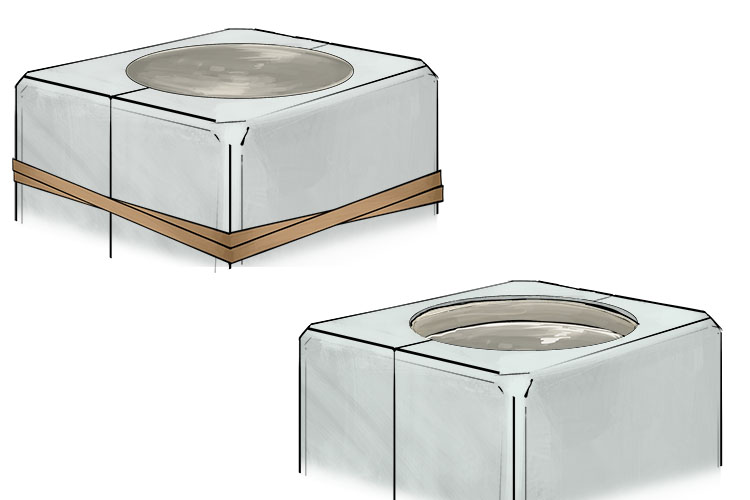
Pour your slip into the mould, making sure to fill it to the brim. You may wish to transfer your slip to a pouring jug of some kind to reduce the risk of spillages.

Now let the slip dry for around 15 to 20 minutes to allow a wall of clay to solidify against the walls of the mould. As the slip solidifies, you'll see the slip level drop as it builds up around the mould.
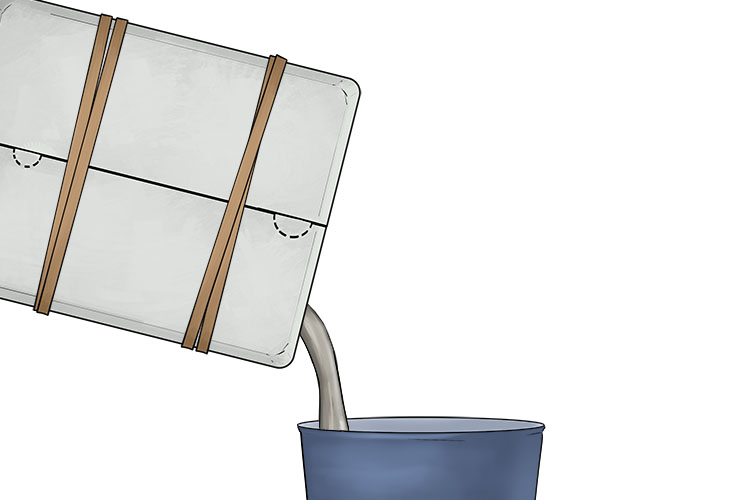
Tip the remaining slip into a cup or container, this slip can be reused for more casting.
Leave the mould upside down on some paper towels for around 10 minutes so any remaining slip can drain off.
Then leave the mould on its side to allow the clay to dry.
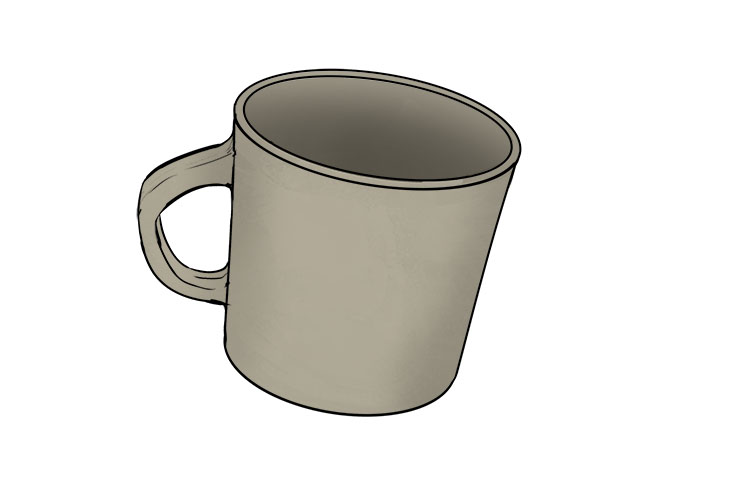
When the clay is leather hard it will start to separate from the mould. You can now remove the rubber bands and separate your mould parts, freeing your model. Your model should easily lift out of the mould, if not, leave it to dry a little longer and try again.
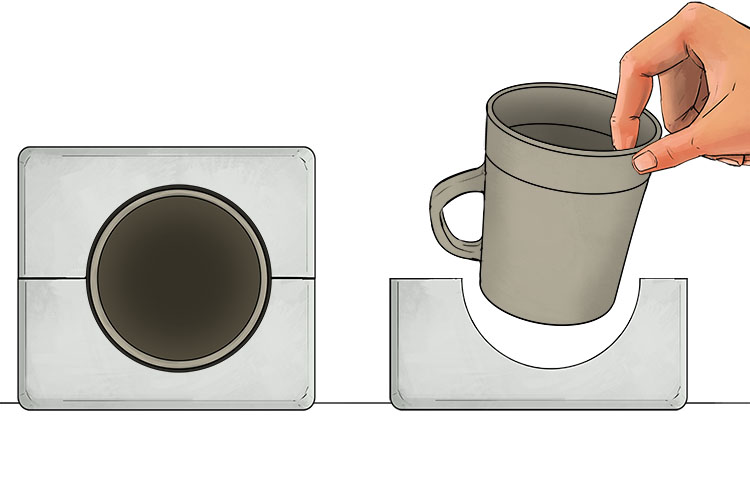
Most moulds will have a reservoir for pouring clay into the mould that will leave you with excess clay that is not part of the final product, this excess clay can be cut away with a clay knife.
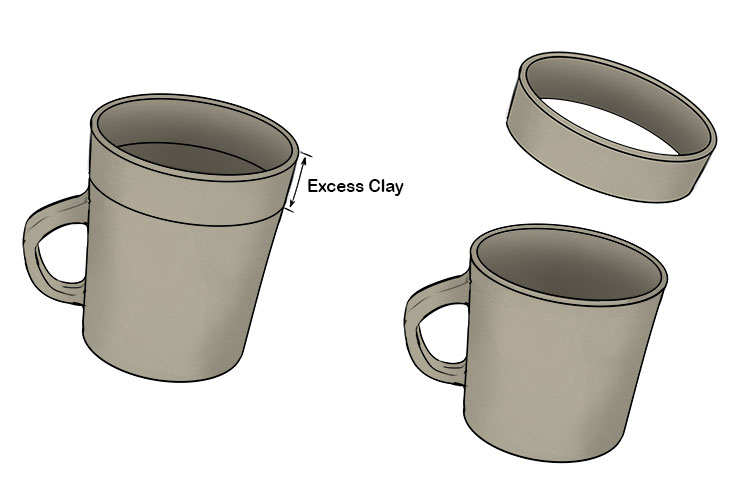
You can now clean up the top edge of the mug and the seamline using a damp sponge.
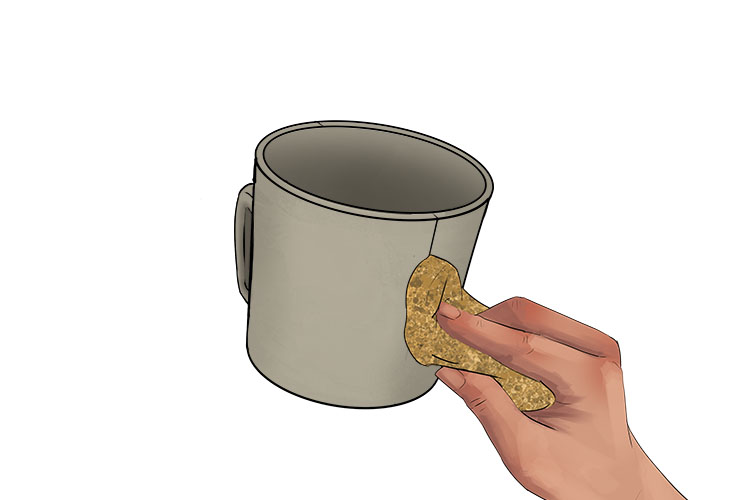
Leave your finished mug to dry completely ready for firing and glazing.
Slip.


