
Biscuit Ware – Refers to pottery that has been fired but not yet glazed
(Pronounced bis-kit wair)
Note: Glaze is a mixture of powdered materials that often includes a pre-melted glass made into a slip (a slurry-like substance) and applied to a ceramic body by spraying or dipping. Once fired it forms a glassy coat.
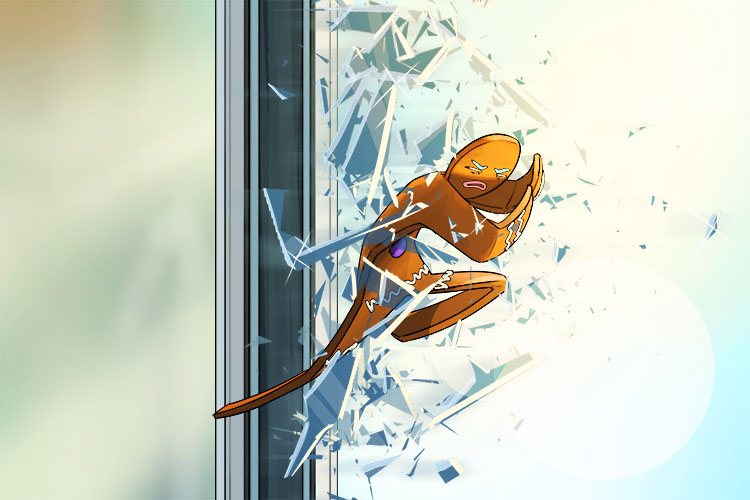
To recall what biscuit ware is, recall the following mnemonic.
The biscuit came alive after it had been cooked but beware (biscuit ware) it might jump through the glazed window to escape, lets hope it has no glass on it.
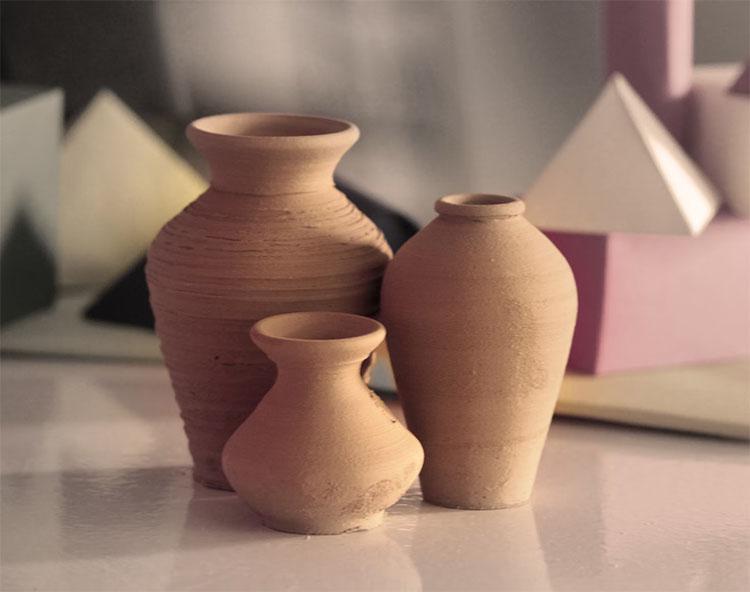
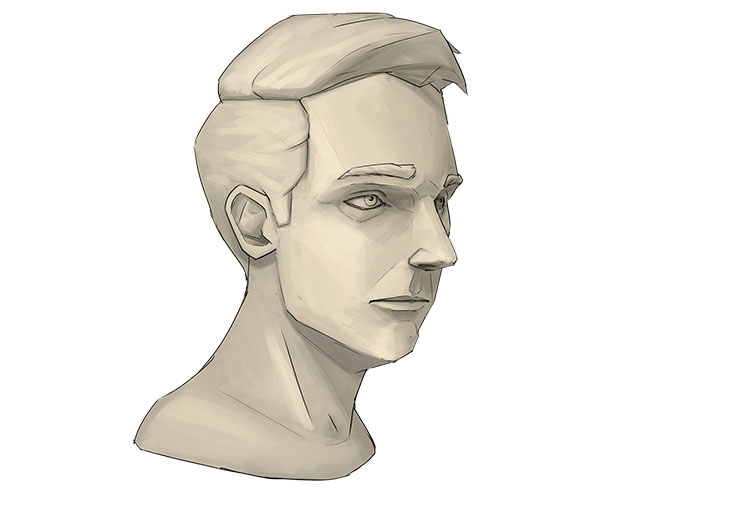
Biscuit ware pots
Biscuit (also known as bisque) refers to any pottery that has been fired but not glazed. This is often (but not always) just a stage pottery goes through before a glaze is applied and the pot is fired for a second time to harden the glaze, creating a glass-like coating. While in the biscuit ware stage, pots tend to have a rough and matte surface. The material is also no longer pliable at this stage, however some types of clay are still porous (able to absorb water) which can help with the application of glazes but would make them unsuitable for containing liquids.
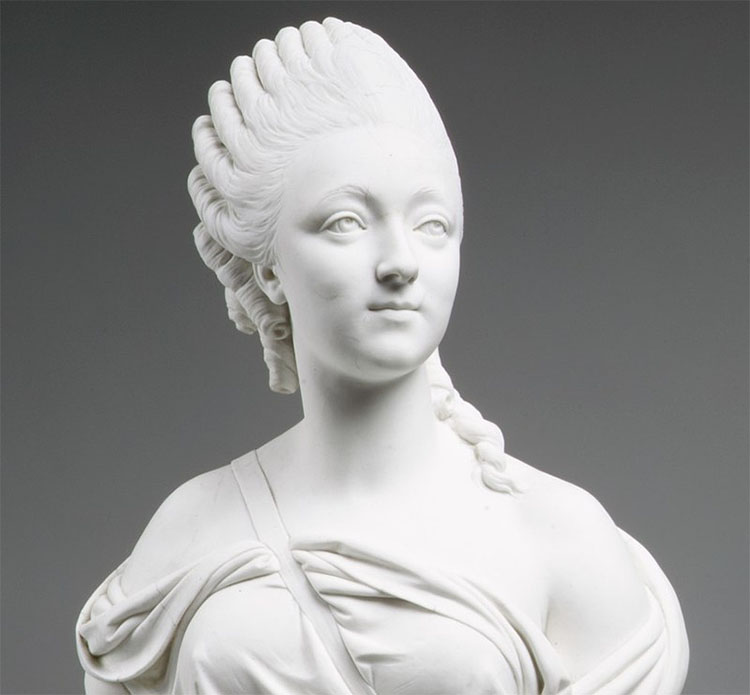
Madame Du Barry bust, re-produced in biscuit porcelain by Sèvres porcelain manufacturers. The original bust was sculpted by Augustin Pajou.
Biscuit porcelain refers to white porcelain that is left unglazed for the final product. It is mainly used for sculptures and other decorative pieces so does not need a protective glaze. Biscuit porcelain can have a similar appearance to smoothed marble and was very popular in 18th century Europe due to the Neoclassicalism movement. When sculpting a piece that will be left as biscuit ware, like a biscuit porcelain bust, it's important to ensure that every minor imperfection is removed before firing as there will be no glaze to cover up and smooth out small mistakes.
Biscuit Ware Project
For this project we will be sculpting a clay bust which we will leave unglazed for the final piece.
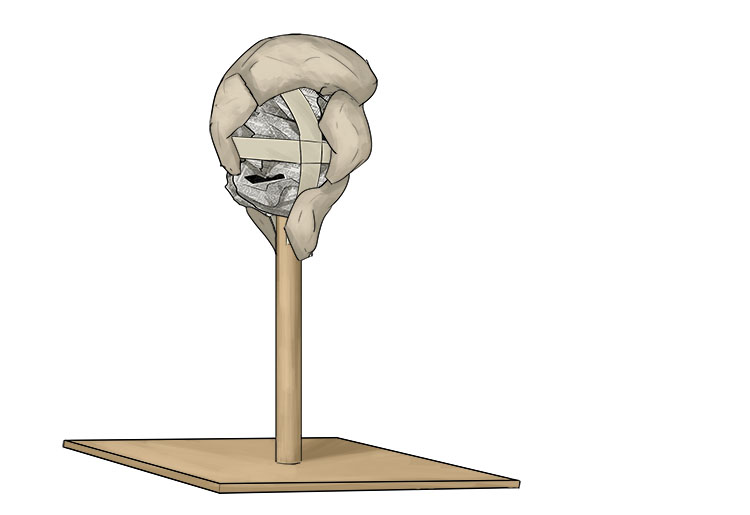
You will need clay, a bust armature (can be purchased from craft stores or you can make your own), newspaper, masking tape, clay carving tools and a wire tool.

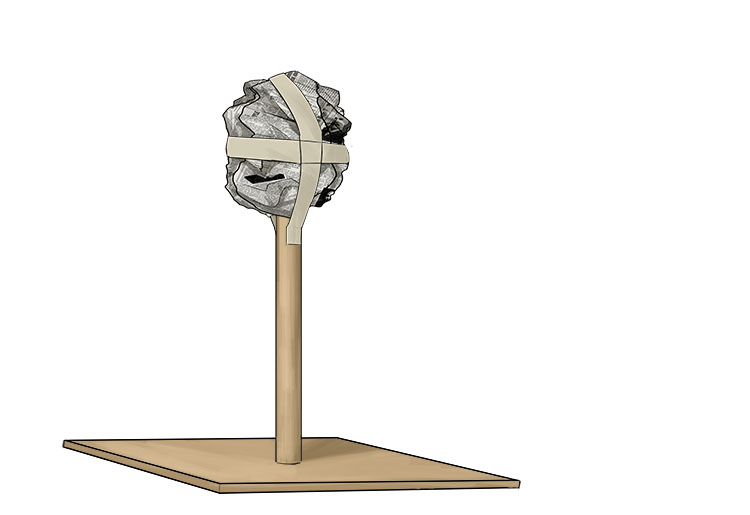
First you will need to tightly scrunch your newspaper into a ball around the top of your armature and secure it with tape (make sure not to use too much as we will need to remove the newspaper later).
Now you can start to build up layers of clay around your armature.
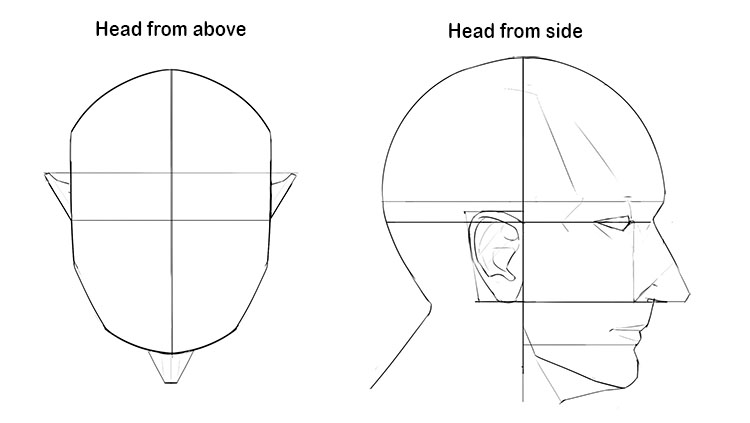
For the proportions and width of a face please see Mammoth Memory proportions of a face. Below is a diagram showing the proportions of the average human head from above and from the side which you can reference back to during the rest of this project. As you can see on the diagrams below, the ear should be just past the halfway mark on the side of the head, with front edge of the ear running along the halfway line. Generally the head will be slightly narrower at the front than the back and shouldn't be flat where the face is which is a common error when artists are starting out.
Continue to add clay and shape it into a rough head shape. Make sure you have a substantial amount of clay at the base of the armature to give you a base for your finished sculpture.
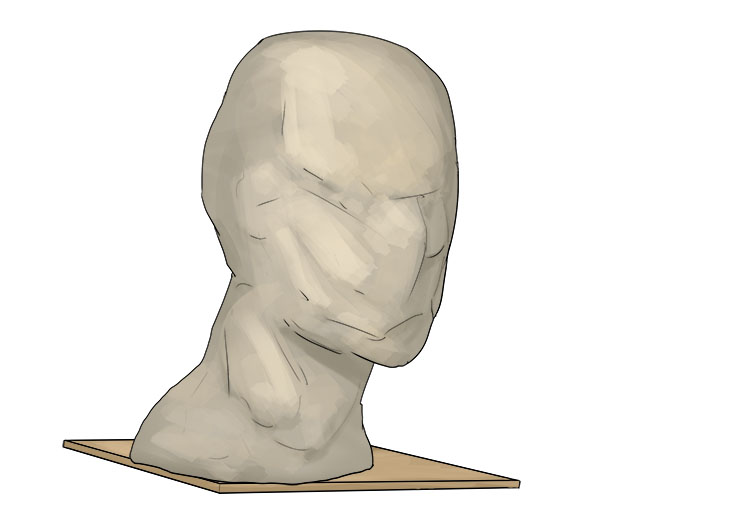
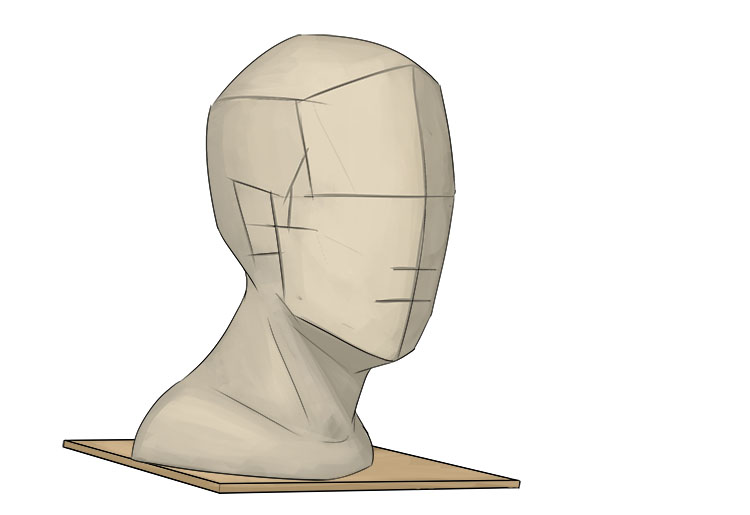
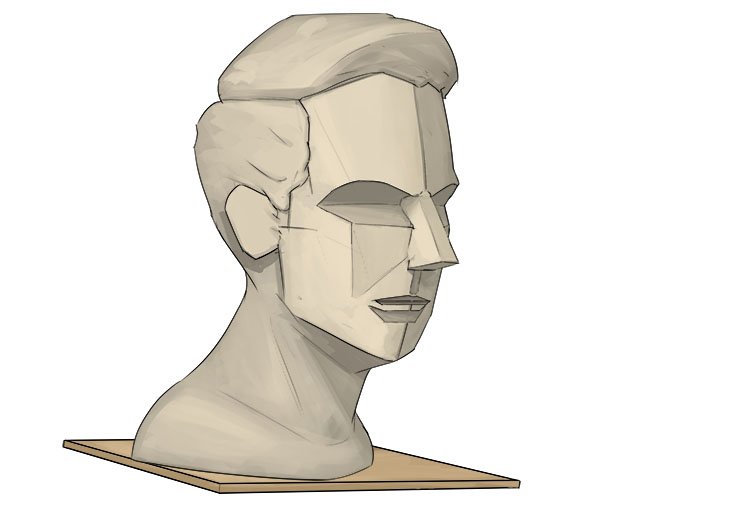
Once you have your rough head shape you need to carve it into a more uniform shape. While doing this it is helpful to mark out horizontal and vertical centre lines to help see whether the head is the correct shape.
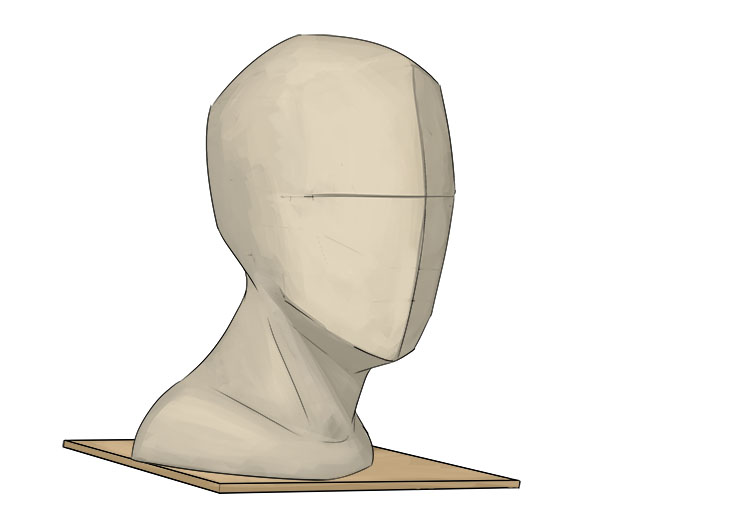
Next carve in some guide lines for the rest of the facial features.
Cut a long horizontal wedge out from along the eye line, this will later be shaped into the eye sockets. Then cut a second smaller wedge out from below the mouth line, this will start to define the chin and lower lip.

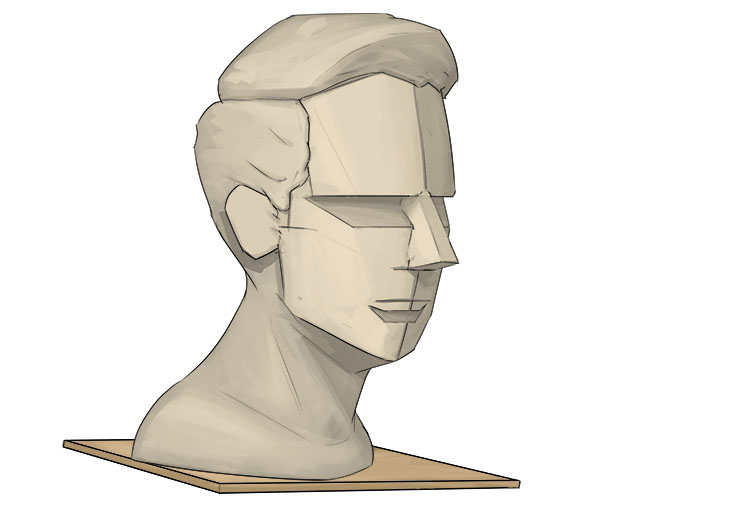
Now we can add additional chunks of clay to make up the rough shapes of the nose, ears and hair.
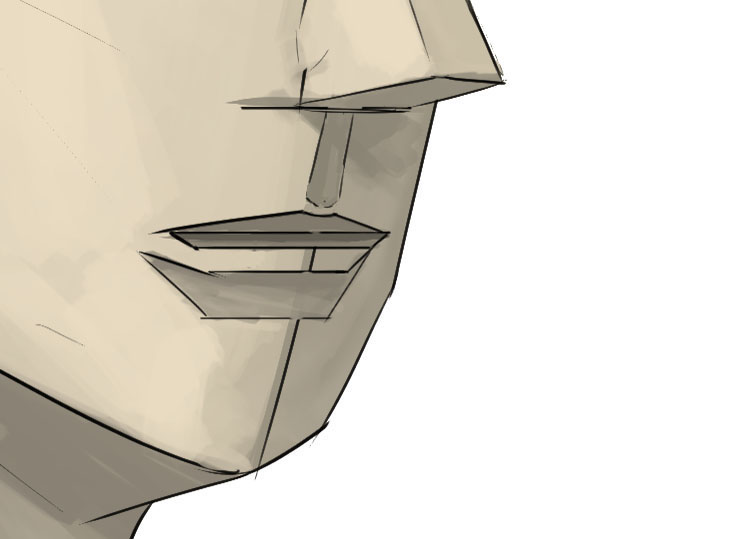
To shape the lips we're going to cut a horizontal wedge along the mouth guide line, the bottom edge of this cut should be just above the cut we made previously to define the chin. The top edge of this cut should be triangular in shape.
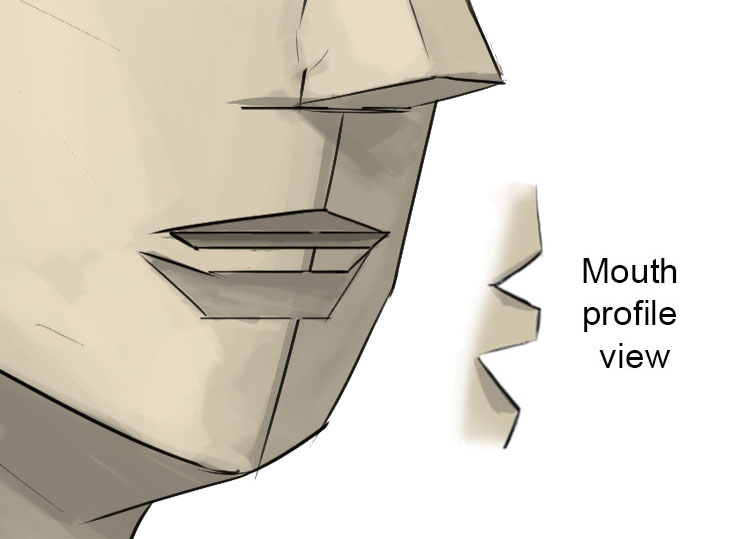
Now carve a shallow vertical groove from the bottom of the nose to just above the top lip to create the philtrum.
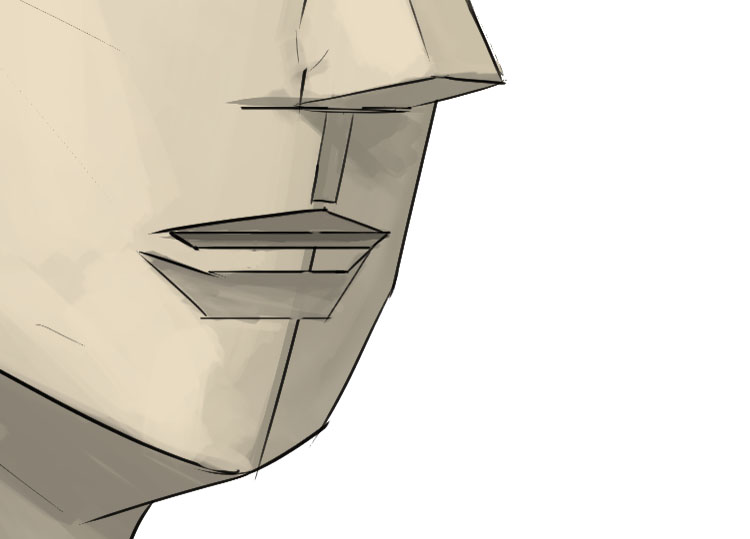
Carefully push the bottom of the philtrum down to create the slight dip in the middle of the top lip.
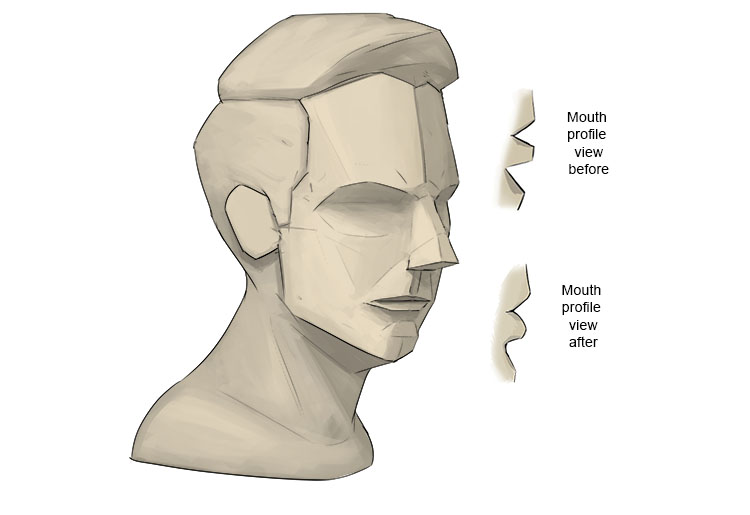
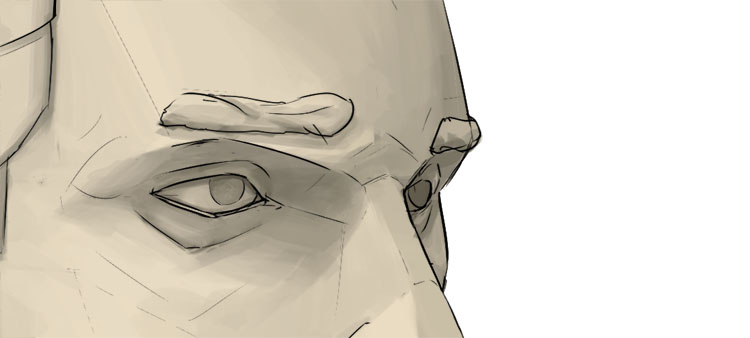
To shape the area around the eyes, push the top edge of the horizontal cut we made for the eyes up into the shape you'd like the brows to be (red line above the eyes). You should also lightly trim the area shaded in red in the image below to help define the cheek area, when trimming this area you should be removing more material from the side furthest from the nose.

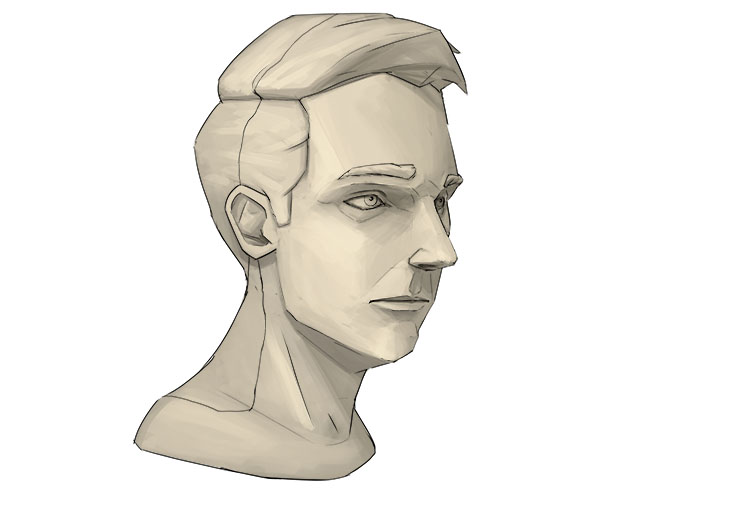
Here's what your face should look like after the previous step.
Now you can smooth out areas like the mouth, eyes, nose, cheeks and brows.
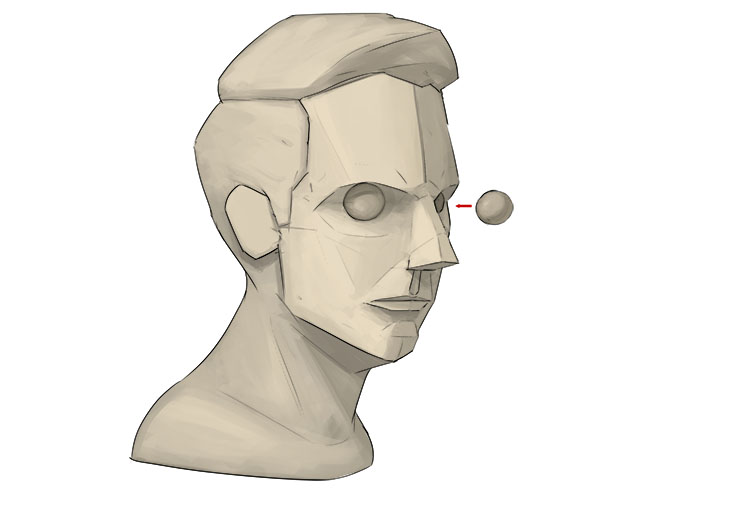
Cut two round holes where you would like to place the eyes.
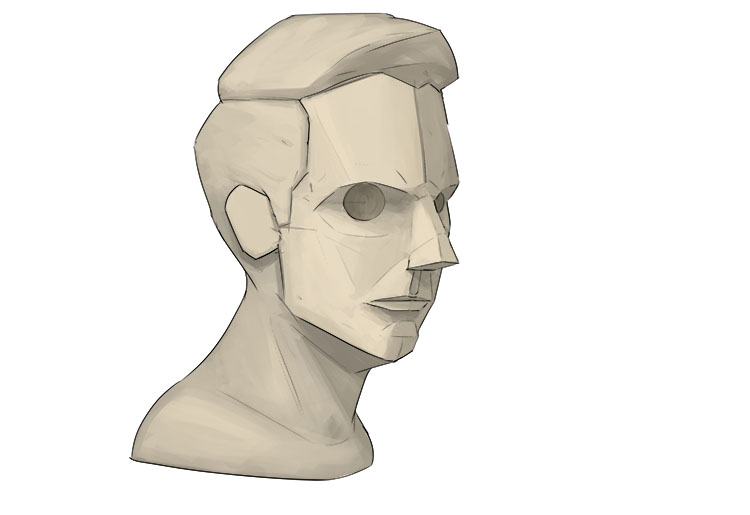
Roll two balls of clay to place into the holes we've just carved, these will be your sculpture's eyes.
Add small, thin pieces of clay onto the eye that can be shaped into the eyelids. Make sure to leave an opening between the eyelids, the size of this opening will depend on the expression you would like the sculpture to have.
Now smooth out and refine the shape of the eyelids, make sure to leave a hard edge along the opening of the eye to prevent the eyelids from blending into the eyeball. You can also continue to smooth and refine the shape of other features like the nose and mouth.
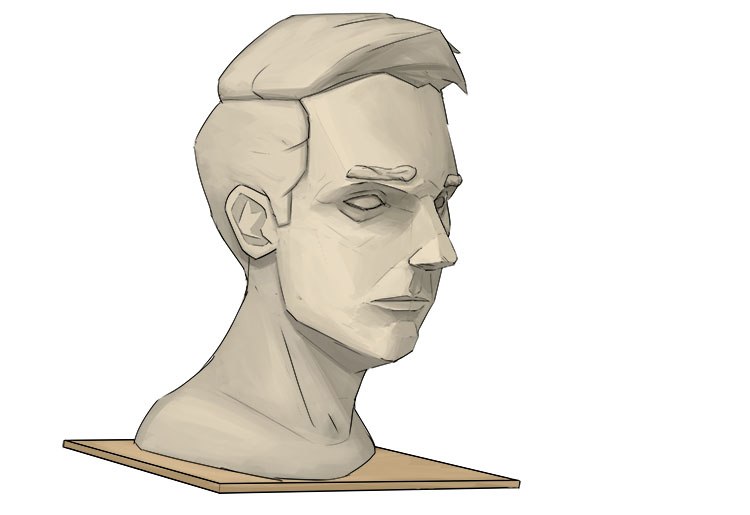
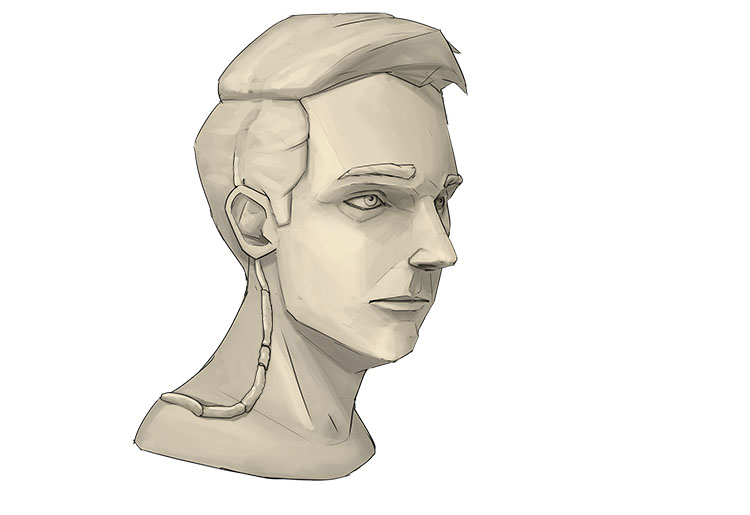
Next add some more clay for the eyebrows and carve in the rough shapes of the inner ear details and the nostrils.
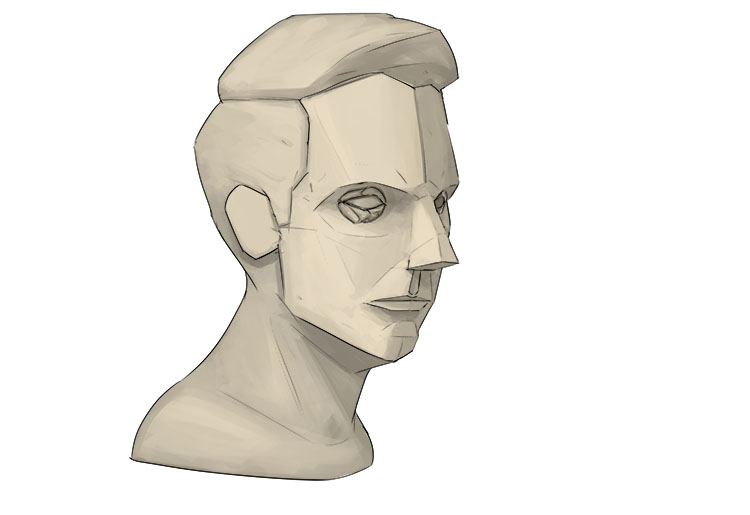
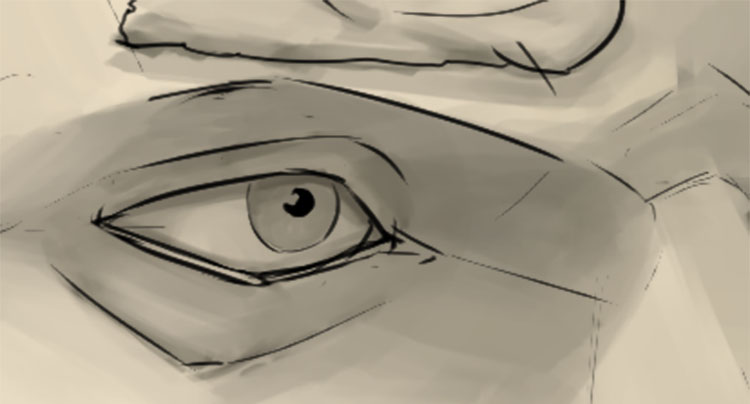
Carve the iris into each eye by carving a slightly concave circle out of the eyeball.
Now create the pupil by carving a small but fairly deep hole into the iris. To give the impression of a highlight on the pupil, we're going to leave a small section of the pupil area untouched.
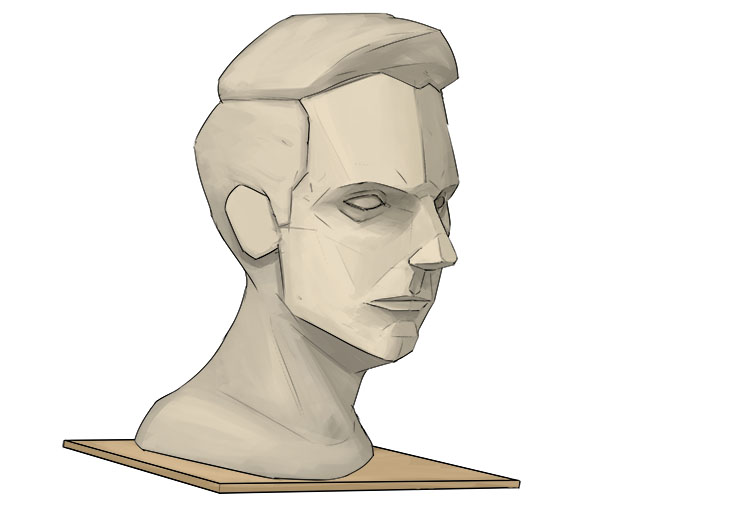
Smooth out and refine the details of your sculpture and remove any imperfections you can find. Once you're happy with the sculpture leave it to dry.

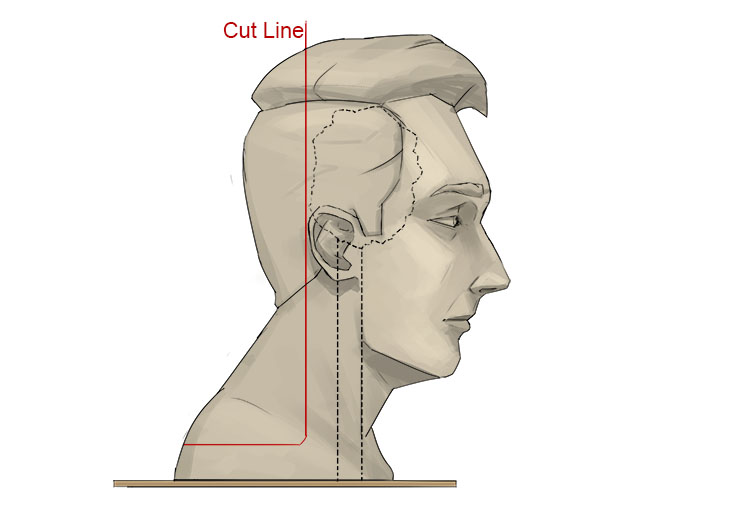
When the sculpture is leather hard (dry enough to hold it's shape when handled but still has enough moisture to be trimmed, carved, smoothed and scored) we can hollow out the bust and remove the armature. To start, cut the sculpture vertically in two using a wire tool. When cutting the sculpture try to avoid cutting through heavily detailed areas so it's easier to smooth out the seam when the two halves are re-attached. Your cut will also need to be off centre so you are not trying to cut through your armature and newspaper.
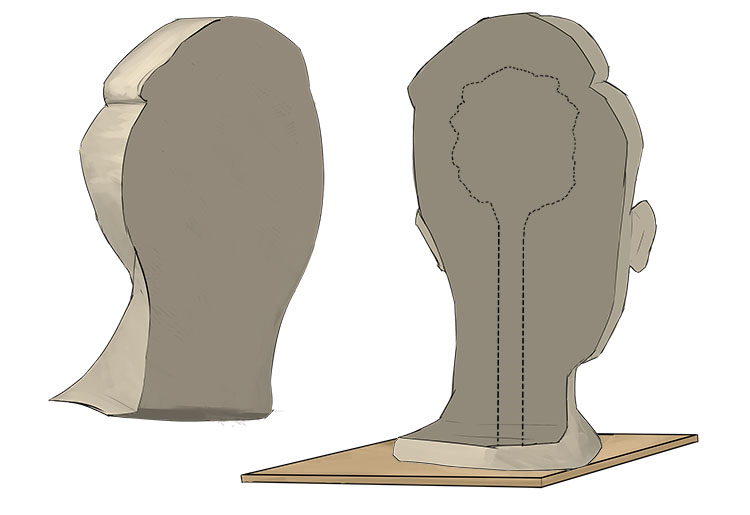
Now we can hollow out the bust by scraping away all the clay inside the sculpture, you should be aiming to have the walls of your bust no thicker than an inch to ensure the clay dries and fires evenly. Hollowing out the bust will also mean removing all of the clay connecting it to the armature and newspaper, since the clay has hardened, it should no longer need the armature to support itself.
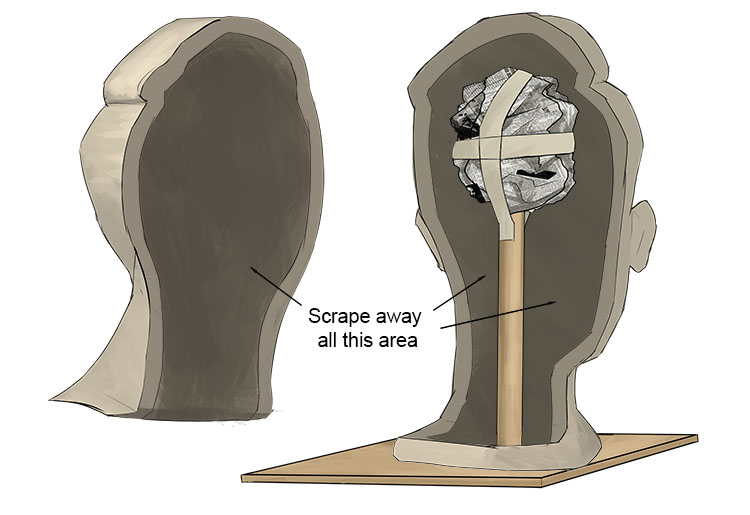
Now remove the newspaper and lift the sculpture off the armature.

Next we need to re-attach our two halves, to do this we are going to use the same technique of scoring, apply slip and blending that we used in our Mammoth Memory slip bonding project.
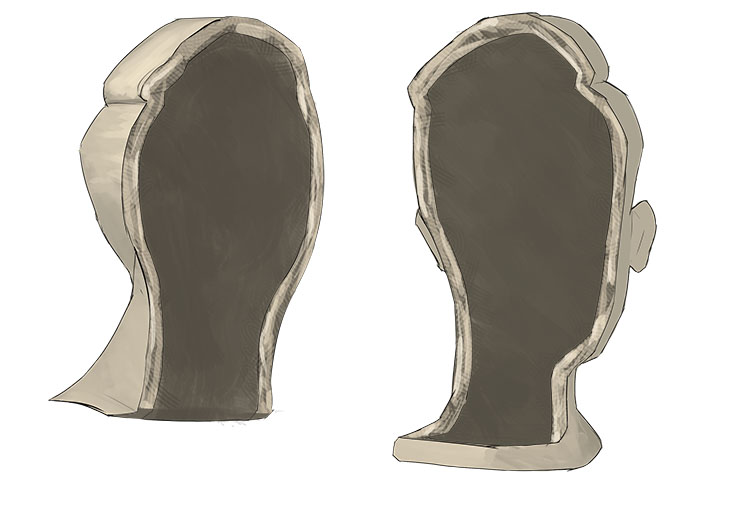
To reinforce the seem we are going to carve a small channel along the seem and fill it with fresh clay. This will give us a stronger bond between the two halves and prevent cracking.

Now smooth out the seem and carve back in any details that were along the seem.
You can now leave the bust to dry ready for firing.
Once your sculpture is fired you will have your finished biscuit ware bust.
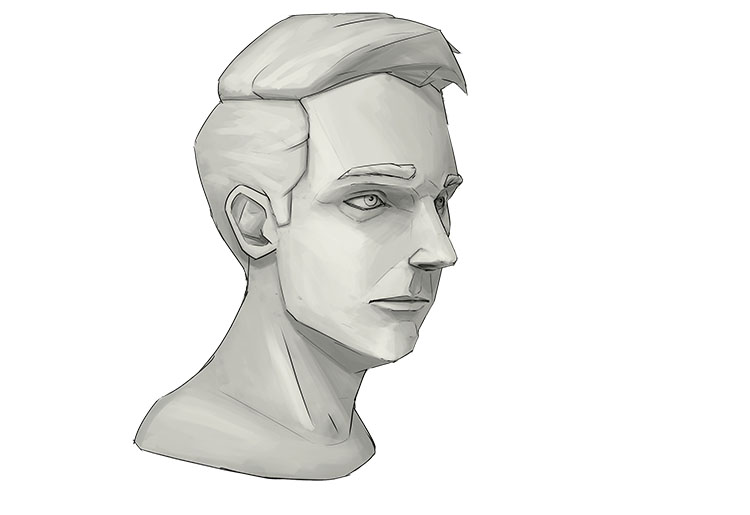
Biscuit ware.


