
Stoneware – Objects made of clay, typically greyish in colour
(Pronounced stown-wair)
Note: With the help of the mnemonic below we are going to learn what the normal colour of stoneware is. More familiarity will come with its use.
We know the meaning of ware as:
Ware - objects made out of clay.
But to remember stoneware is greyish in colour use the following mnemonic.
The Rolling Stones do not wear (stoneware) well, they all look very grey.

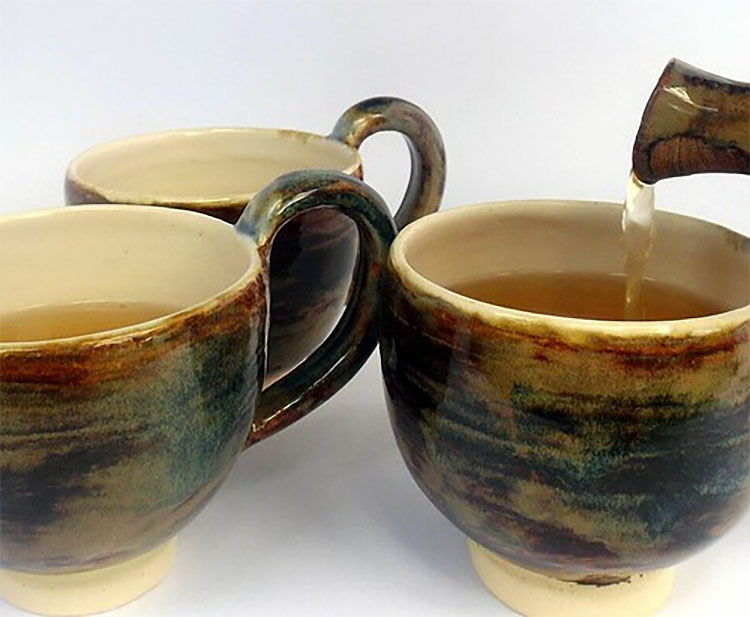
Stoneware is usually greyish in colour, tends to be less porous and sturdier than earthenware. Stoneware is also a high-firing clay meaning it can withstand higher temperatures. It's low porousness and ability to withstand higher temperatures makes it excellent for more practical uses like cooking or storing liquids.
Stoneware Project
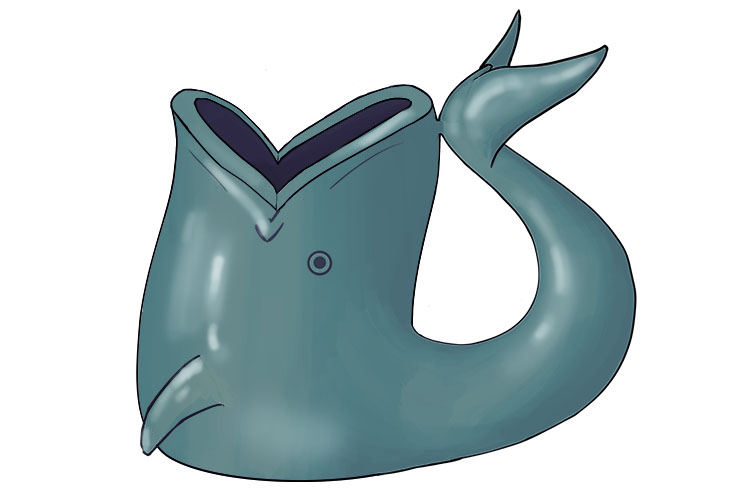
For this project we are going to create a fish shaped pouring jug using stoneware clay.
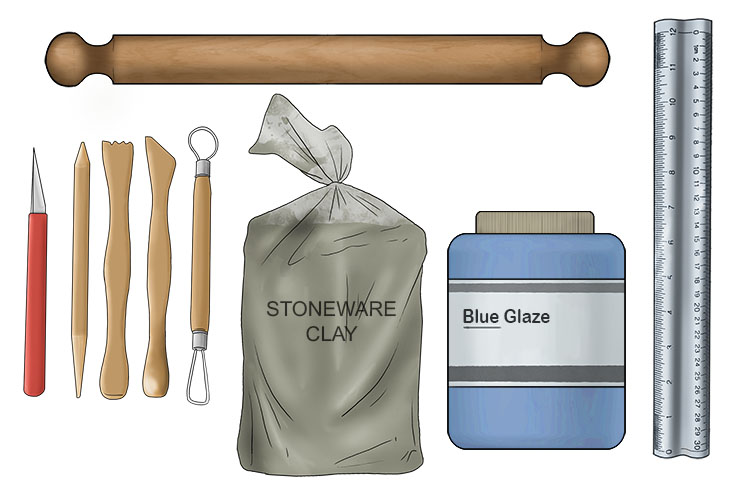
You will need stoneware clay, a rolling pin, clay carving tools, glaze and a ruler.
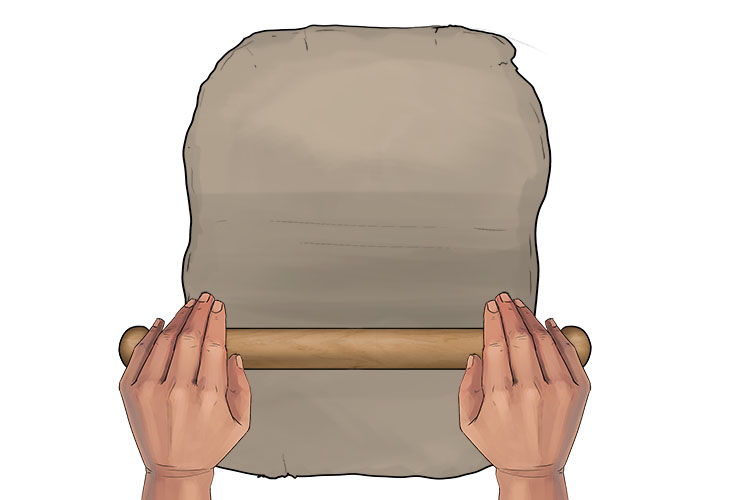
Roll out a 1/2 inch thick sheet of clay.
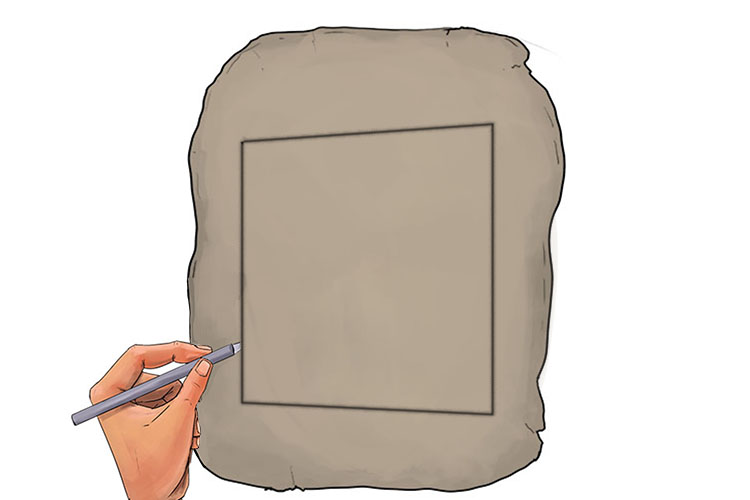
Cut out a trapezium shape from your rolled out clay. The height of your jug will be determined by the distance between the two parallel sides.
Join the two sloped sides together to form a cylinder that is wider at one end. The wider end will be the bottom of your jug. Score and apply slip to the joint.
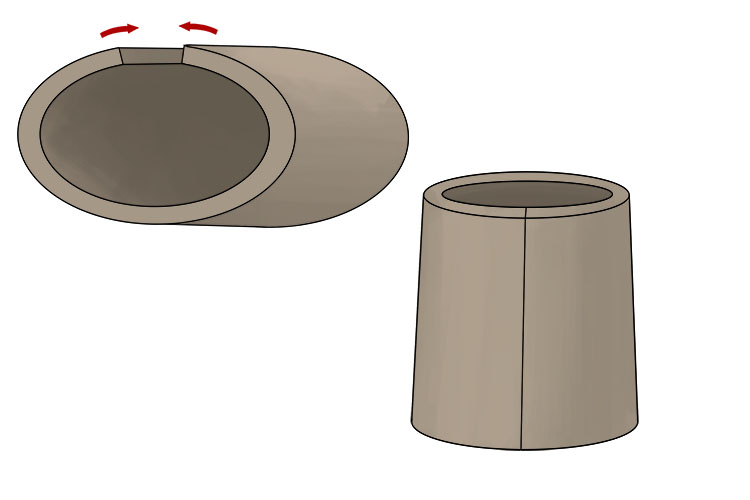
Smooth out the seam.
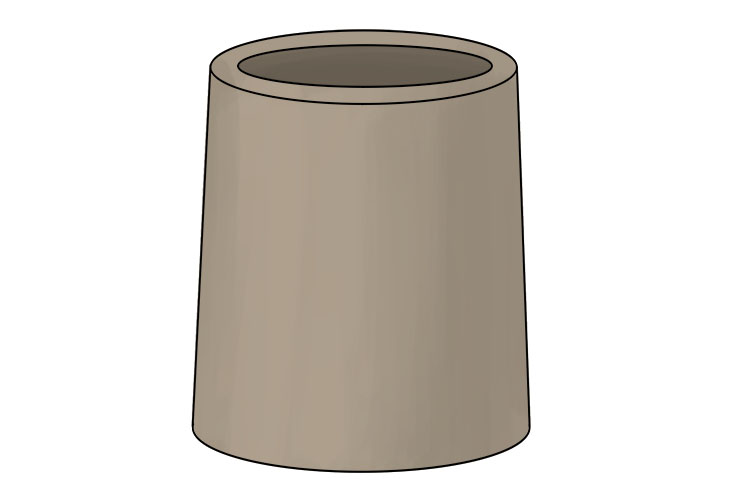
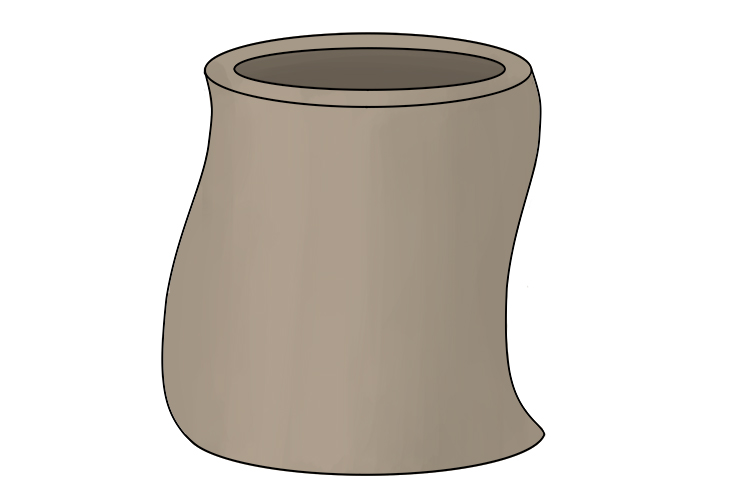
Carefully push at the walls of your cylinder to give it a slight S-shaped curve when viewed from the side.
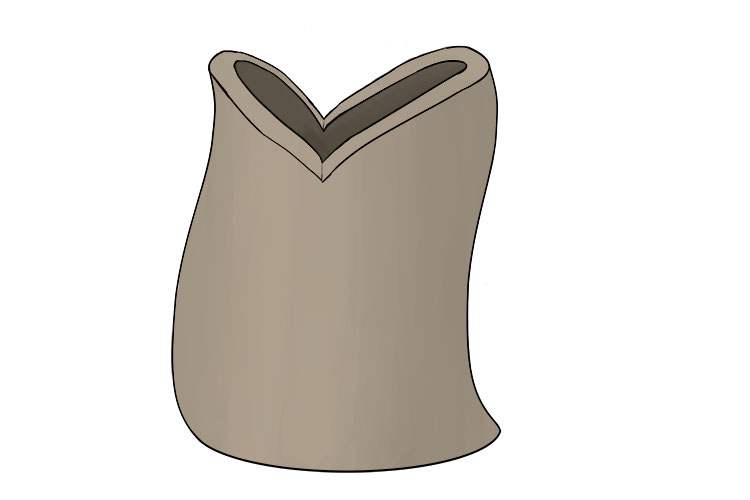
Cut out a curved v-shape from the top of the jug on each side to create a mouth shape.
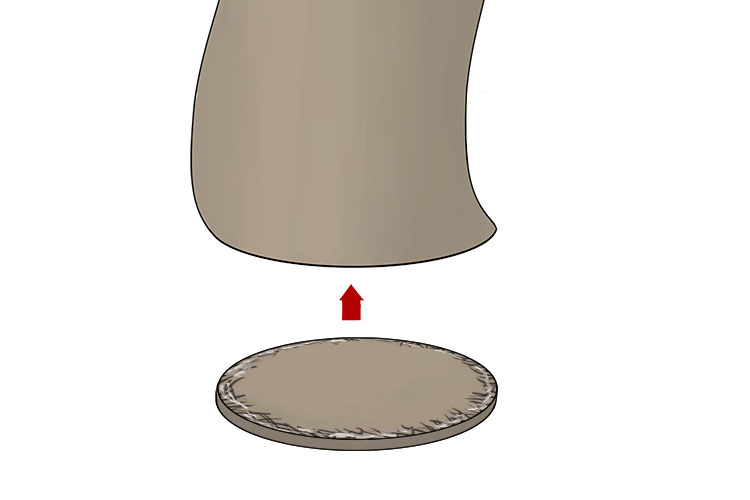
Place the body of the jug on a piece of rolled out clay and cut around the base of the body to create a bottom piece.
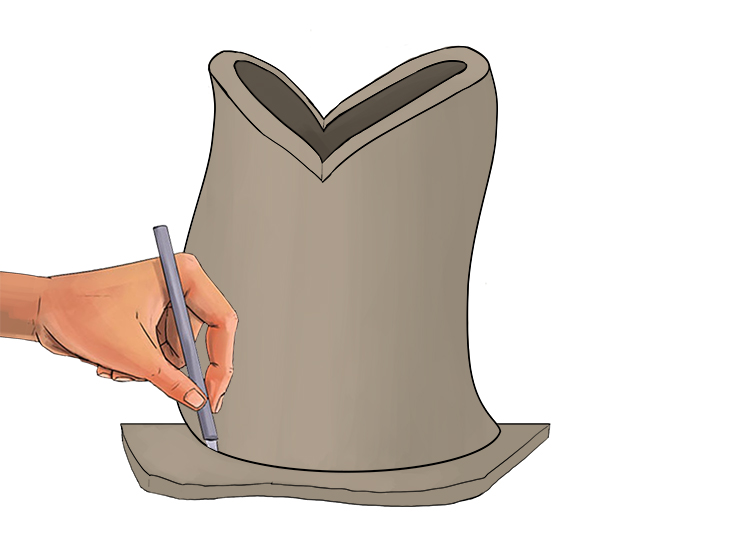
Now, using slip, attach the bottom to the body.
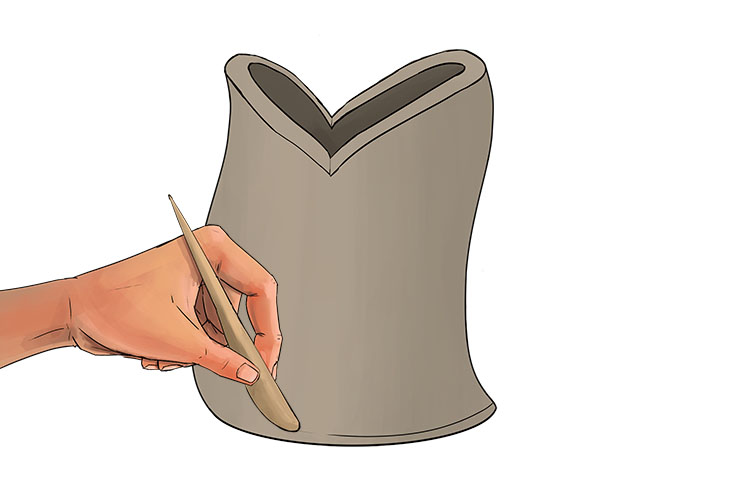
Smooth out the seam.
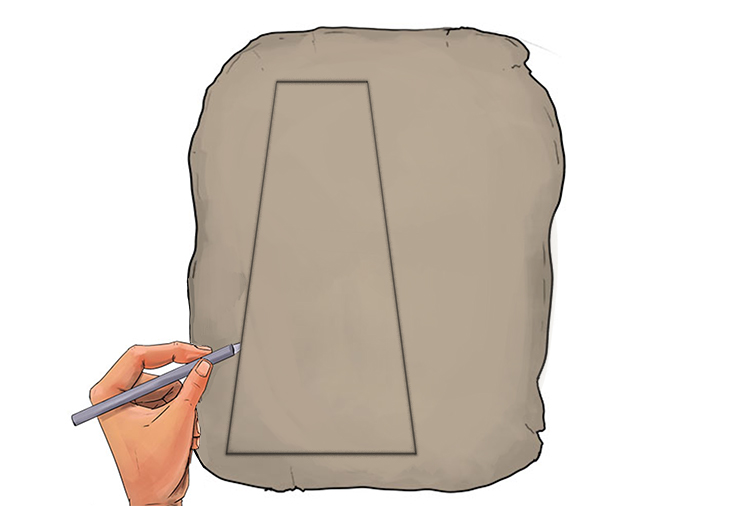
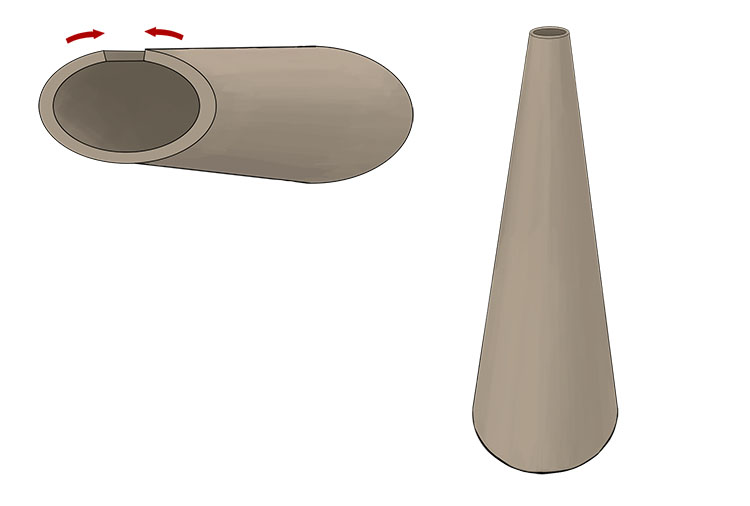
Now cut out a tall, narrow trapezium from some 1/2 inch thick rolled out clay. This will be used to create our handle which will be shaped like a fish’s tail so make sure the top of the trapezium is quite a lot narrower than the bottom.
Join the two sloped sides together to create a cone-like shape. Again score and apply slip to the joint.
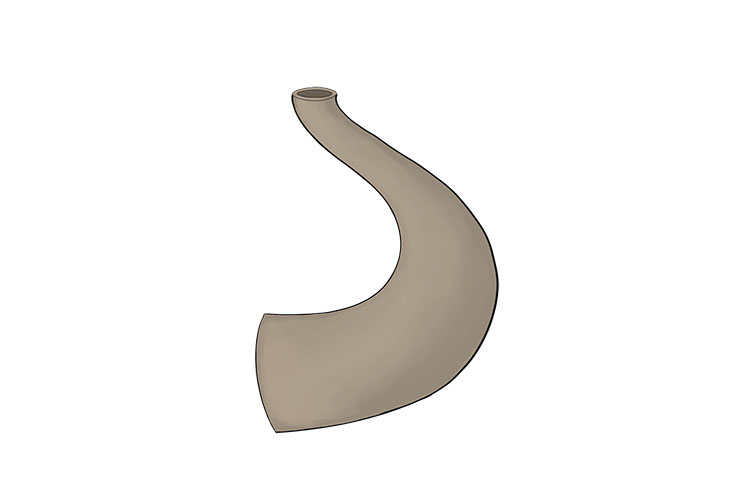
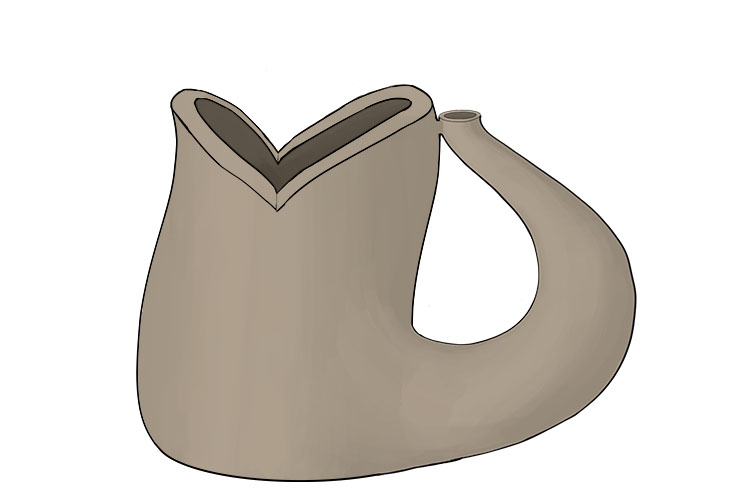
Now carefully bend the cone into a C shape but with the narrow end curved back up as shown below.
Next score and slip the bottom and side of the top of the handle piece.
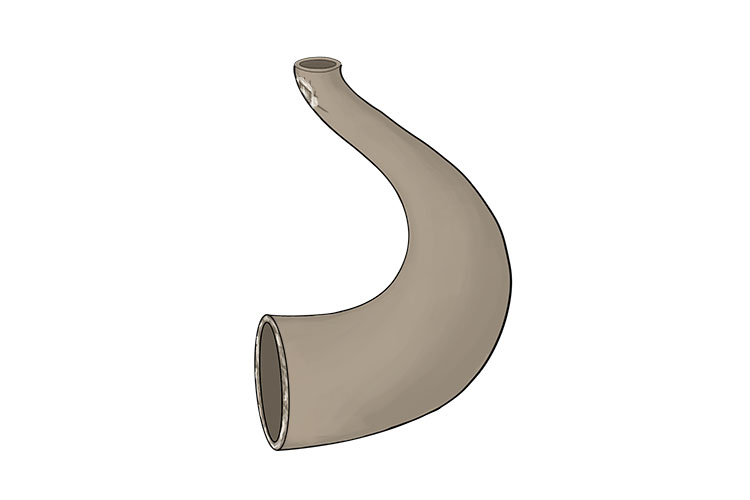
Attach the handle piece to the jug with the wider end at the bottom of the jug.
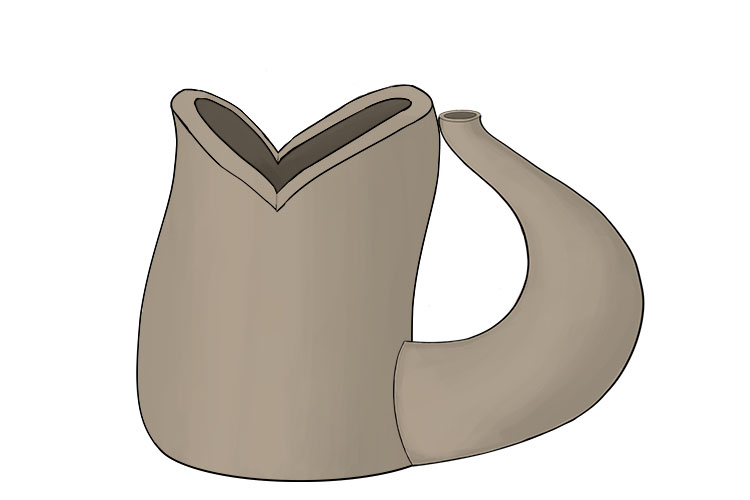
Smooth out the seams where the handle attaches to the body of the jug.
Add a lump of clay to cover the hole on the top of the handle.
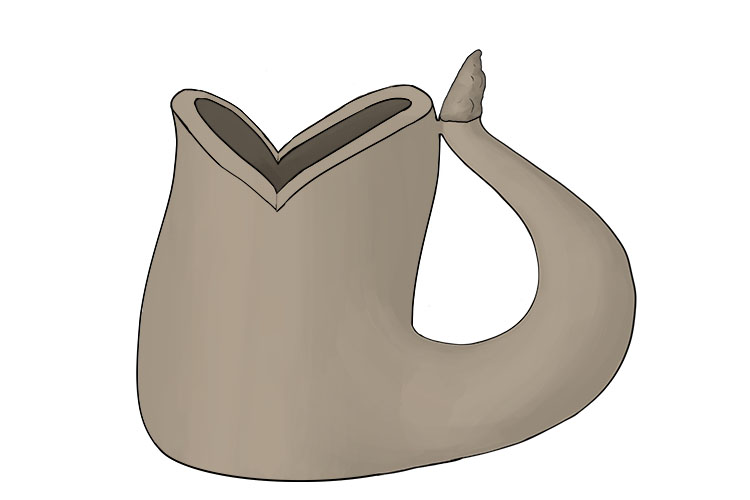
Smooth the lump of clay into a rounded point so it looks like the end of a fish’s tail.

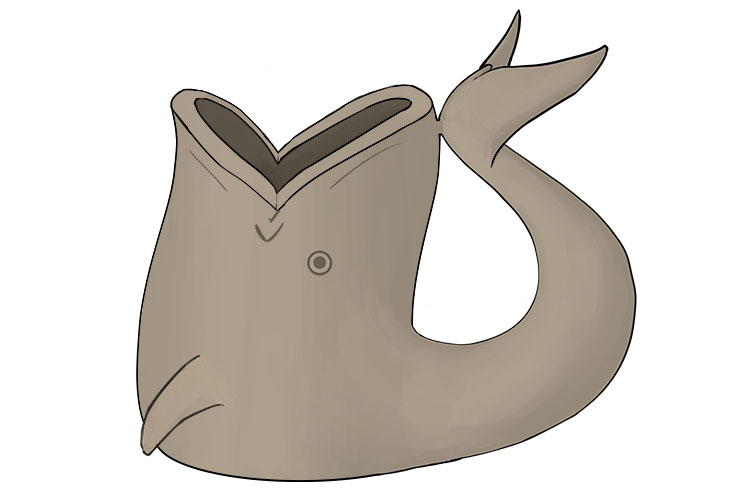
Cut out two larger and two smaller fin shapes from your leftover rolled out clay.
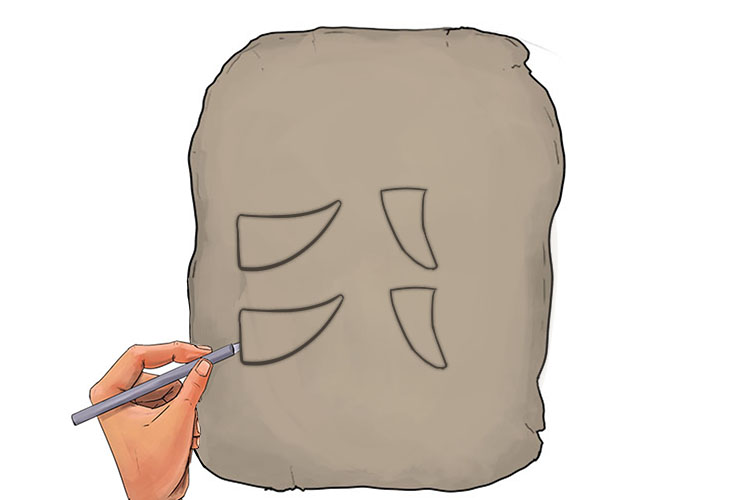
Attach the two larger fins to the end of the handle/tail and the two smaller ones to the sides of the body of the jug.

Smooth out the seams where you attached the fins to the tail and body.

Carve a circle into each side of the jug for the eyes. You can also carve some details around the mouth.

Carve a smaller circle into the eye for the pupil. Then leave to dry for firing.
Now apply your glaze and fire again to solidify the glaze.
Stoneware.


