
High and Low Level Horizon Line (Three Point Perspective)
To understand the importance of choosing the correct horizon line with three point perspective artwork, we are going to provide you with an example of a high and low perspective on the same building. But please note, this can equally be achieved on a human/animal model if you break the human/animal into squares, cubes, rectangles and cuboids.
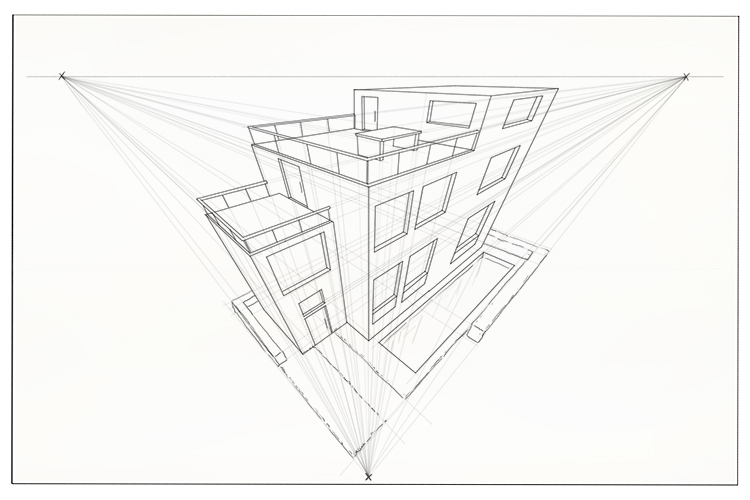
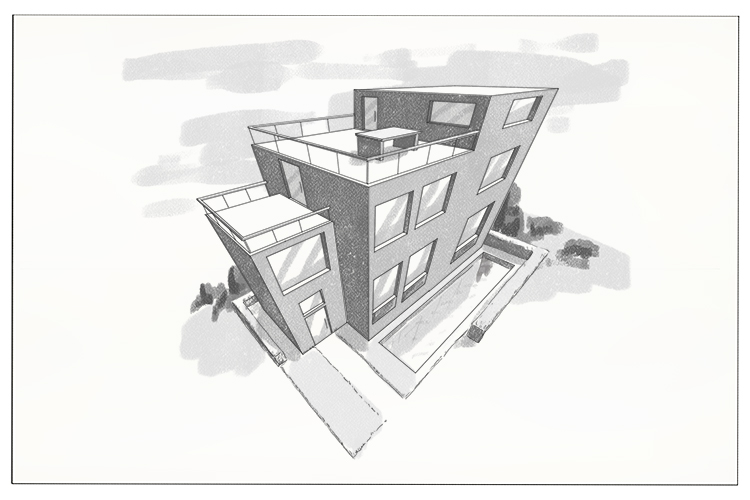
High Level Horizon Line (three point perspective) Project 1
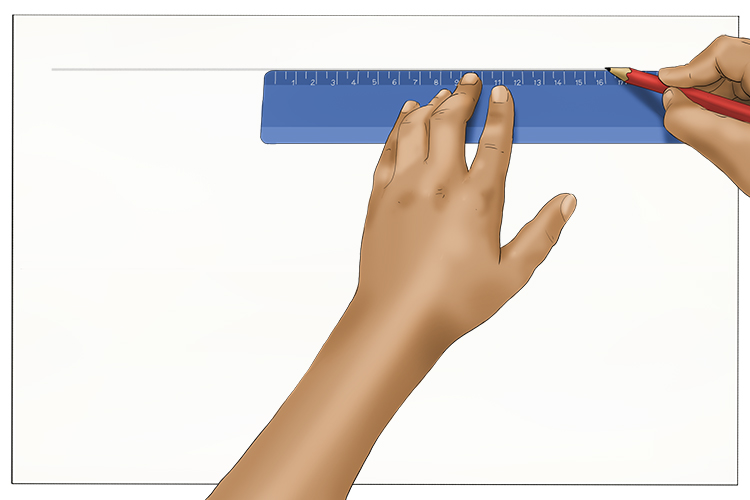
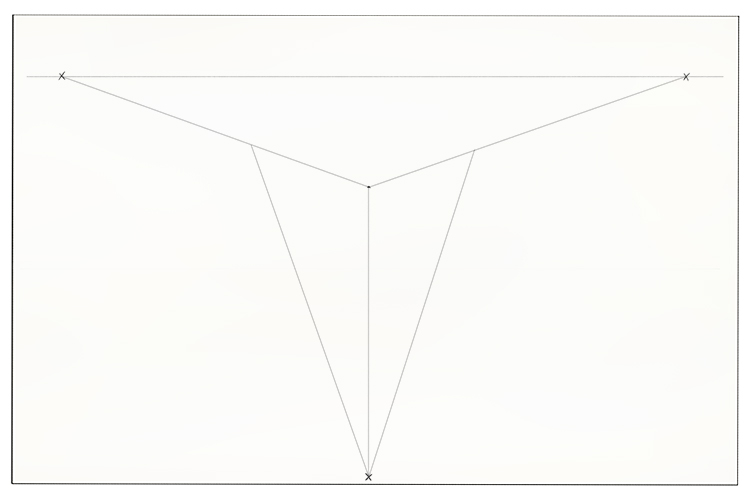
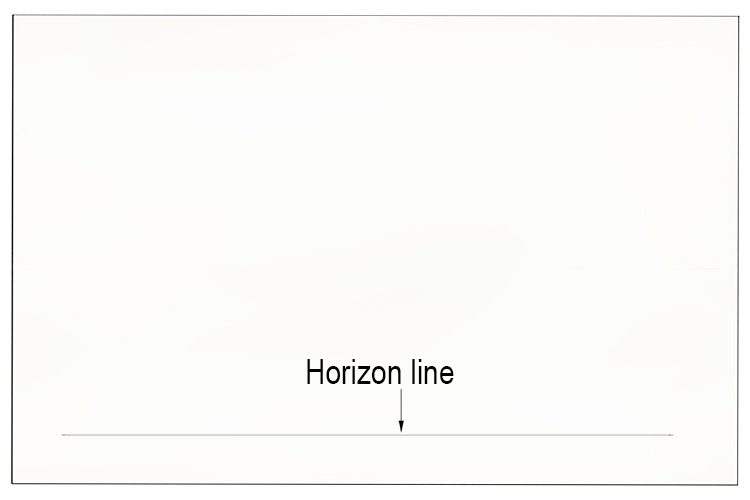
Start by drawing a horizon line somewhere near the top of the page. As we are drawing the same building in three point perspective you can use this as a final guide to this drawing.
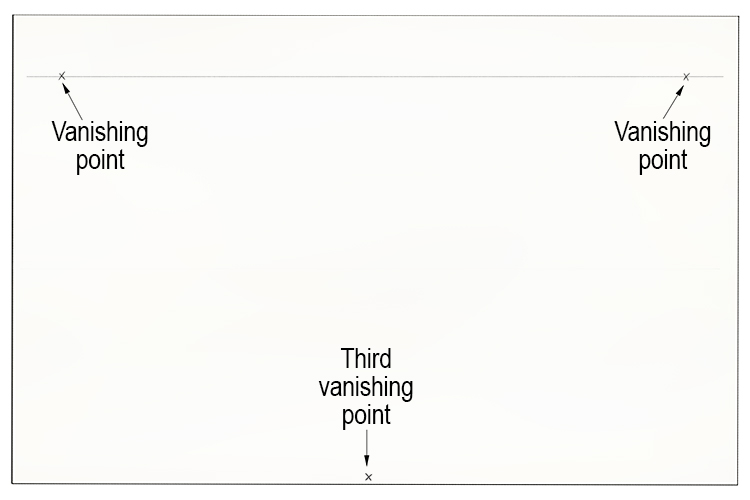
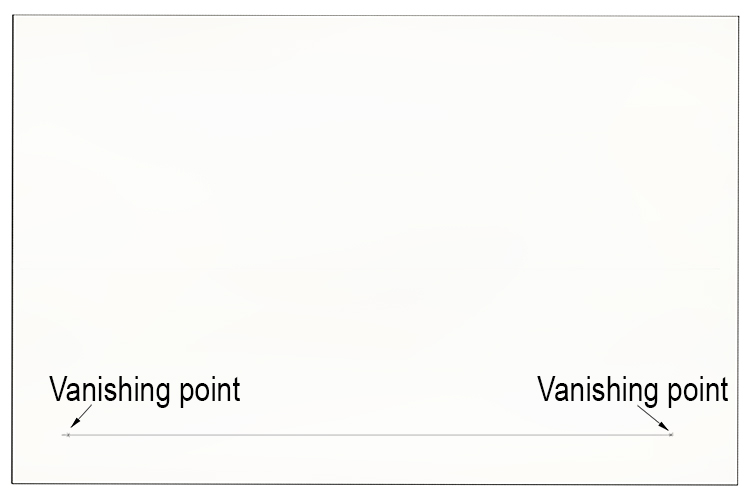
Towards each side of the page, draw a small cross on the horizon line. These vanishing points will be two of the 'three points' that the title refers to.

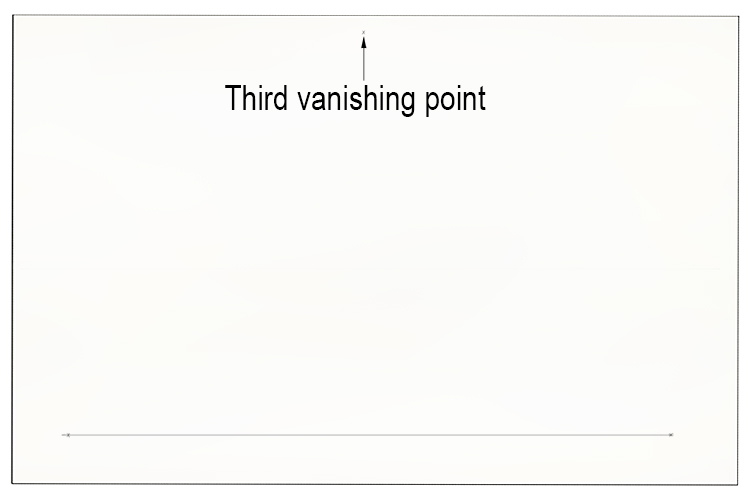
At the bottom centre of the page, add a third cross. This is the third point of a three-point perspective drawing.
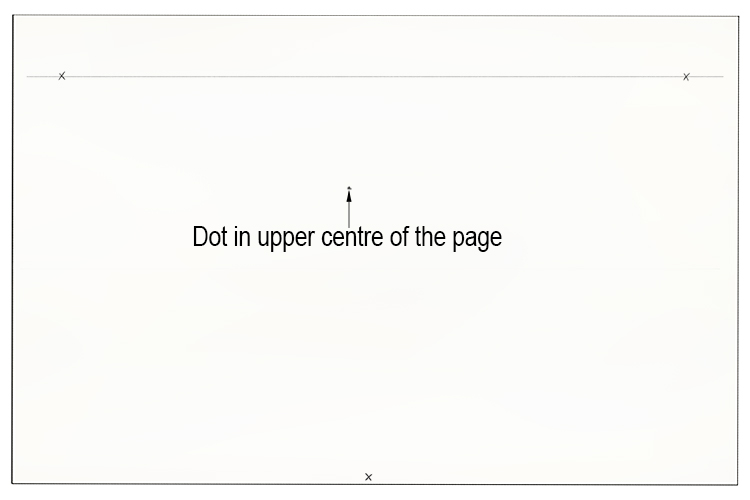
The next stage is to draw a dot somewhere in the upper centre of the page. In a three-point perspective drawing, there are no horizontals or verticals. Every line comes from one of the three vanishing points, so to draw the blocks that will make up our building, we have to start from a single point that will become a corner.
From the dot, draw a guideline to each of the three vanishing points.
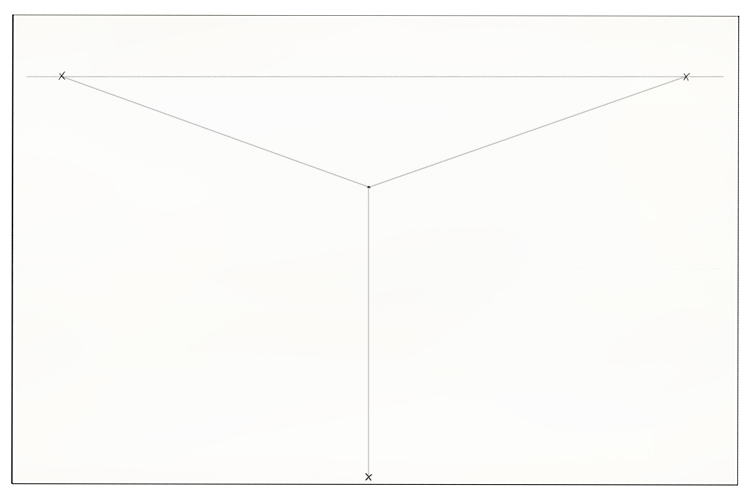
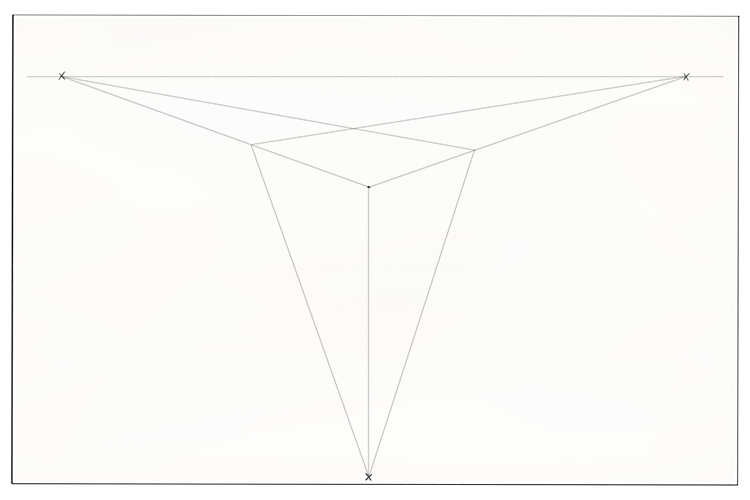
These guidelines will form the front corner of our building. To add the outer edges, draw lines from the bottom vanishing point, landing at points on the top two guidelines to give the building your desired width.
The points at which these new lines meet the top guidelines will be the top corners of our building. Draw new lines from these points to their opposite top vanishing point.
To create the bottom edge of the building, draw guidelines from each of the top vanishing points to the position on the centre line where you wish the building to end.
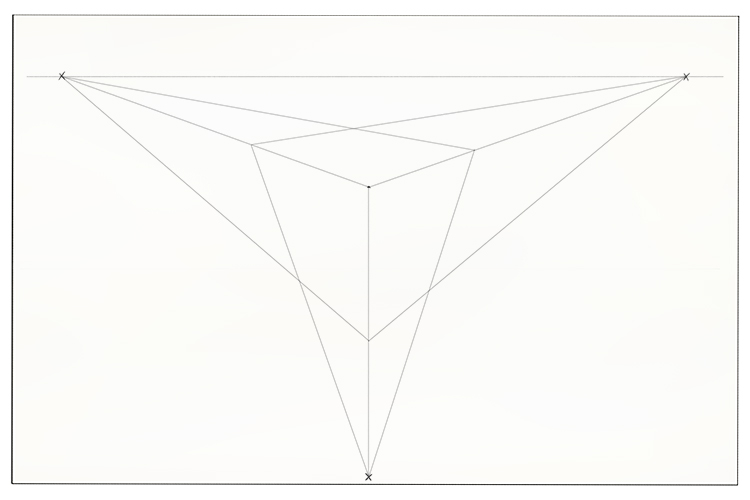
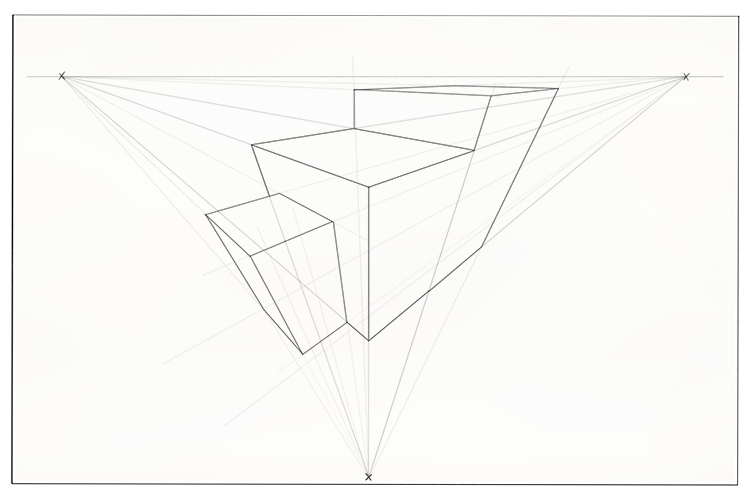
You can now see the 3D shape has been formed: this will be the block we will use as the main area of our building.
From this central block, we can use the three vanishing points to add attached blocks that will form the other sections of the building.
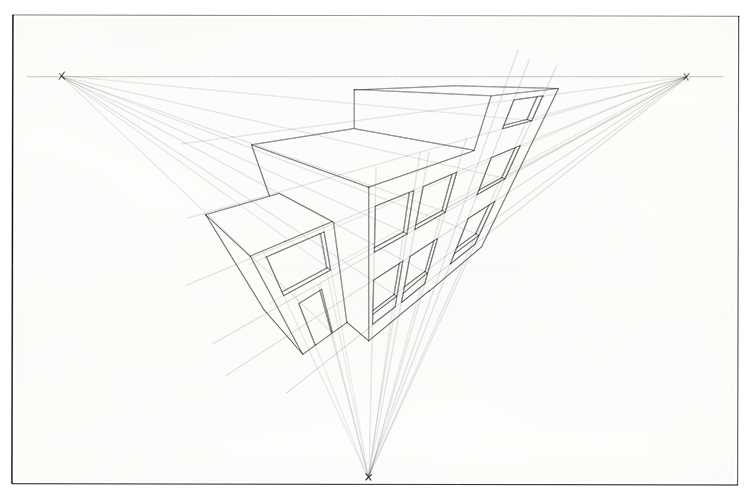
The three vanishing points can now be used to add details such as windows and doors to the structure.
It is best to do one side at a time. Use the opposite vanishing point to create the window recesses.
Repeat the process to add windows and doors to the left-facing sides of the building.
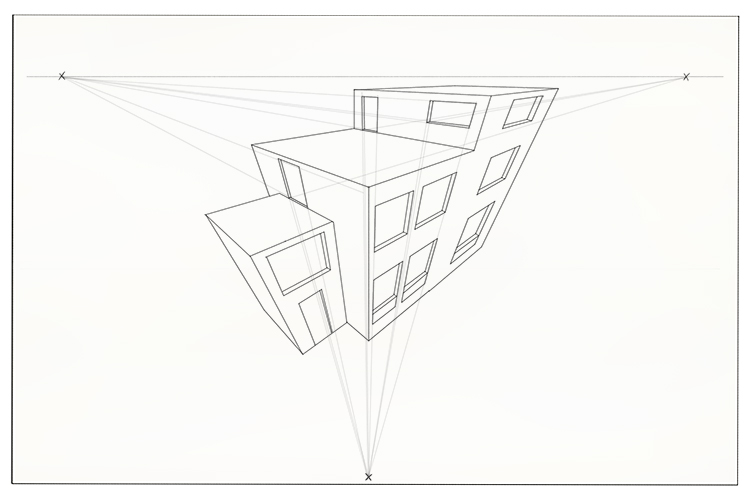
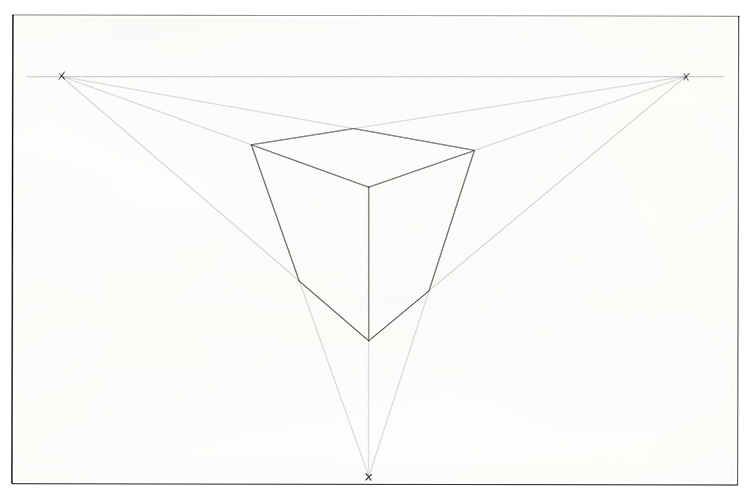
Erase your guidelines and you can see the basic structure of your building completed.
Now your building is complete, use the three vanishing points to add detail to the drawing. Think about the building's surrounding and finish.
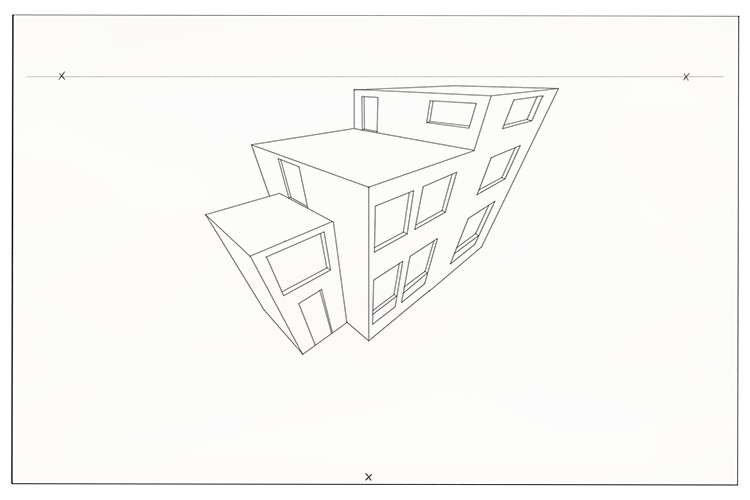
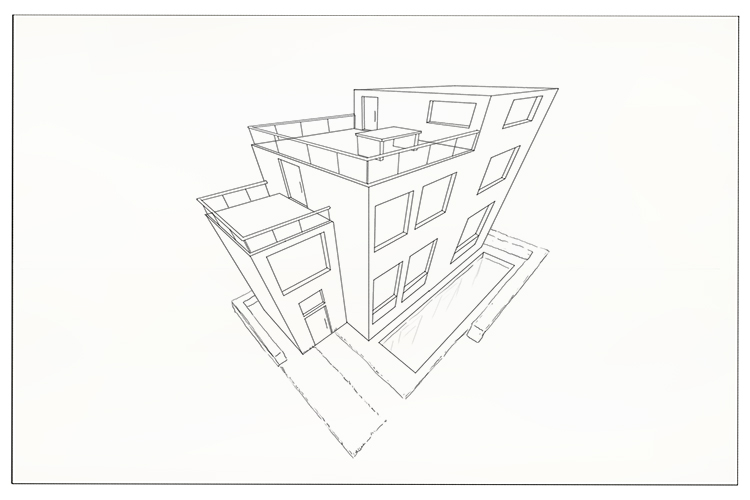
Erase the guidelines and vanishing points and you are left with the finished outline ready to be shaded.
Shading emphasises the perspective even more. Imagine a source of light to the right-hand side and shade all of the left-facing walls darker as if they are in shadow.
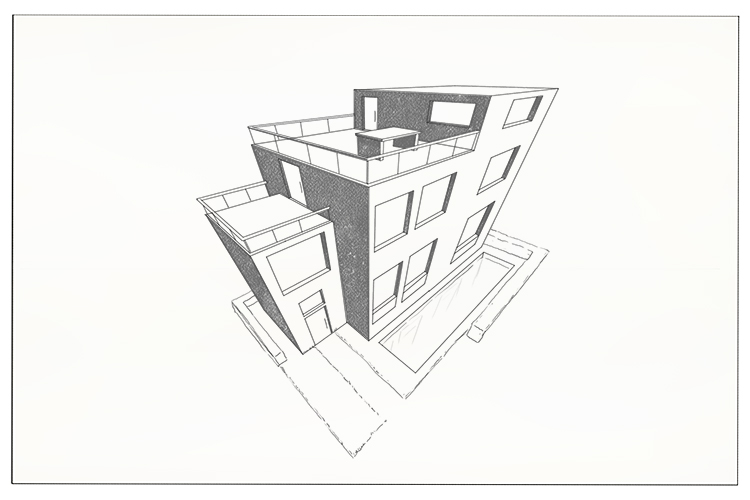
Shade all the right-facing sides a lighter tone, leaving everything that faces upwards the lightest tone.
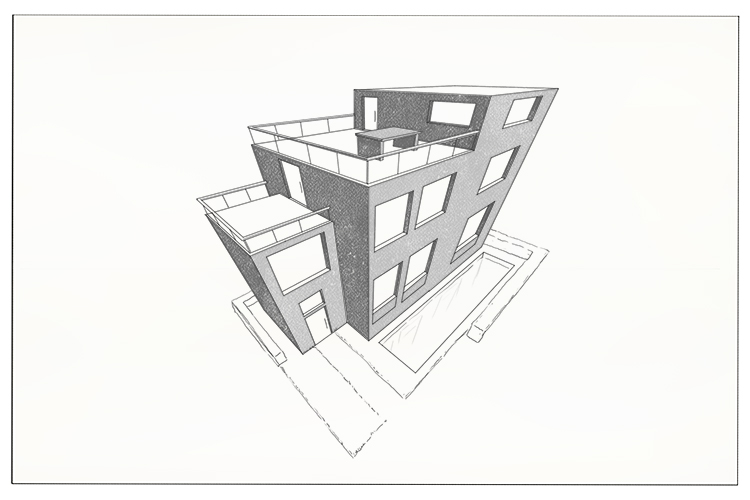
You can now continue to shade and add detail until you are happy with your final drawing.
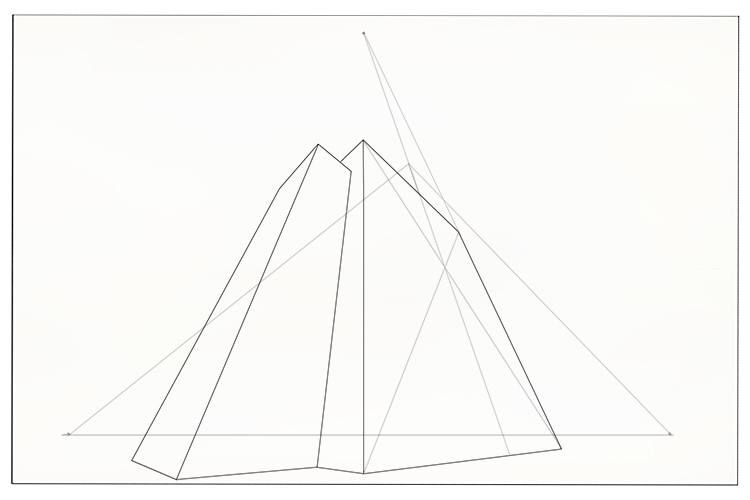
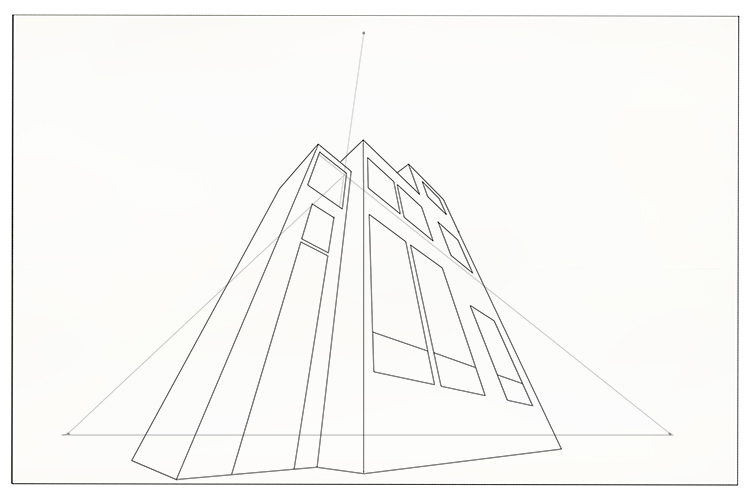
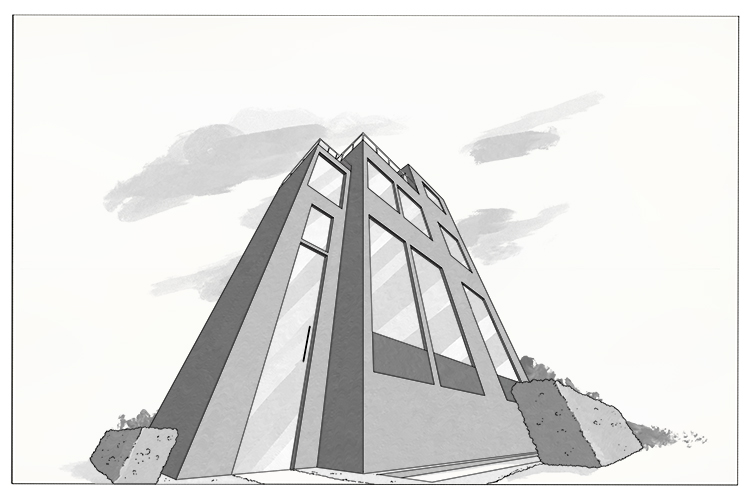
Low Level Horizon Line (three point perspective) Project 2
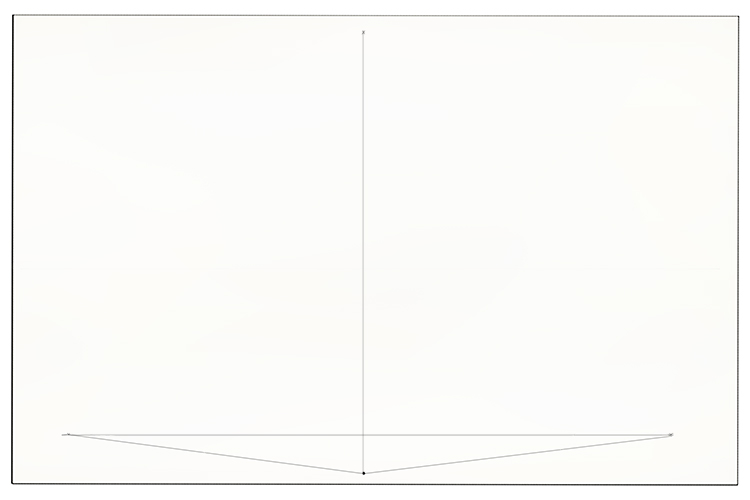
Start by drawing a horizon line somewhere near the bottom of the page. As we are drawing the same building in three point perspective you can use this as a final guide to this drawing.
Towards each side of the page, draw a small cross on the horizon line. These vanishing points will be two of the "three points" that the title refers to.
At the top of the page, add a third cross. This is the third point of our three point perspective drawing.
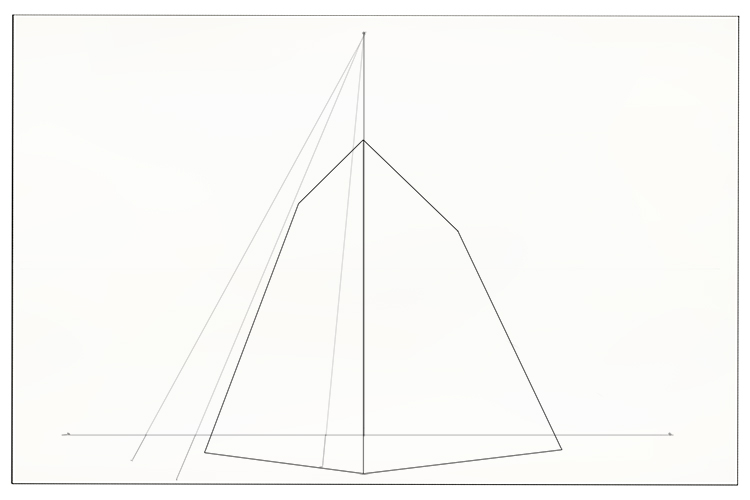
The next stage is to draw a dot somewhere in the lower centre of the page. In a three-point perspective drawing, there are no horizontals or verticals. Every line comes from one of the vanishing points, so to draw the blocks that will make up our building we have to start from a single point that will become a corner.

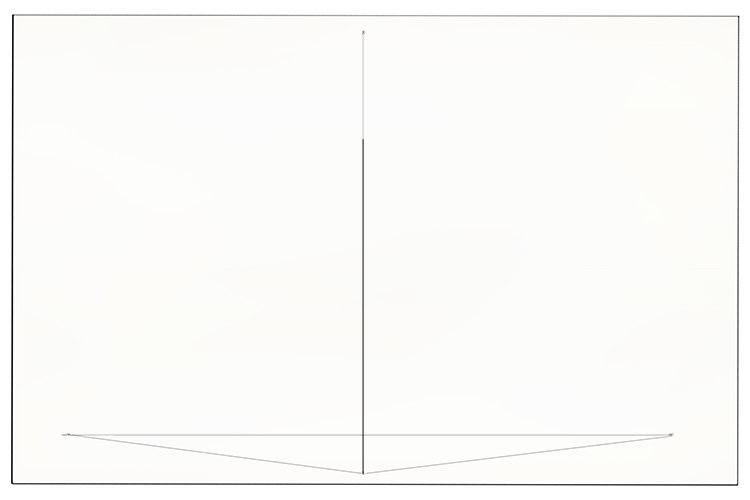
From the dot draw a guideline to each of the three vanishing points.
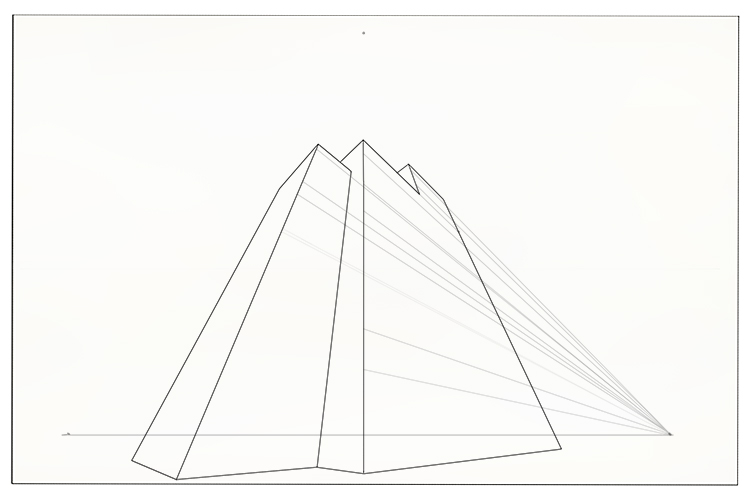
These guidelines will form the front corner of our building. Now draw the front vertical line of the building to the height you want your building.
To add the outer edges of the building draw lines from the top vanishing point down to the other vanishing points where you want the width of the building to be.
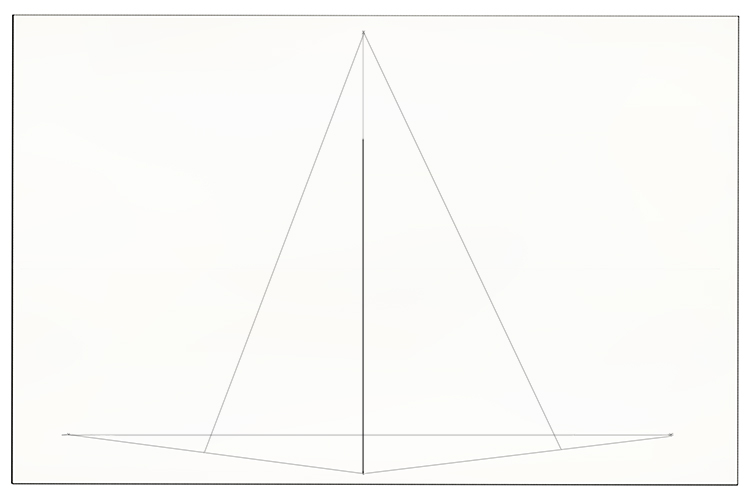
Now from the vanishing points on the horizon line complete the edges of the building.
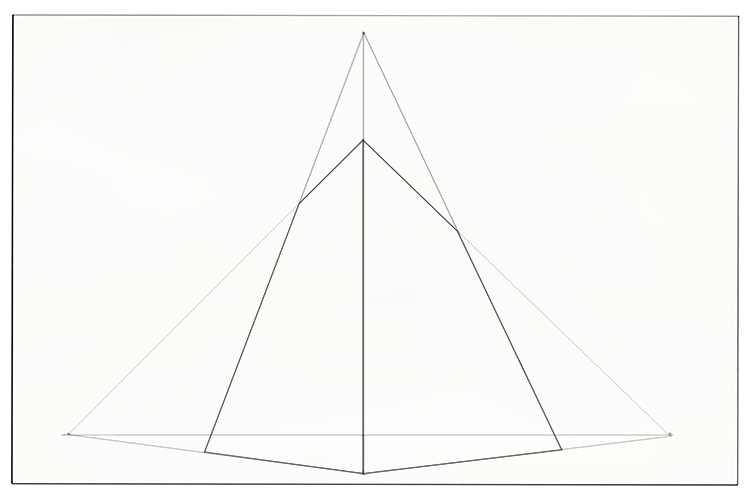
You then need to draw three lines to the left of the vertical line. The line on the right will join into the bottom line of the existing block and the other two will go further down, as shown below.
From the middle of the three lines you have just drawn, draw two more lines down from the top to meet the horizon line vanishing points. This will give you the correct angles for the top and bottom of the left hand building. Where the other two lines intersect the new top and bottom lines will be the edges of your building.
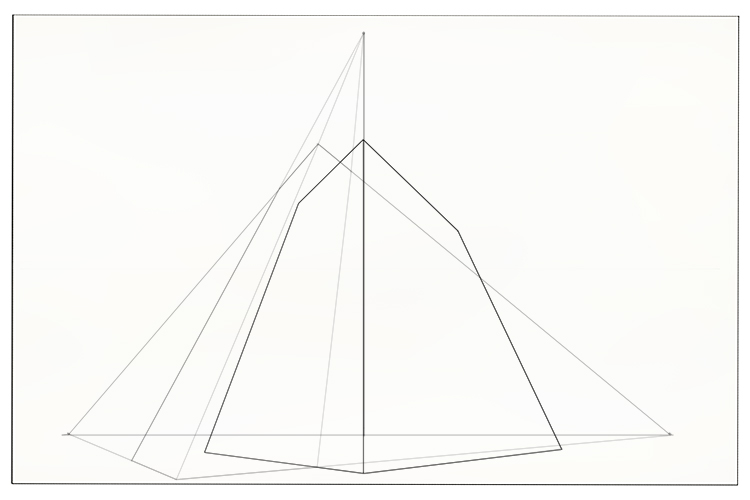
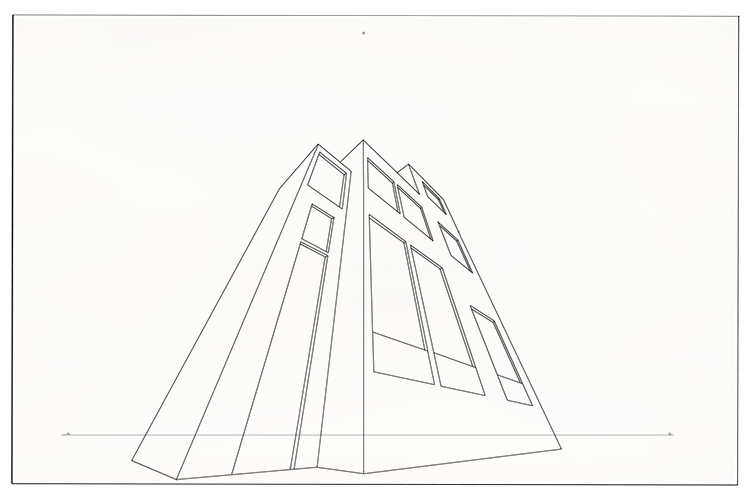
This is what your building should look like now.
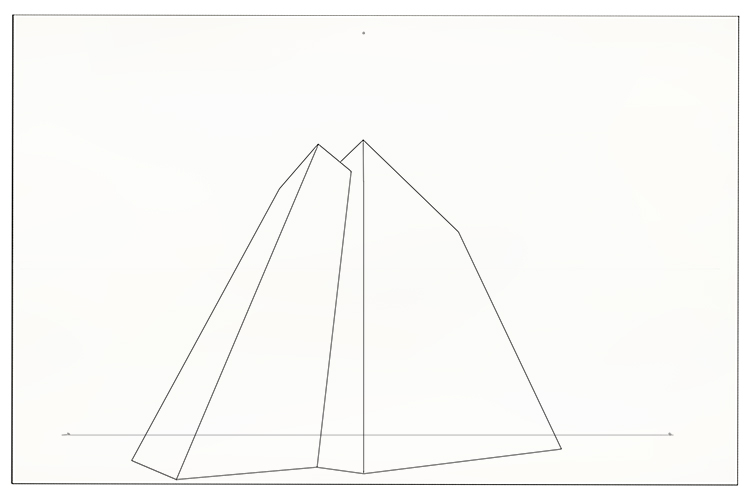
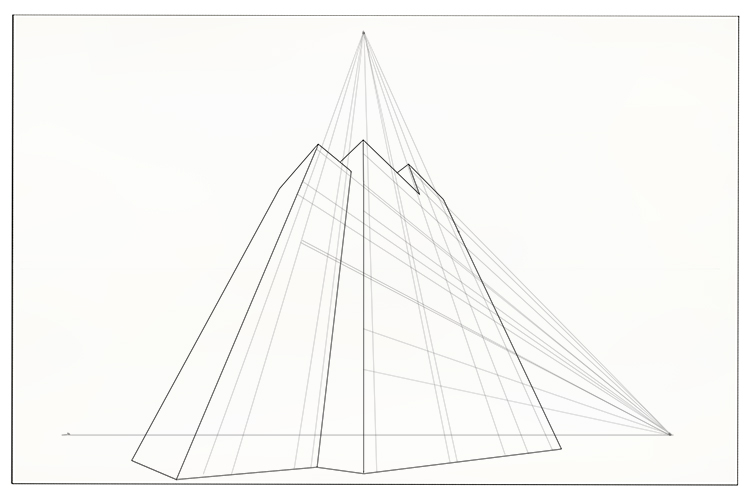
You now need to add the taller section of the right hand building. Find the middle of the right hand block, draw a line from each corner to form an X and then draw a line from the top vanishing through the centre of the X.
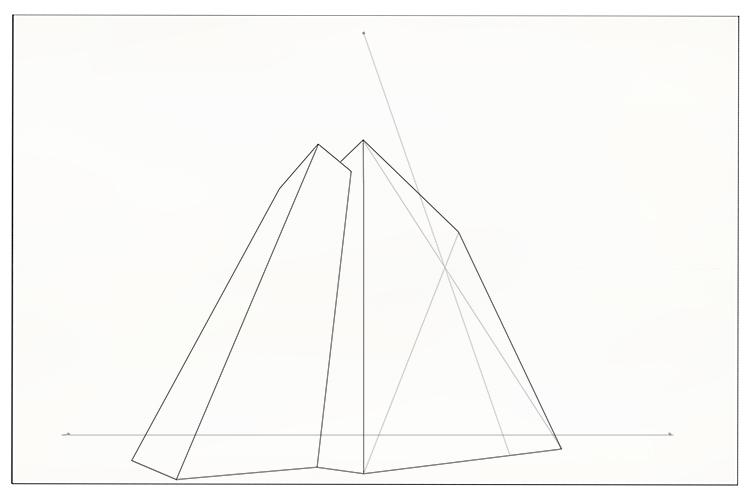
Connect the line to the bottom vanishing points. As this taller section is flush with the right hand line of the original building, extend it up to the top vanishing point.
All the main blocks of the building are now in place.

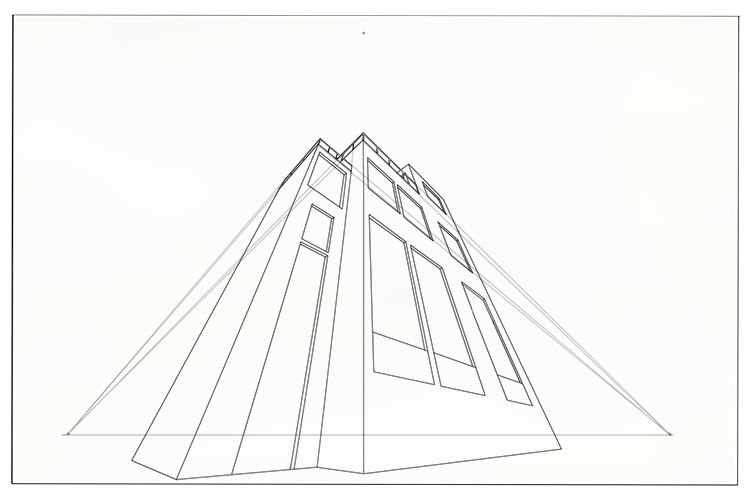
To draw the windows and door, draw in the lines from the vanishing points from the right.
Then, add the vertical lines.
Once you're happy with these lines, draw in the windows and erase the guide lines.
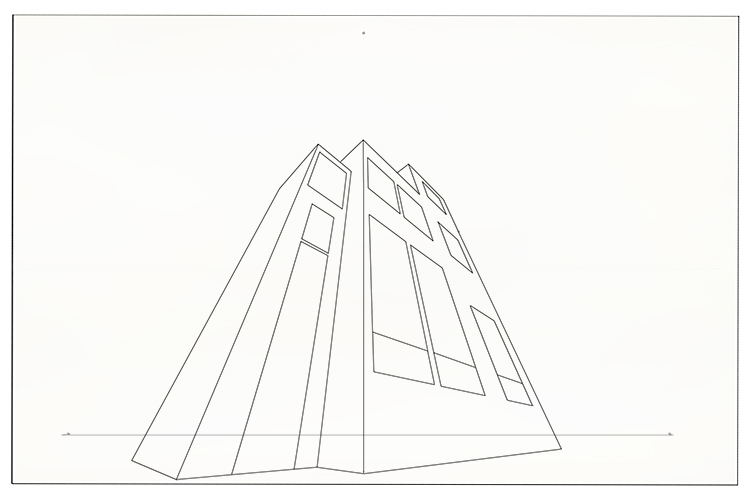
Use the vanishing points to create the window recesses as shown below.
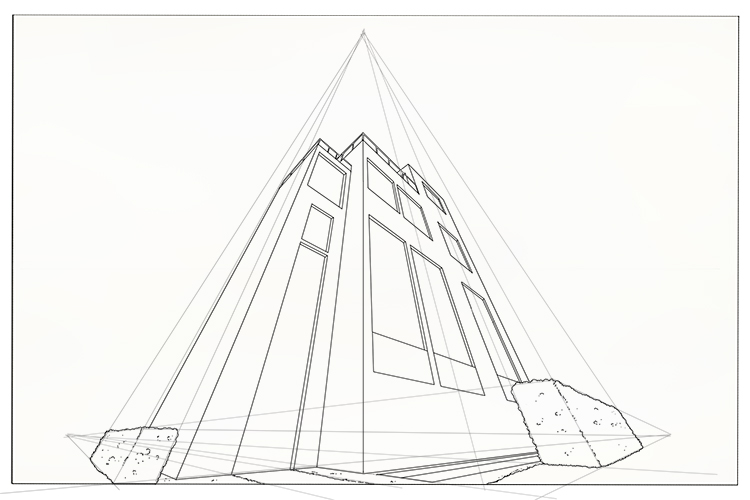
Fill in the rest with the same technique.
Add the railings to the lower and middle buildings.
Again using your vanishing points, you can add details such as the hedges and path to the door.
Finally, add the shading.
Summary
You can now compare project 1 and project 2 to see how a high and low horizon line on a three point perspective alters the look of a building. See below:


