
How to draw perspective – Two-point perspective
In this method, we will look at two-point perspective. This technique uses one horizon line but two vanishing points in order to make objects appear three dimensional.
Note: This viewpoint assumes your eye is level with the horizon line.
The first step in this tutorial is to get a piece of paper and use a ruler to lightly draw a horizontal line across the centre of the page. This will be your horizon line.
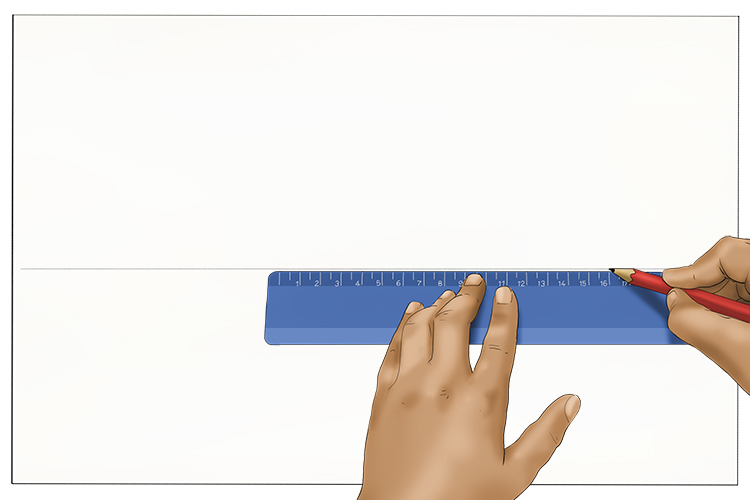
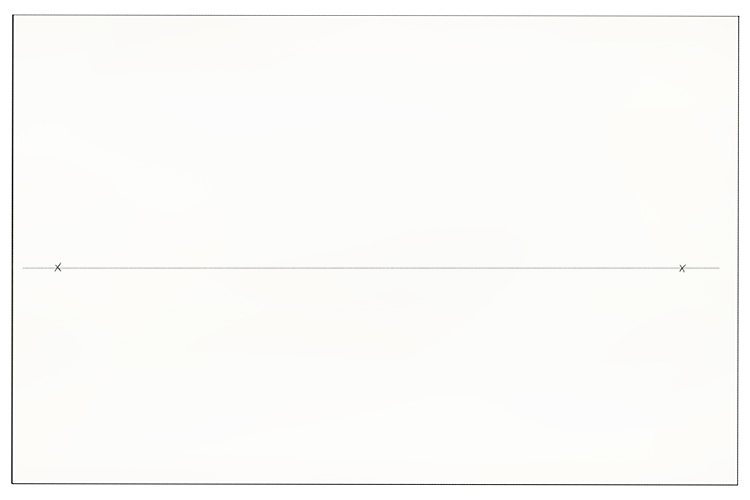
Towards each side of the page, draw a small cross on the horizon line. These vanishing points will be the 'two points' that the title refers to.
Note: Sometimes the vanishing points can be further out than the edges of the paper. In this case, you would have to tape the paper down and extend the paper while the drawing is constructed.
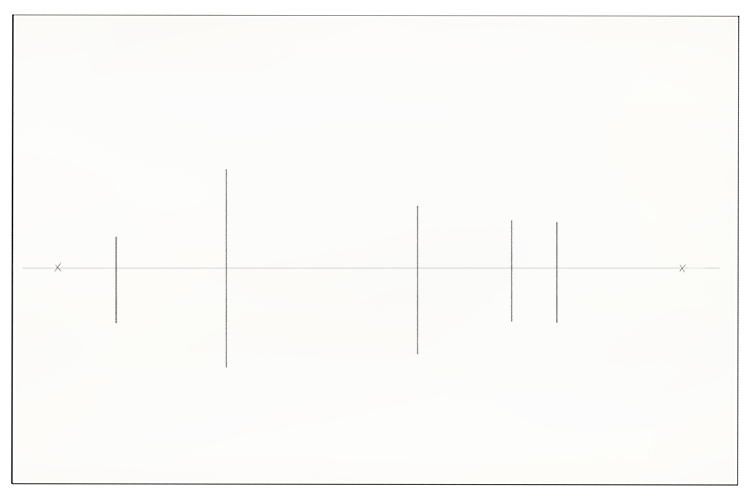
Start adding some vertical lines. These will be the upright sides of the buildings we are drawing. With a two-point perspective drawing, all vertical lines stay vertical.
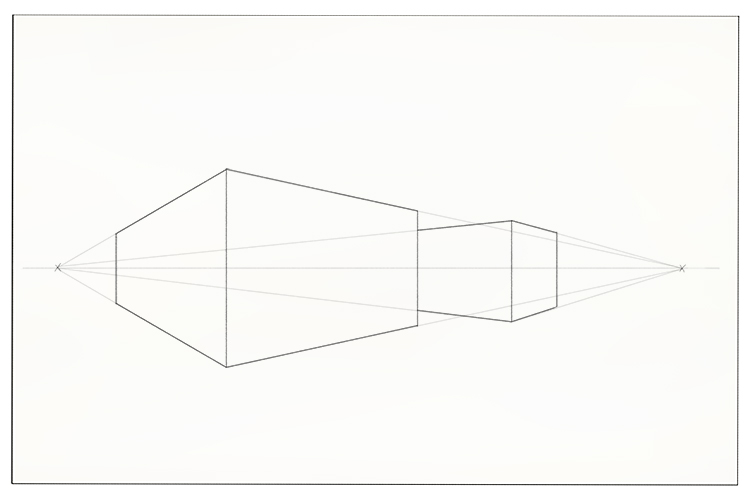
With a two-point perspective drawing, there are no horizontal lines. Any left facing side is drawn from the left-hand vanishing point and any right facing side is drawn from the right-hand vanishing point.
Use the vanishing points to add the lines creating the box shapes of buildings. Use an eraser to remove any extra vertical line that is showing.
You can now clearly see the 3D effect two-point perspective creates. To start turning these box shapes into buildings, add a pitched roof onto the front box. On the right-facing side, draw a line up the centre into the space above the box. Draw lines up from the corners to meet the line.
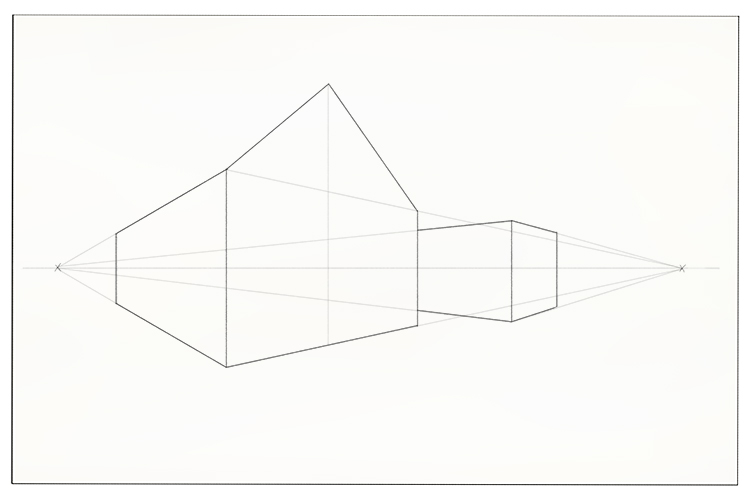
To finish the roof, draw a guideline from the apex to the left-hand vanishing point to show the top of the roof and then copy the angle of the pitch to join it up to the back wall.
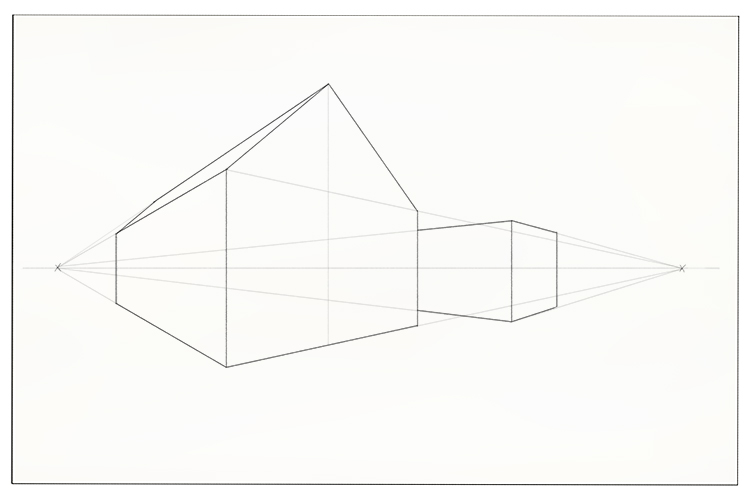
To add a thick, flat roof to the right-hand section of the building, add the verticals first, then join them up using the vanishing points for the angles.
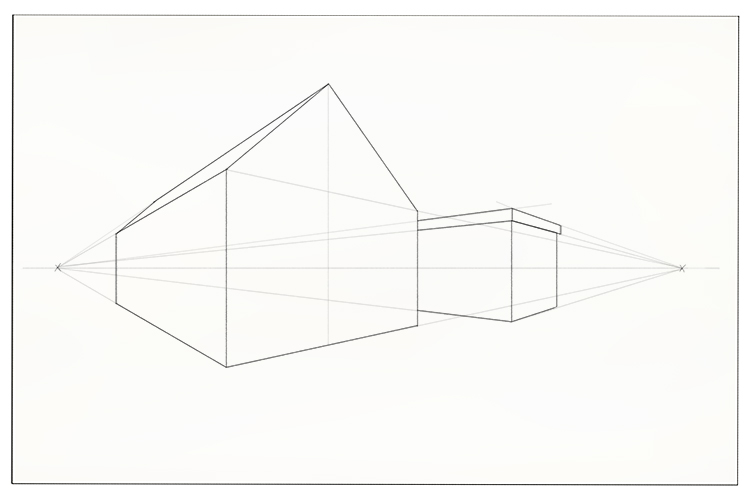
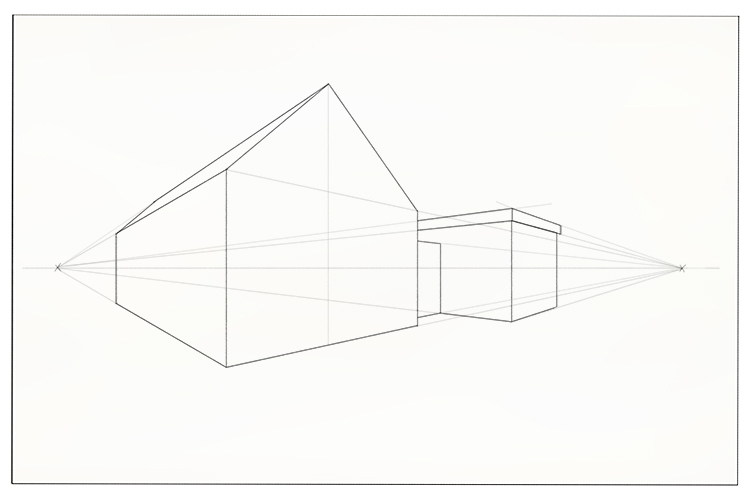
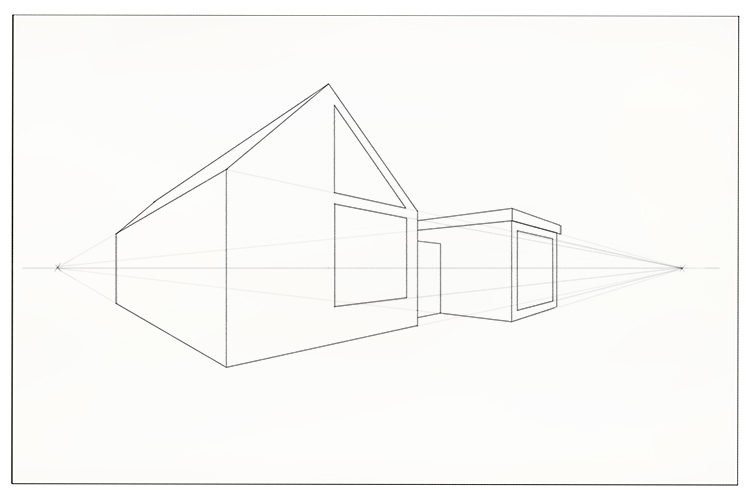
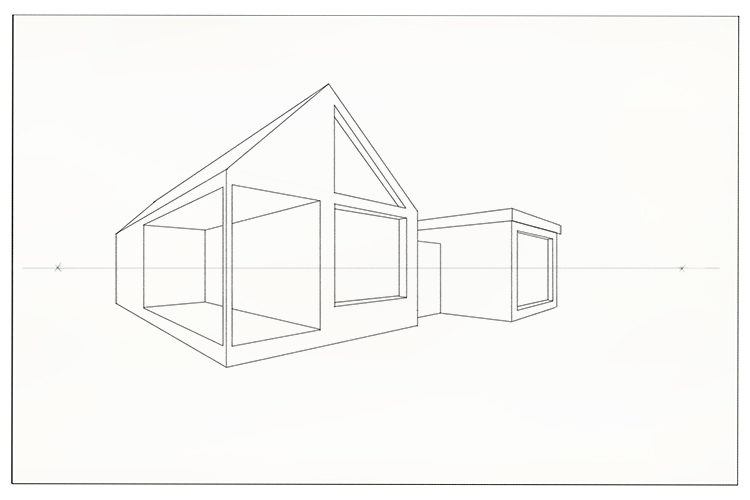
To join the two sections together, mark the vertical of a walk-through into the right-hand section of the building, and use lines from the right-hand vanishing point to draw the top and bottom lines of the walk-through.
Draw the verticals for some large windows and join them together using the vanishing points as guides.
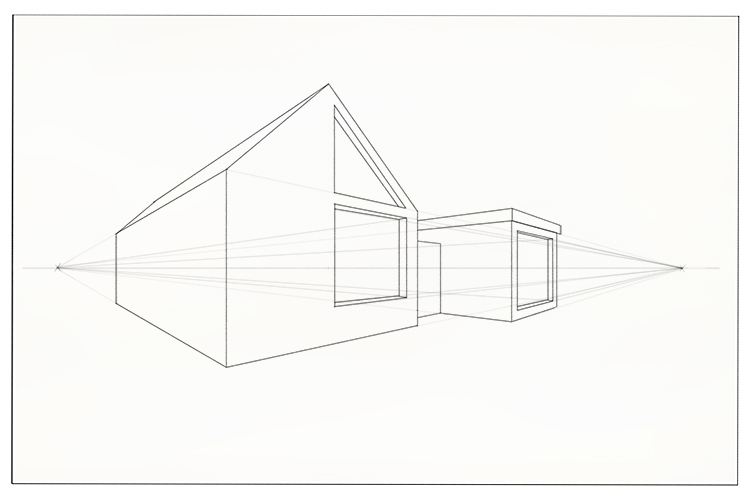
As the windows are on right-facing walls, use the left-hand vanishing point to add the lines showing the window recesses.

Now use the right-hand vanishing point and verticals to join the points up.
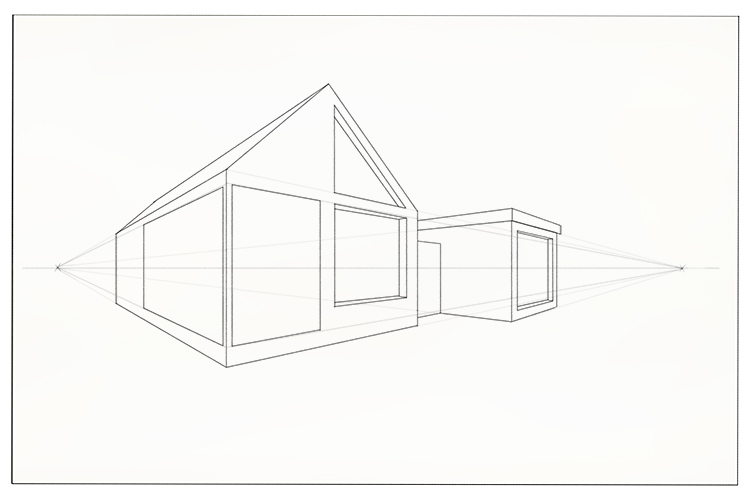
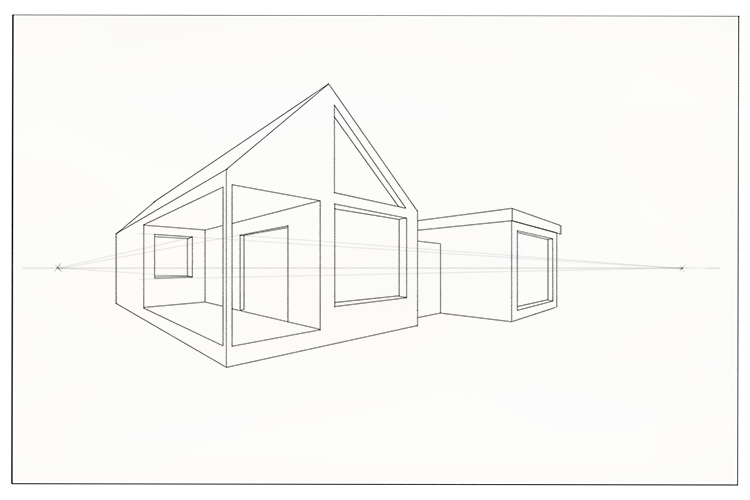
To make the building more interesting, we can cut out a veranda on the left-hand side.
To start this, draw the areas that will be open on the outer walls.
To make this area more visibly a cut-out veranda, we need to show the lines of the floor and ceiling on the inside. Join the left-hand vanishing point to the corners on the right, and the right-hand vanishing point to the corners on the left.
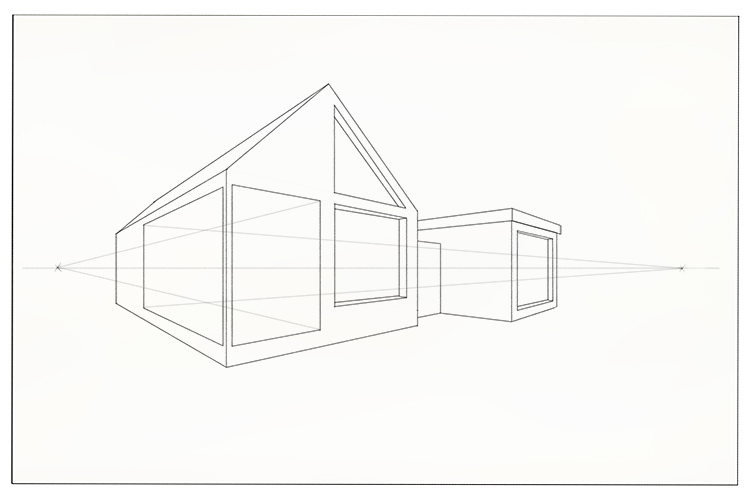
Draw a vertical between the two crossover points and the section will appear to be receding into the building.
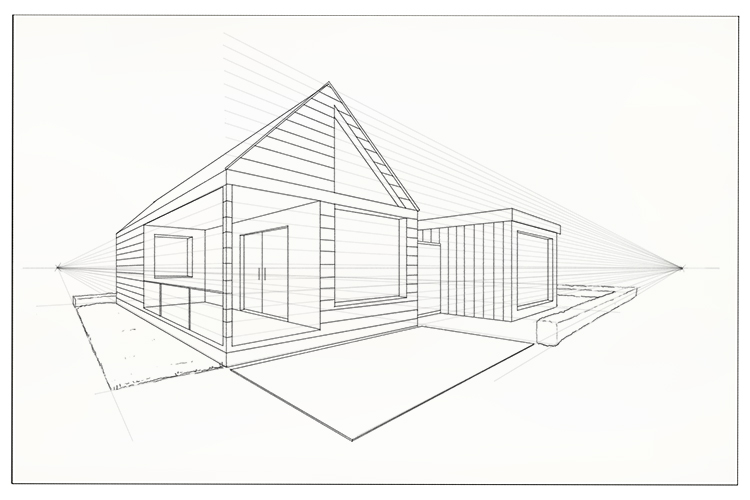
Add a door to the inside of the veranda and a window on the back wall using the technique we used for the windows before.
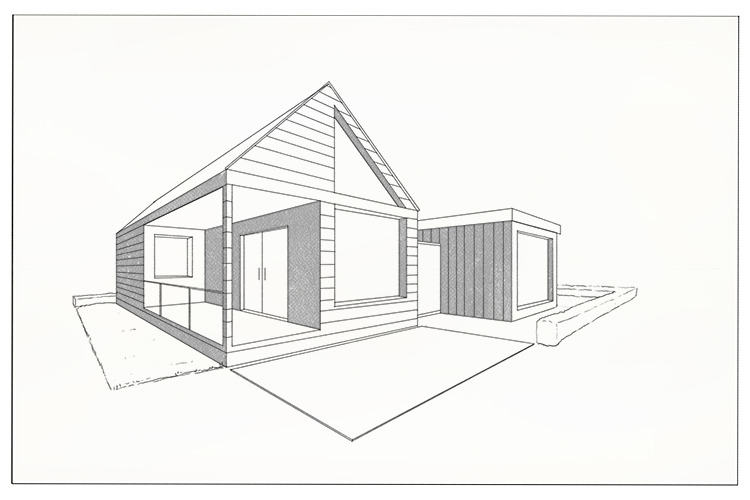
Now the general outline of the building is in place, use the vanishing points to add details such as a door, cladding, and landscaping.
Erase your guidelines to reveal your final lines.
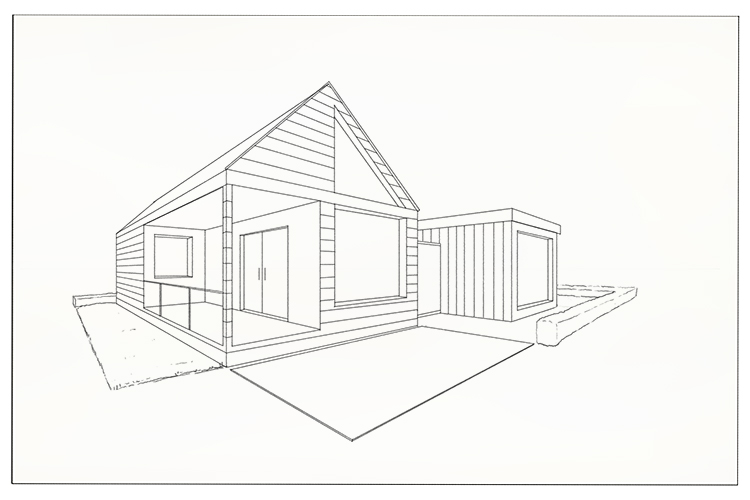
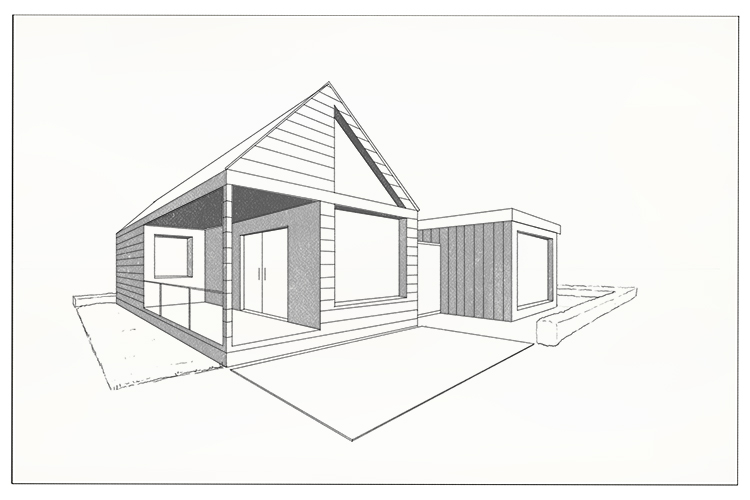
You can now start shading your image. Imagine a light source from one side to emphasise the perspective. Shade all of the left-facing walls a darker tone than the right.
Shade any down-facing areas the darkest tone.
The main areas of light and shade are now in place and you can continue shading and adding detail to your image until you are happy with it.
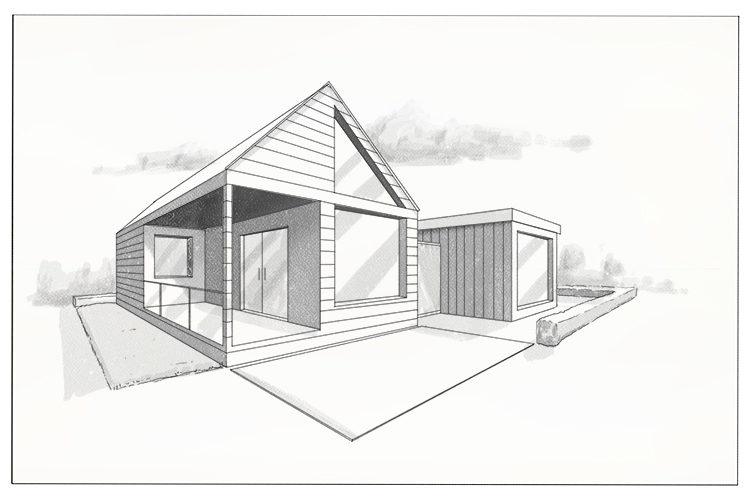
This is two-point perspective.


