Technical Drawing One Point Perspective
An isometric drawing may not be realistic enough i.e. it doesn't represent a view point that can be found in real life. If you want an accurate one point perspective drawing, carry out the following process.
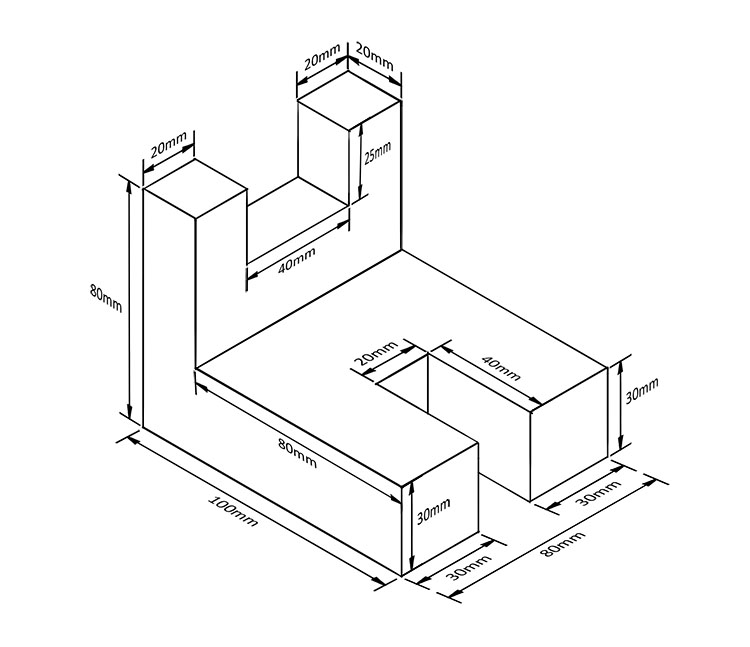
Note: We will make an accurate one point perspective drawing of the object we created in isometric drawing as below:
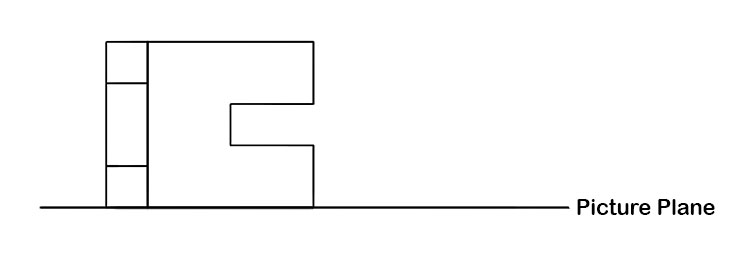
To start this accurate drawing you must place a plan view (from above) against a horizontal line. This horizontal line we will call a picture plane from now on.
Now decide which angle would give you the best view:
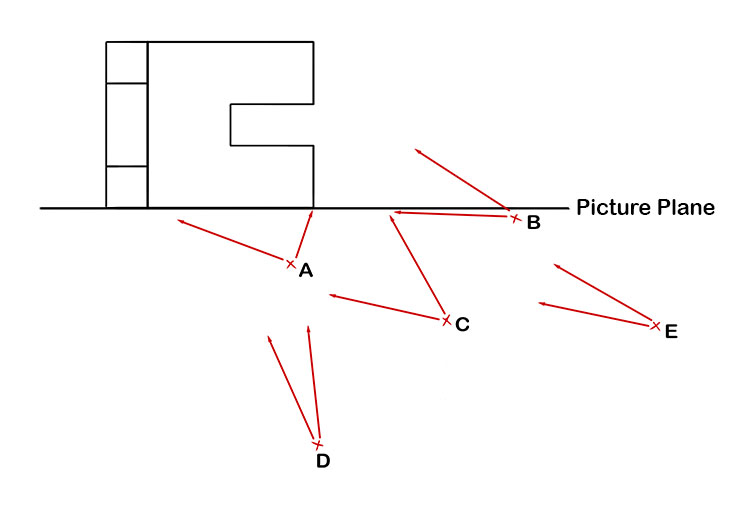
A- Doesn't give enough view of one side of the shape.
B- Doesn't give enough view of the other side of the shape.
D- This view is too narrow a view.
E- This view is also too narrow a view point.
C- This is the best angle of view.
So our chosen viewpoint is as follows. Note where each one of these viewing lines passes the picture plane.
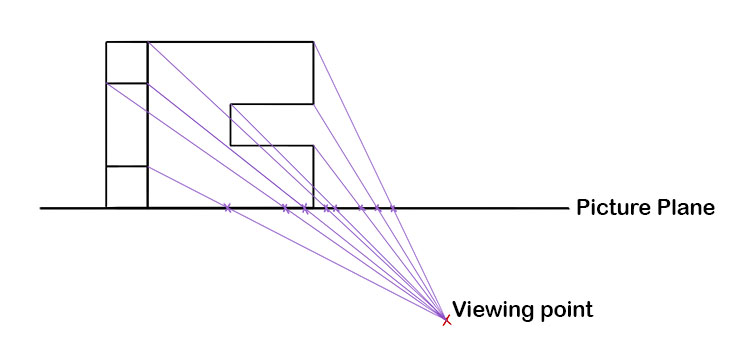
Now start with the side elevation and work out your horizon line from the Mammoth Memory high and low level horizon line (one point perspective) as below: We are going to choose a high level horizon line.
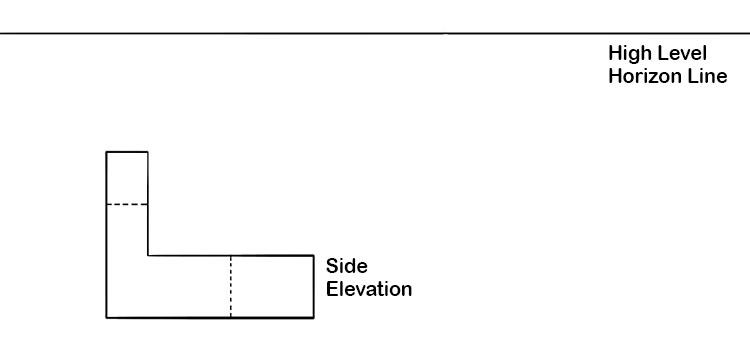
If you line up your plan view with your side elevation you must drop your chosen viewing point vertically down. Where it touches the horizon line is your vanishing point.
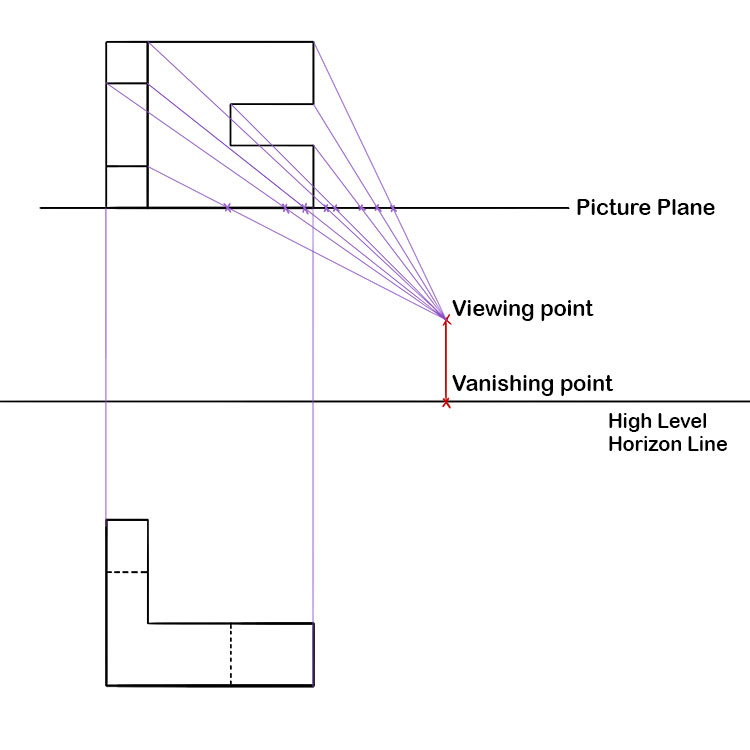
Now you can join all the side elevation corners with the vanishing point.
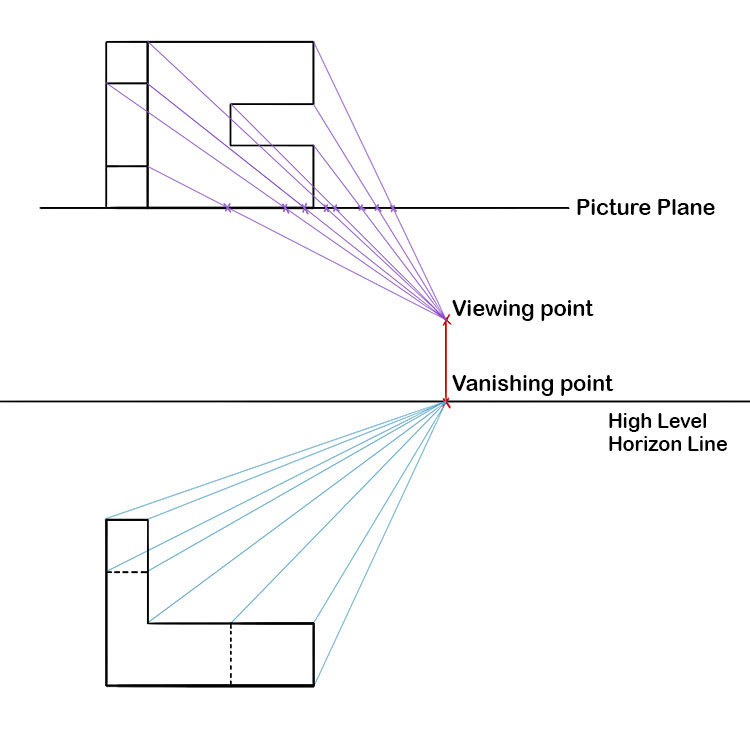
Drop vertically down each of the points that pass the picture plane and project these down on to the appropriate point.
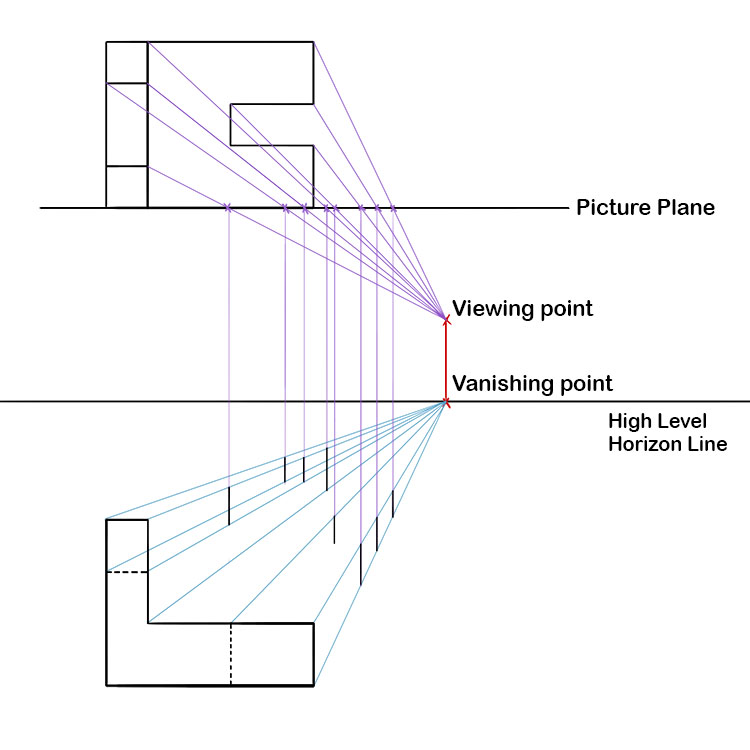
Now with this information you can concentrate on the side elevation, vanishing point and relevant verticals.
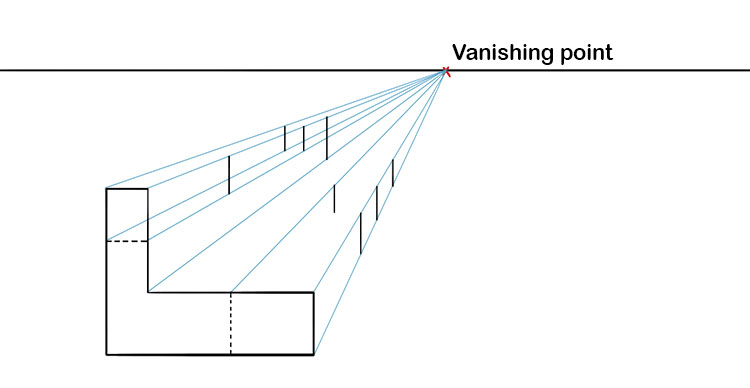
You should have all the information you need to complete the accurate one point perspective.
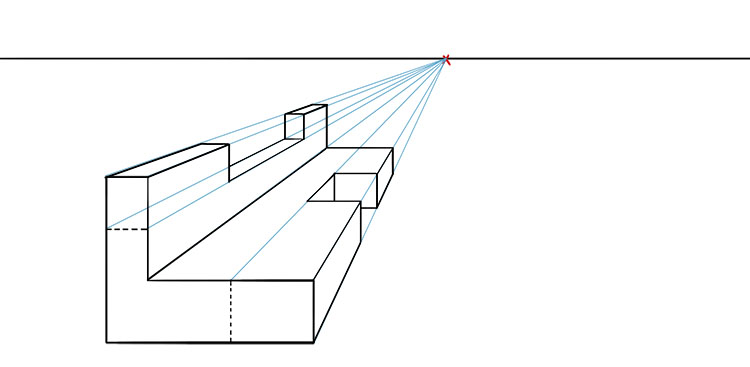
Now remove all the irrelevant lines and you will have a very accurate technical drawing of a one point perspective.
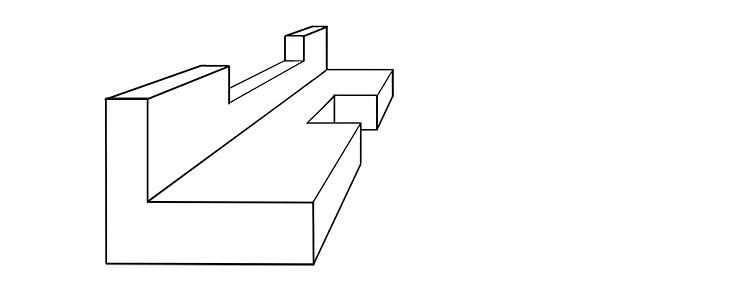
Technical drawing one point perspective.
