
How to draw perspective – three point perspective
In this method, we will look at three-point perspective. This technique uses a horizon line containing two vanishing points and a third vanishing point elsewhere in order to make objects appear three dimensional.
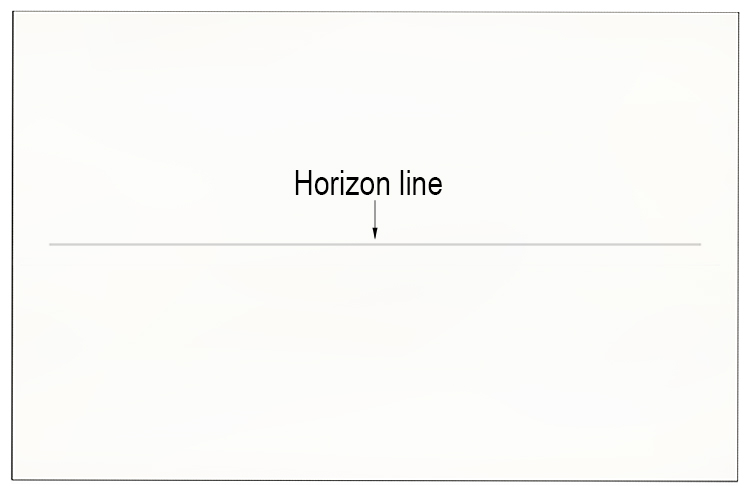
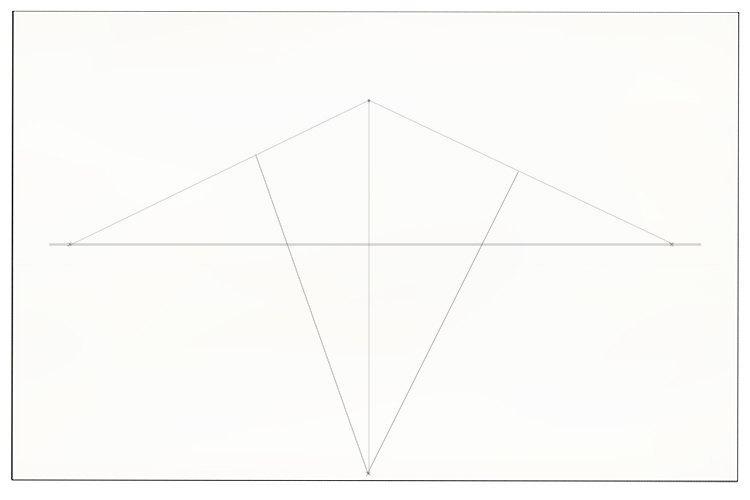
The first step in this tutorial is to get a piece of paper and use a ruler to lightly draw a horizontal line in the middle of the page.
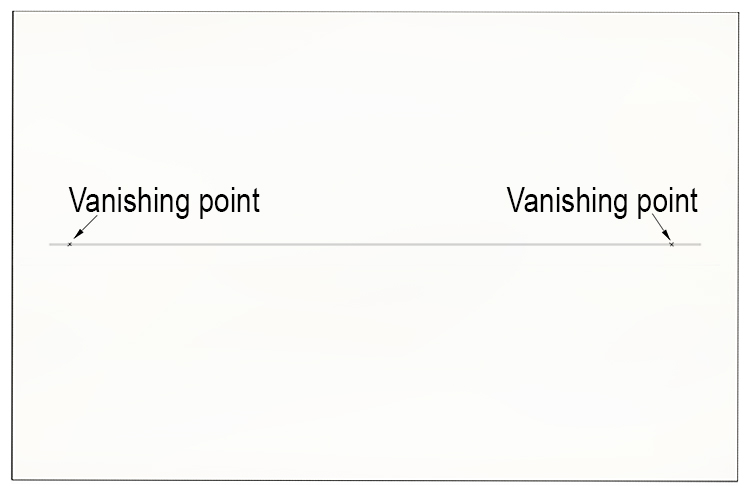
Towards each side of the page, draw a small cross on the horizon line. These vanishing points will be two of the 'three points' that the title refers to.
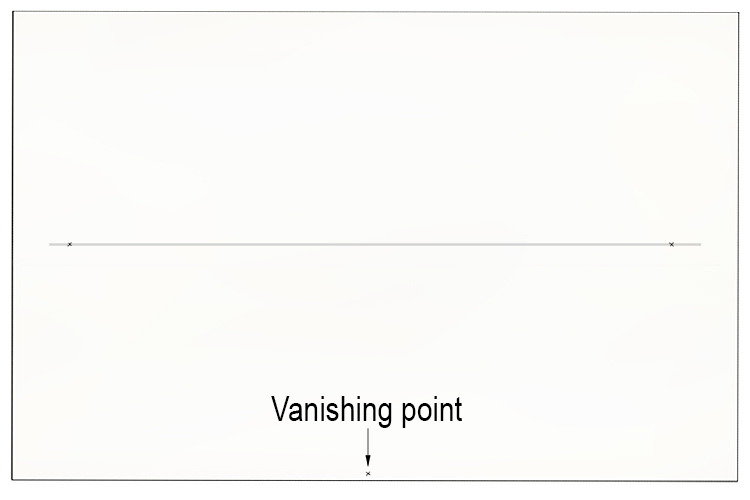
At the bottom centre of the page, add a third cross. This is the third point of a three-point perspective drawing.
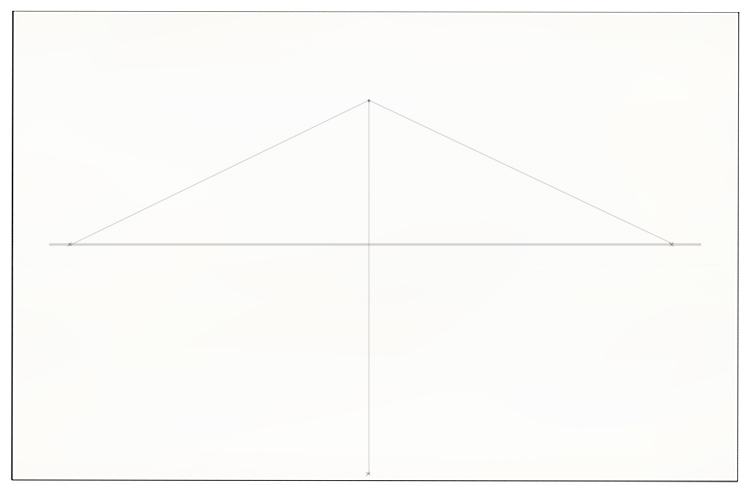
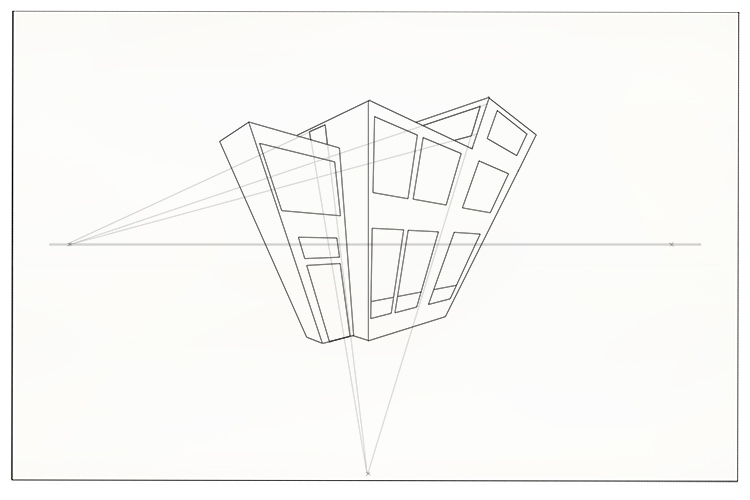
The next stage is to draw a dot somewhere in the upper centre of the page. In a three-point perspective drawing, there are no horizontals or verticals. Every line comes from one of the three vanishing points, so to draw the blocks that will make up our building, we have to start from a single point that will become a corner.

From the dot, draw a guideline to each of the three vanishing points.
These guidelines will form the front corner of our building. To add the outer edges, draw lines from the bottom vanishing point, landing at points on the top two guidelines to give the building your desired width.
To create the bottom edge of the building, draw guidelines from each of the top vanishing points to the position on the centre line where you wish the building to end.
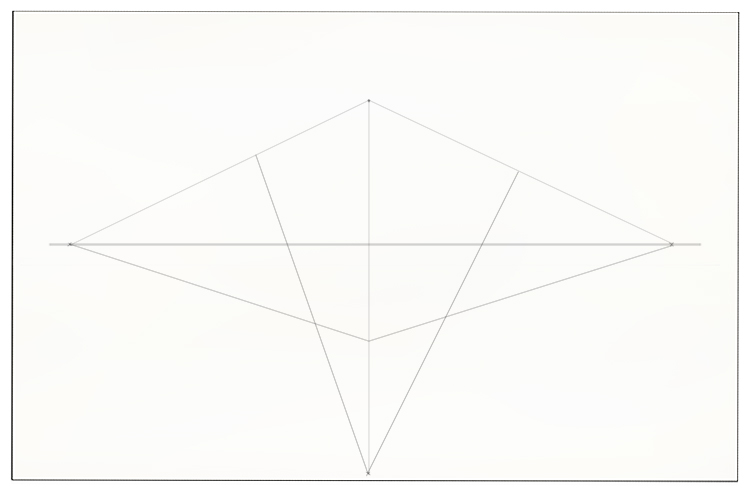
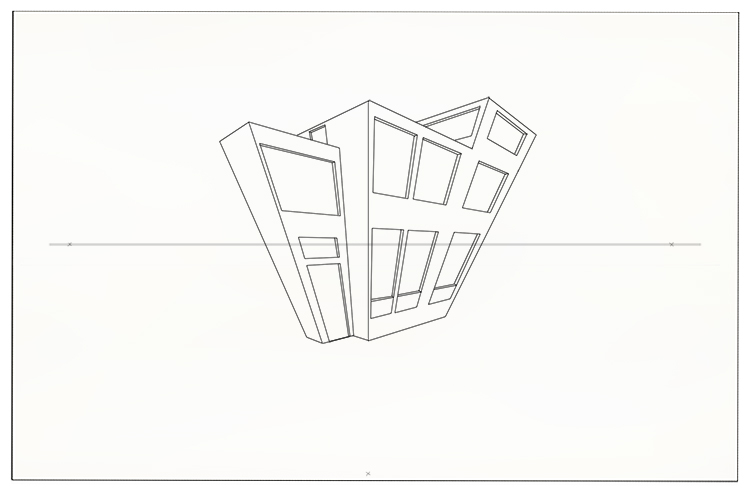
You can now see the 3D shape has been formed: this will be the block we will use as the main area of our building.

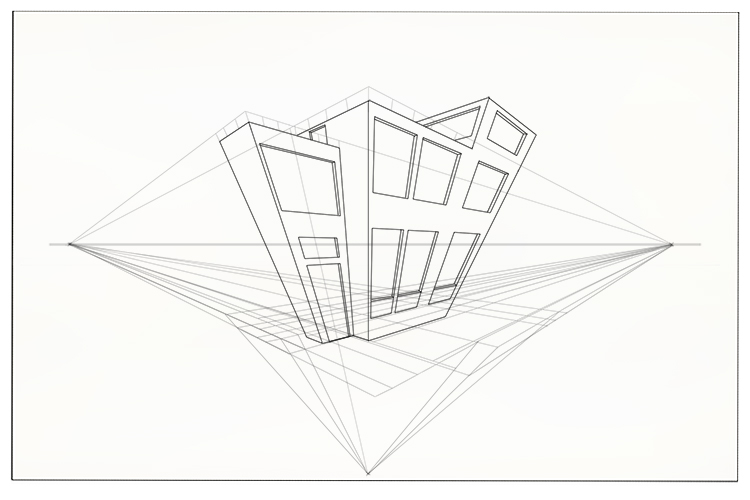
From this central block, we can use the three vanishing points to add attached blocks that will form the other sections of the building.
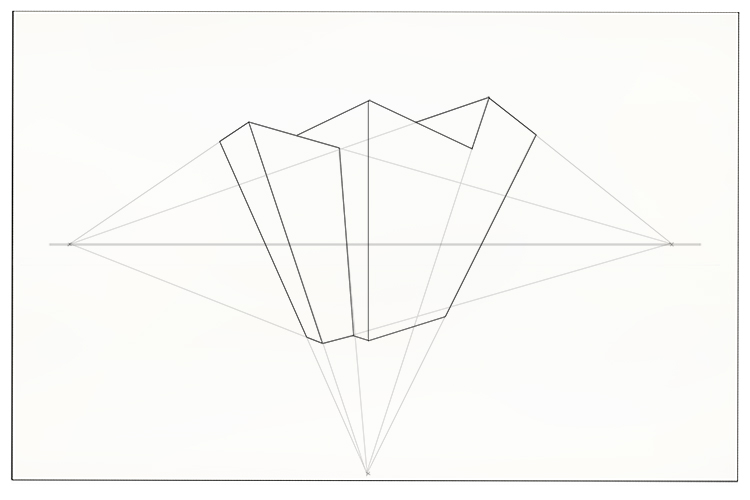
The three vanishing points can now be used to add details such as windows and doors to the structure.
Repeat the process to add windows and doors to the left-facing sides of the building.
Use the opposite vanishing point to create the window recesses.

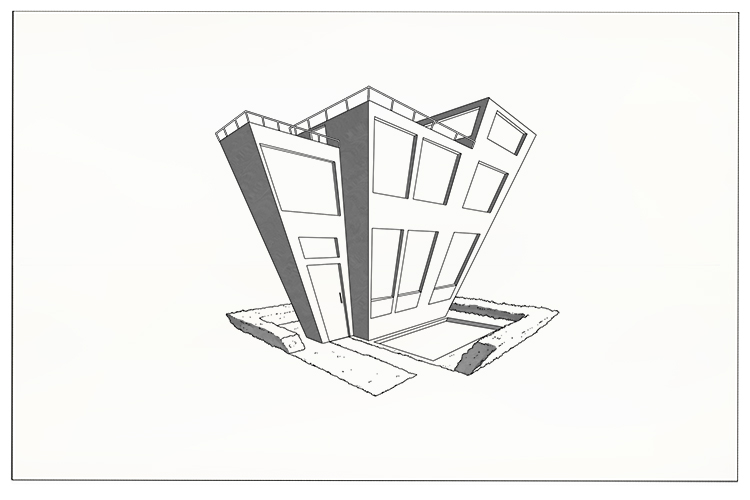
Erase your guidelines and you can see the basic structure of your building completed.
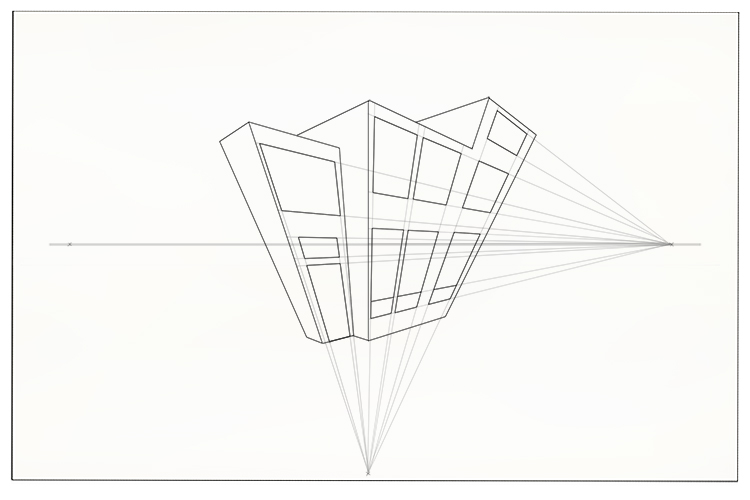
Now your building is complete, use the three vanishing points to add detail to the drawing. Think about the building's surrounding and finish.
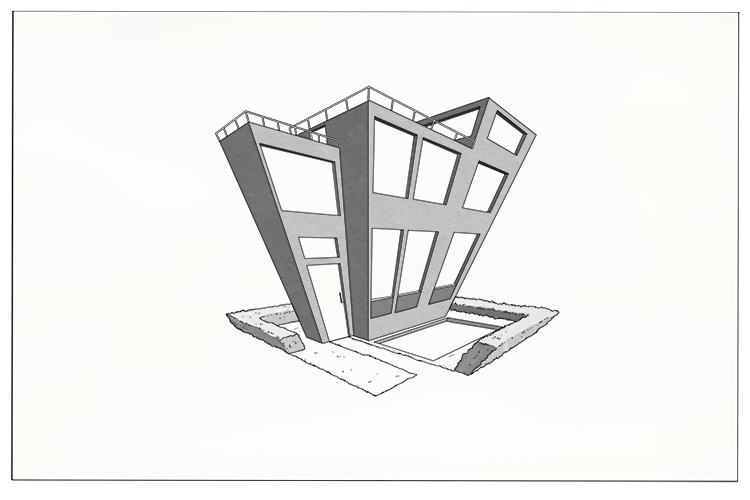
Erase the guidelines and vanishing points and you are left with the finished outline ready to be shaded.
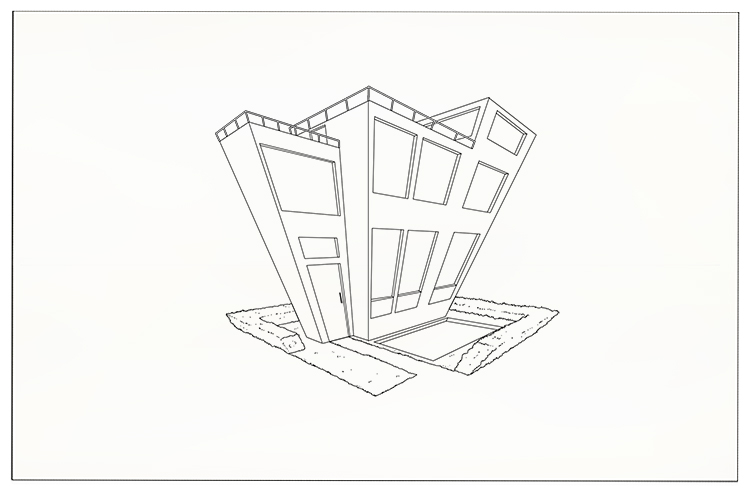
Shading emphasises the perspective even more. Imagine a source of light to the right-hand side and shade all of the left-facing walls darker as if they are in shadow.
Shade all the right-facing sides a lighter tone, leaving everything that faces upwards the lightest tone.
You can now continue to shade and add detail until you are happy with your final drawing.
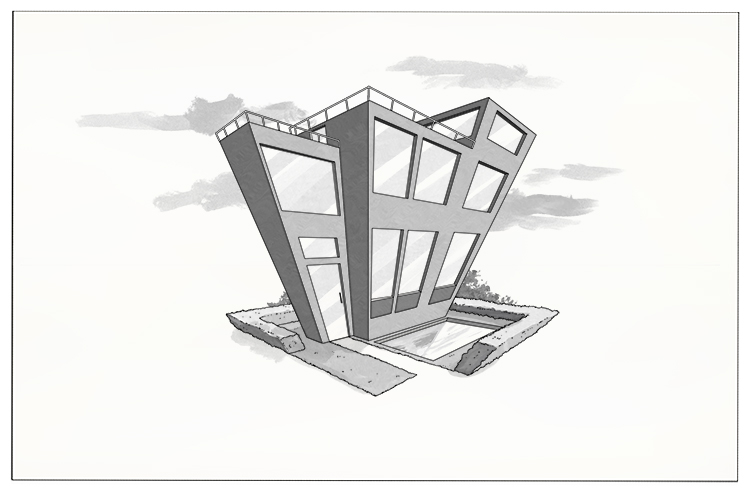
This is three-point perspective.


