
How to draw perspective – One-Point Perspective
Drawing accurate perspective can seem daunting but it can be broken down into simple stages depending on the drawing. There are three main methods of drawing perspective; one-point perspective, two-point perspective and three-point perspective.
We will take you through each of these techniques to help you meet the challenge that drawing perspective presents.
For all three of these tutorials, we will draw buildings. Buildings are great to draw when starting out perspective drawing because they are essentially geometric blocks with straight edges that can easily adhere to the rules of perspective drawing.
The first method we will look at is one-point perspective. This technique uses a horizon line and one vanishing point in order to make objects appear three dimensional.
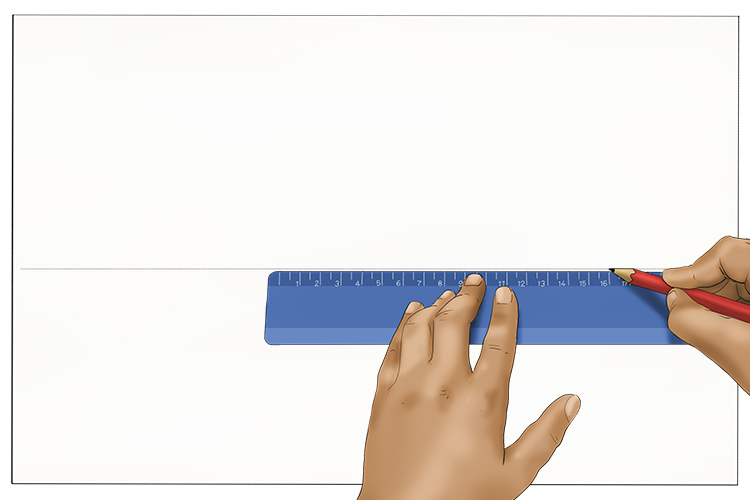
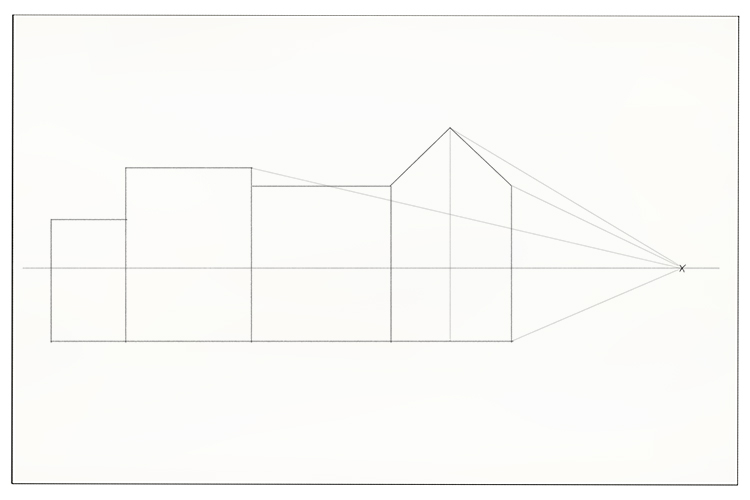
The first step in this tutorial is to get a piece of paper and use a ruler to lightly draw a horizontal line across the centre of the page.
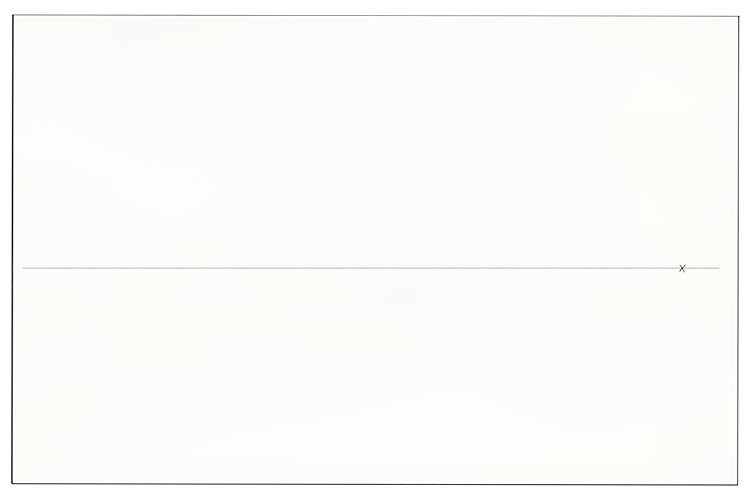
Towards the right-hand side of the page, draw a small cross on the horizon line. This vanishing point will be the 'one point' that the title refers to.
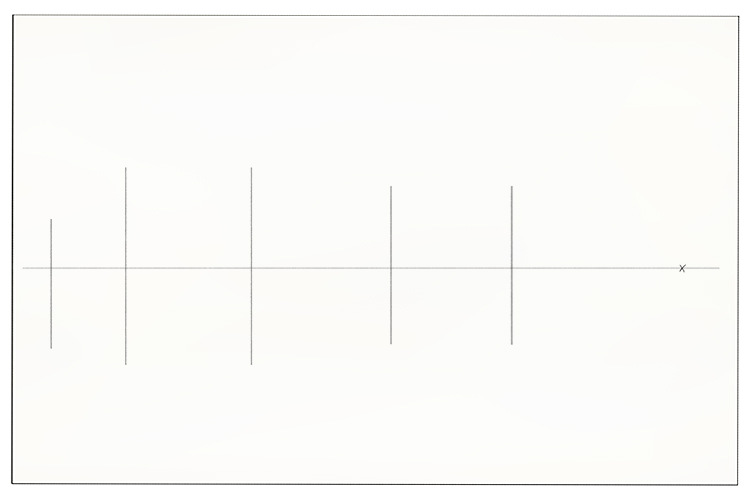
Start adding some vertical lines. These will be the upright sides of the buildings we are drawing. With a one-point perspective drawing, all vertical lines stay vertical.
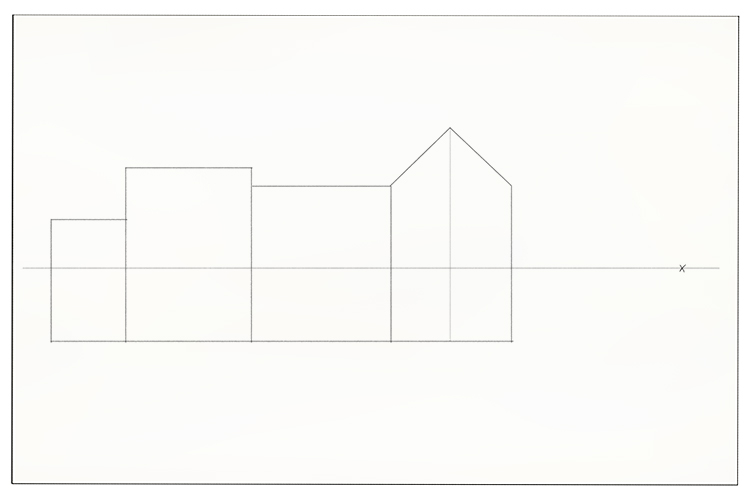
Any horizontal lines on the front-facing side of the buildings also stay horizontal. For example, the line of the floor and a horizontal roofline will stay horizontal. You can add these lines in now.

To add a front-facing pitched roof, draw a line from the centre of the fourth section of the building and go up from the top corners to meet that line.
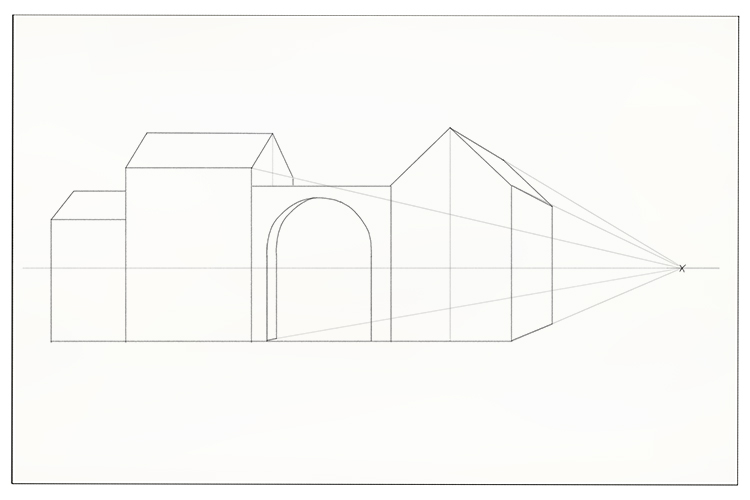
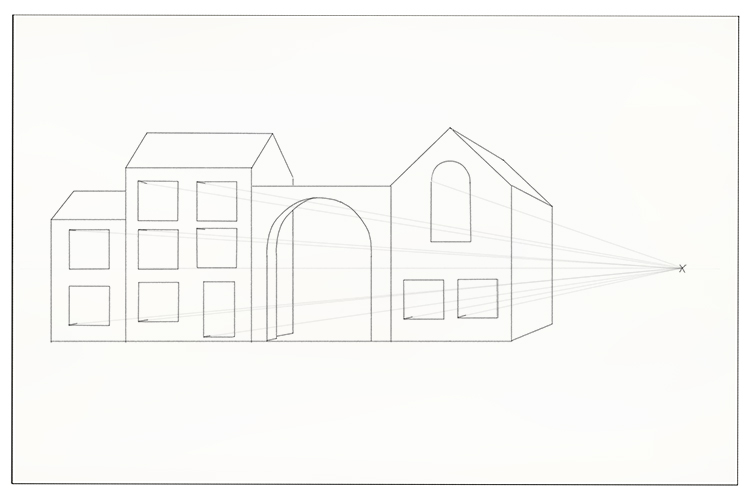
The next stage is where the vanishing point comes into play. Lightly draw lines from the vanishing point to the corners of the buildings – you will notice the 3D image is now already beginning to appear.
Add new vertical lines to show how far side of the buildings goes back.
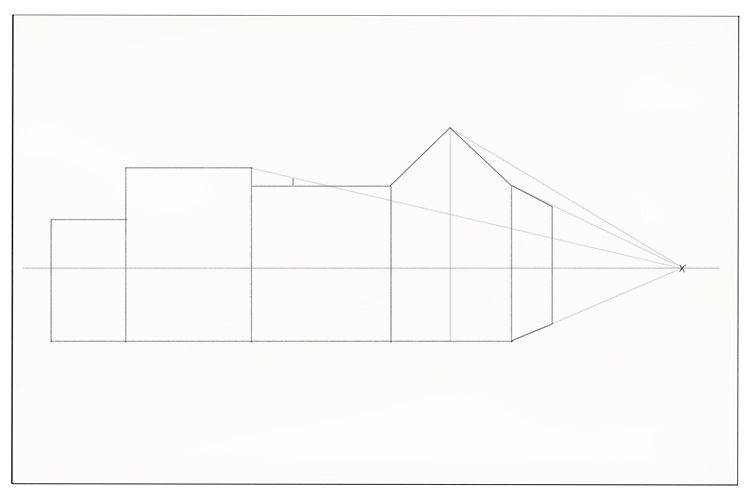
You can now copy the angle of the front of the pitched roof from the new vertical line to show the back of it.
To create a side-facing pitched roof on the second section of the building, lightly draw a vertical line halfway back on the new side of the section. Draw your lines up from the corners to meet the line.
The top of the roof will stay horizontal and the left-hand pitch will match the angle of the right-hand pitch.
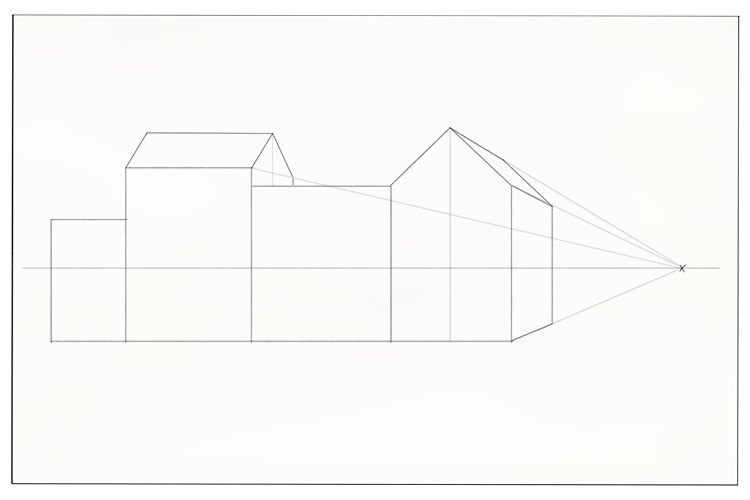
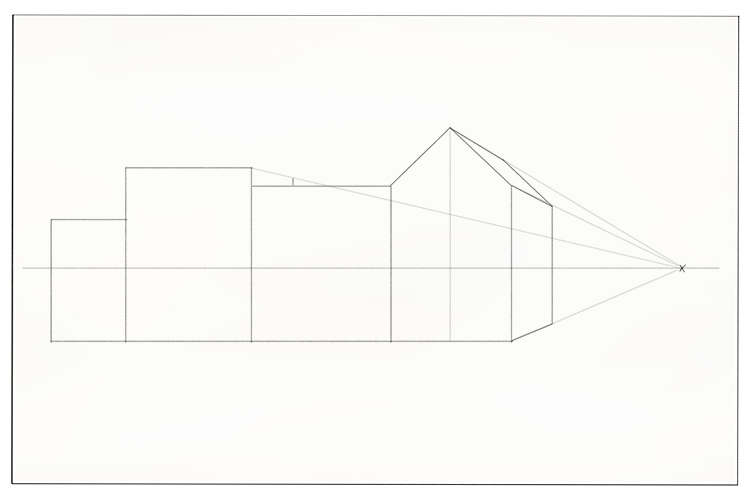
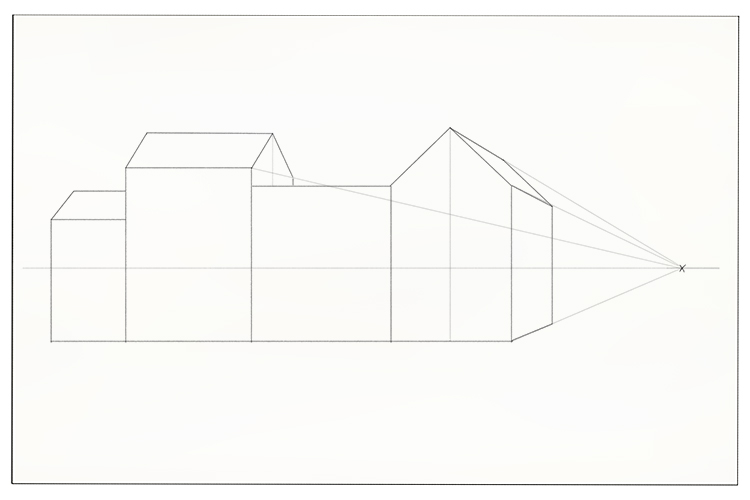
Repeat the process to add a roof to the first section of the building.
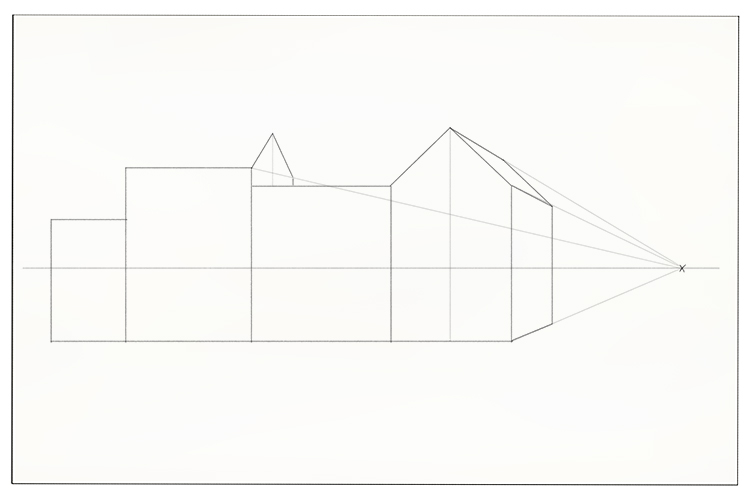
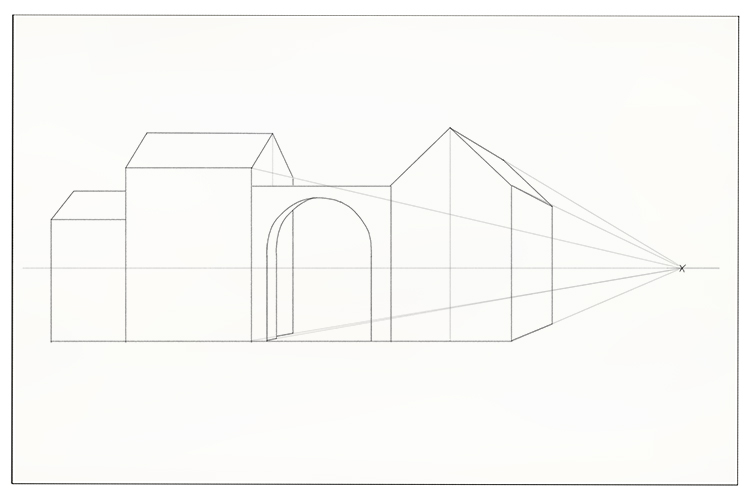
Using a pair of compasses, lightly draw a circle in the third section of the building and draw lines down from each side to create an arch.
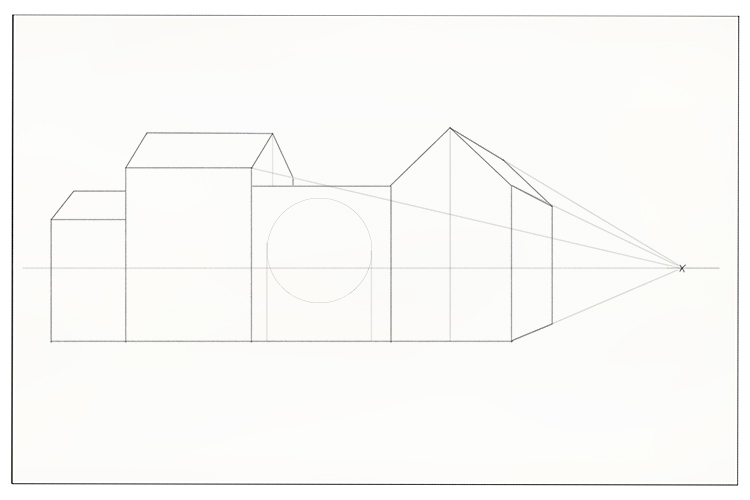
Go over the arch darker and rub out the bottom half of the circle.
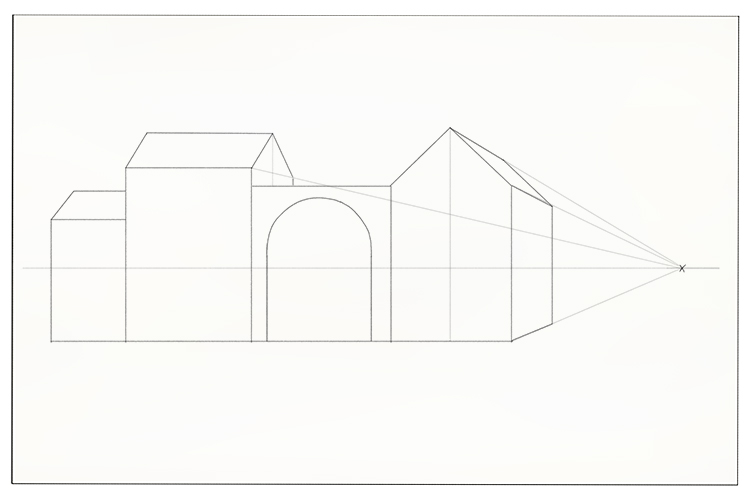
Use the vanishing point to work out the angle of the inner lip of the arch and add an inner edge.
Through the arch, you would now see the bottom half of the second section of the building. Use the vanishing point to find the baseline. Lightly draw a line from the vanishing point to the bottom right corner on the front of the second section of the building.

Using this line, fill in the back section of the building, joining it to the back of the roof visible above the arch.
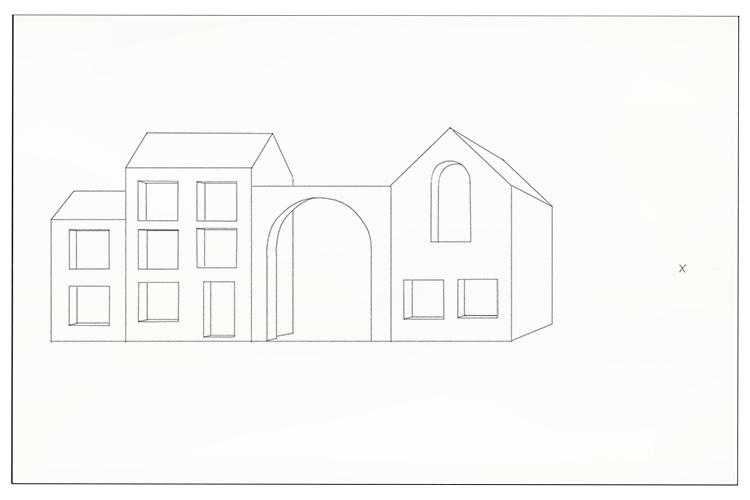
You can now erase the guidelines you have used so far to avoid confusion in the next stages. Keep the vanishing point visible as this will still be used.
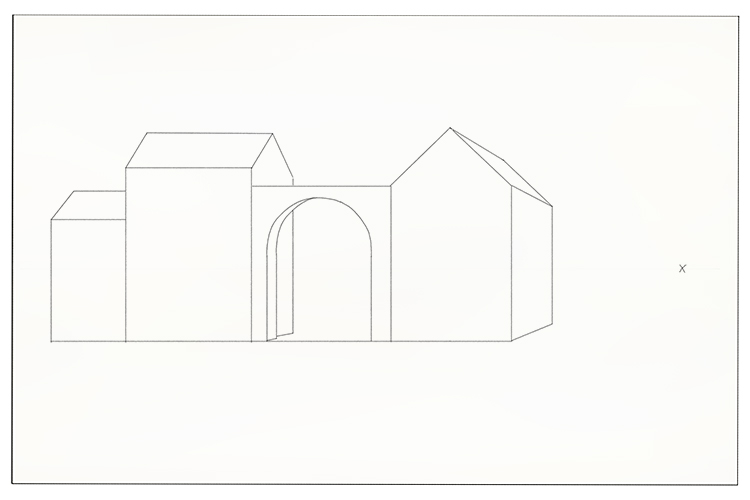
The following stages all add detail to the drawing, using the vanishing point to ensure accuracy.
On the front faces of the buildings, draw the shapes of windows and a door. Remember, on the front faces all verticals stay vertical and all horizontals stay horizontal.
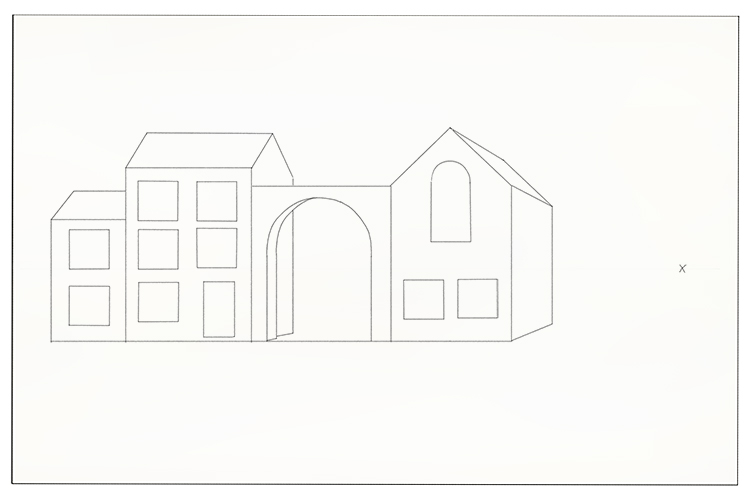
Now the windows are marked out, use the vanishing point to determine the angle of the visible inner edge of the windows and door. How far back you go is up to you.
Add the horizontals and verticals to finish off the inner edges.
To add a side window, use the vanishing point to add the angles of the top and bottom of the window and then add the vertical lines for the sides.
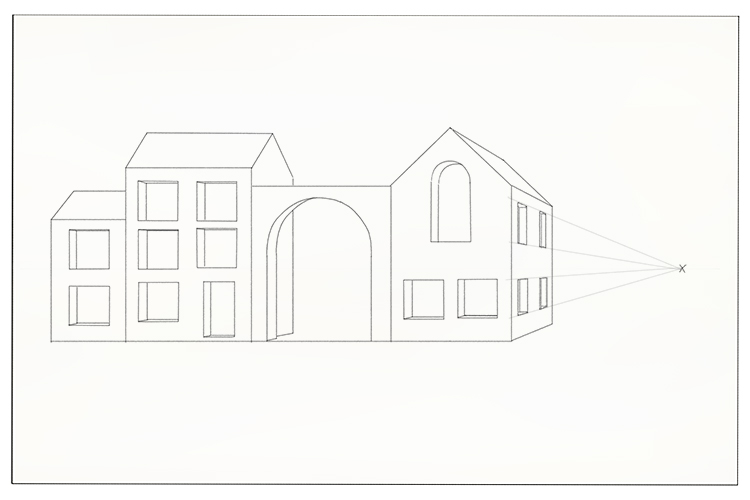
Use the vanishing point to add some extra details to the image to make it more interesting.
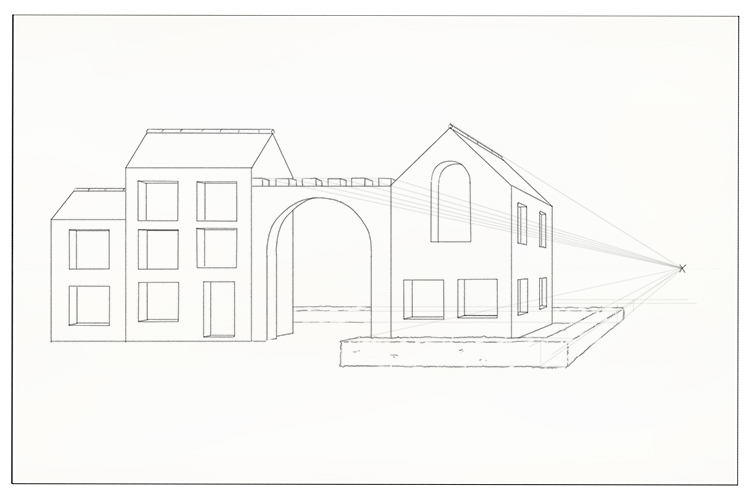
You can now shade the image. Make the window gaps black and think of the direction of light falling on the building. Emphasising this will add to the 3D appearance.
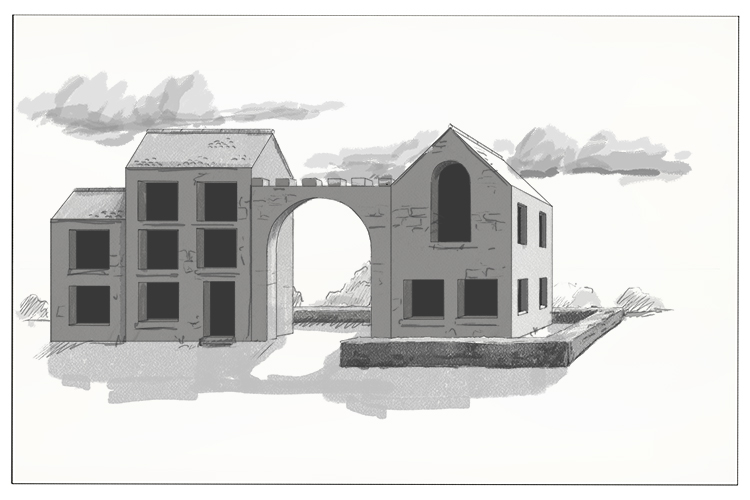
This is one-point perspective.


