
High and Low Level Horizon Line (Two Point Perspective)
To understand the importance of choosing the correct horizon line with two point perspective artwork, we are going to provide you with an example of a high and low perspective on the same building. But please note, this can equally be achieved on a human/animal model if you break the human/animal into squares, cubes, rectangles and cuboids.
High Level Horizon Line Project 1
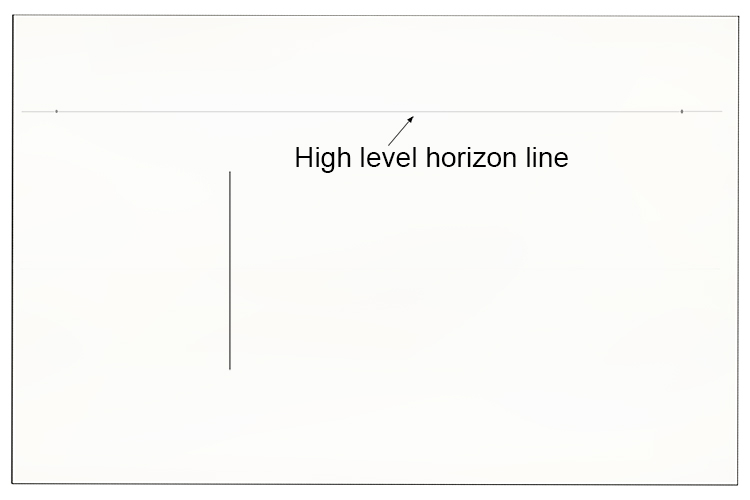
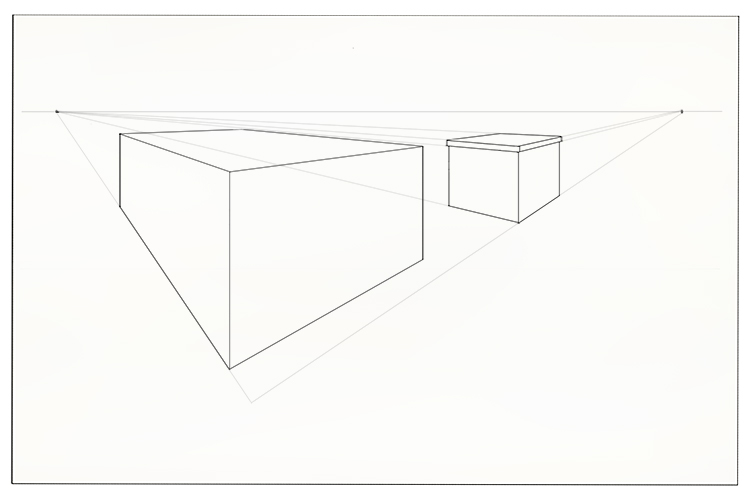
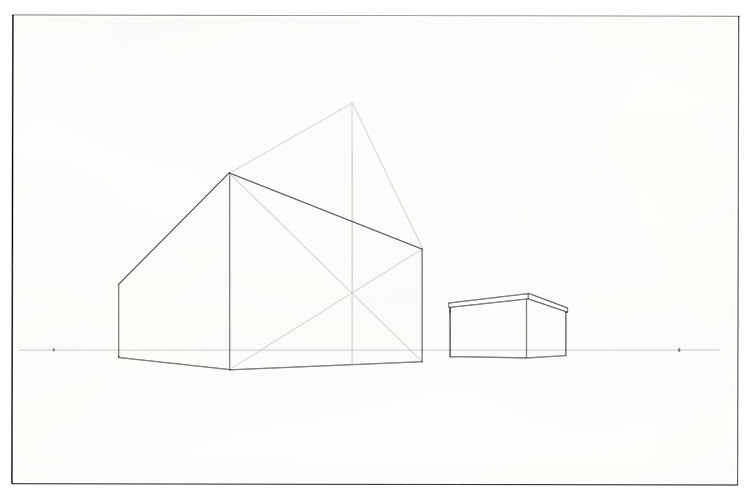
Start by drawing a horizon line somewhere on the top half of the page. As we are drawing the same house which features in two point perspective, draw the same vertical line which is closest to the viewer. This will be our starting point.
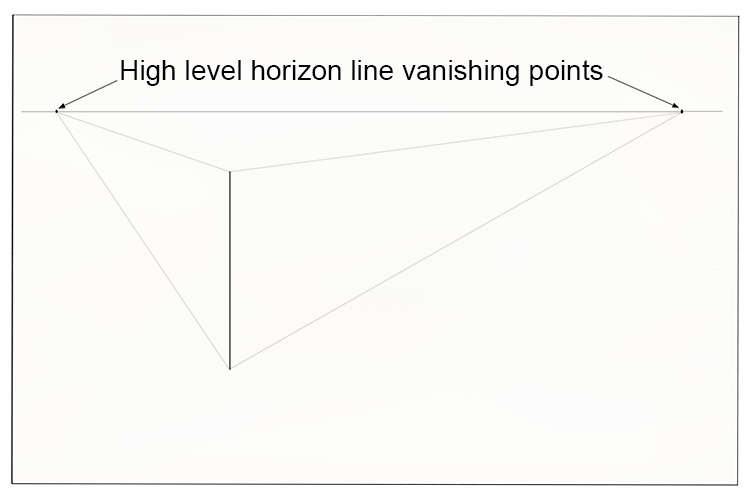
Draw lines from the top and bottom of the vertical line to each of the vanishing points.
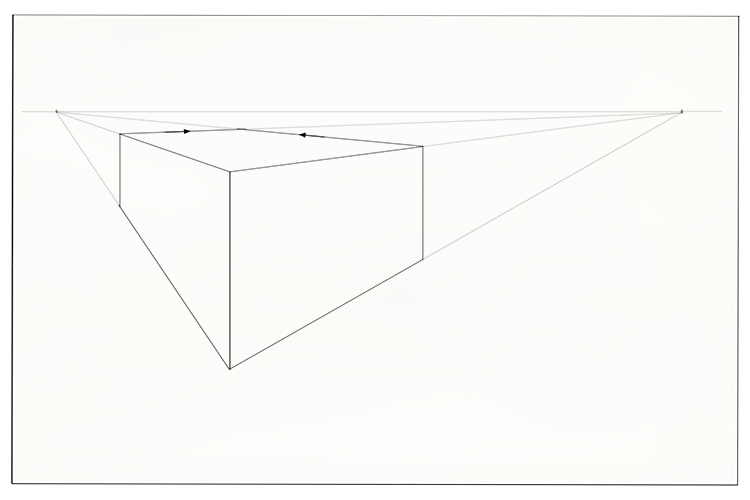
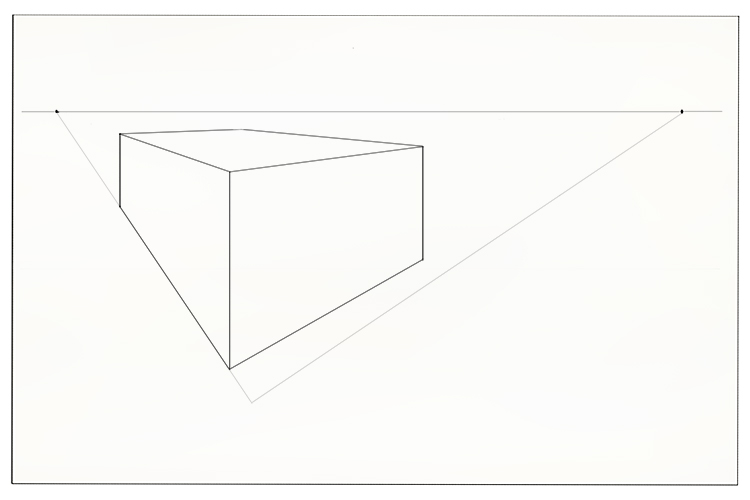
Decide what size your house is going to be and draw the vertical lines of each corner of the building. Draw from the top of each line to the vanishing point on the other side, as shown below.
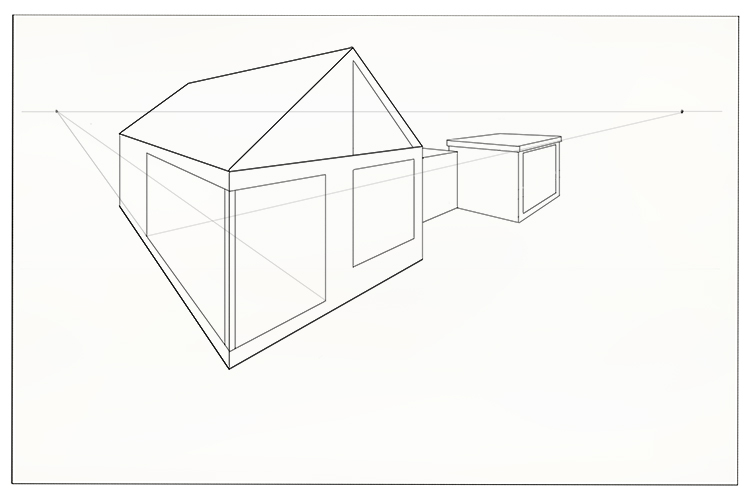
The garage to the right of the house is slightly further forward. Draw a line from the left vanishing point to along the line that is already there, but over shoot the end slightly. Connect this line with the right vanishing point.
Draw the vertical lines to form the garage. Using the vanishing points, draw the roof. To give the roof the look of being slightly further out from the building, draw the vertical lines of the roof a little further right than the rest of the building as shown below.
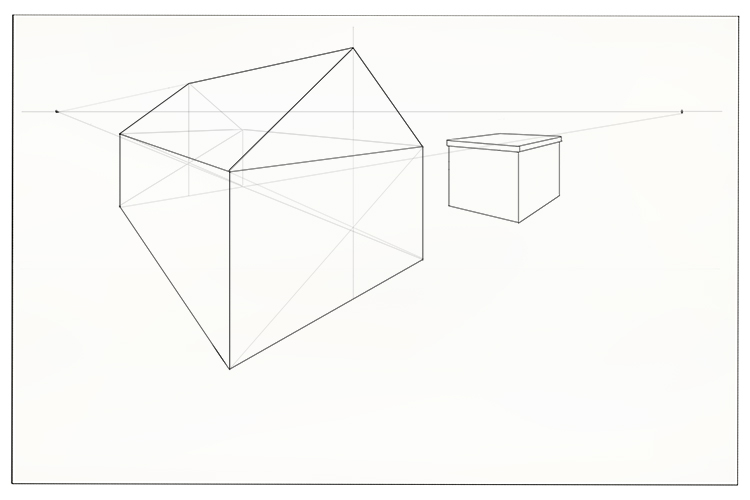
To find the shape of the roof, draw a line from each corner of the right side of the house to create an X. Draw a line straight up through the middle of the X, this is your middle point. Draw lines from the corners of the house to meet the vertical line and then from the point of the roof, draw a line back to the vanishing point on the left. Do exactly the same for the left hand wall of the house.
Use the same technique to create the building between the house and the garage.
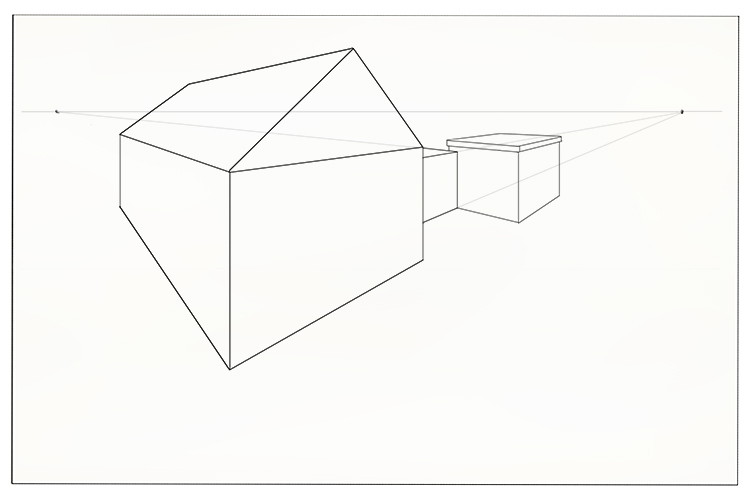
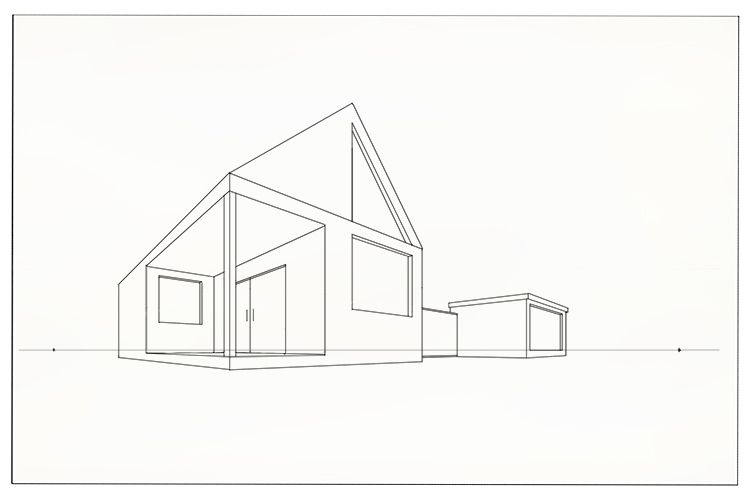
You can now draw the windows and veranda by drawing lines to both vanishing points. You'll need one near the top and one near the bottom. You can also do this for the garage. If you draw a line from the point of the roof to the bottom of the building, this will give you a starting point for the triangular window at the top of the house. If you look at the building from the mid level horizon line, you'll notice that the window is higher than the veranda, so add a higher line here too.
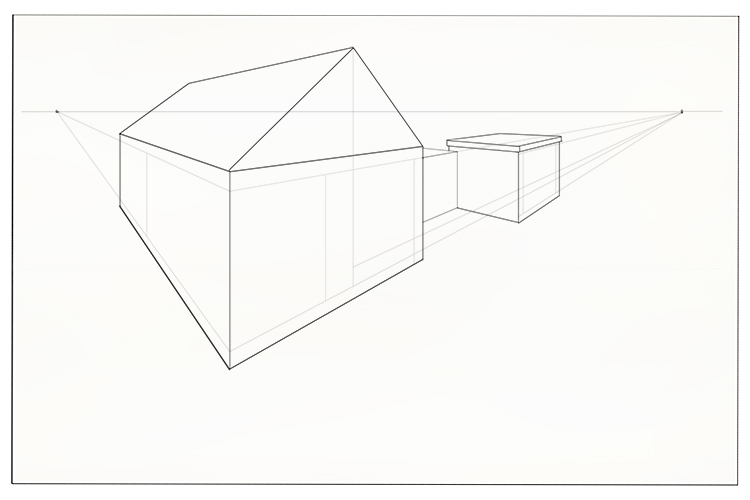
As you can see the floor in the veranda, you'll need to mark that out too as shown below. To create the triangular window, draw a line from the middle line to the line of the house which separates the building from the roof at the same angle as the roof.
Using the same techniques taking lines to the vanishing point, you can now fill in details, such as the door and window inside the veranda and window sills.
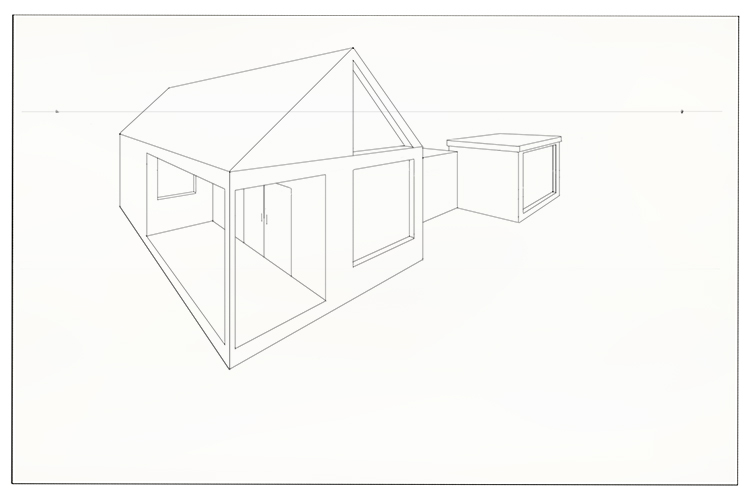
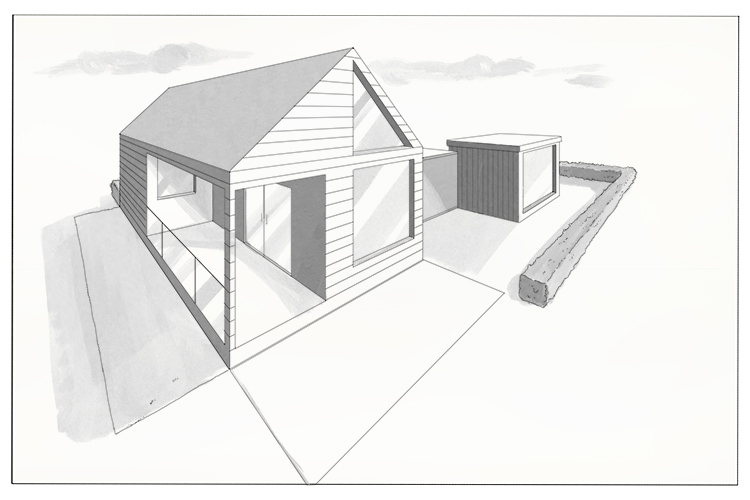
Finally, you can add the finishing touches, such as shading and landscaping.
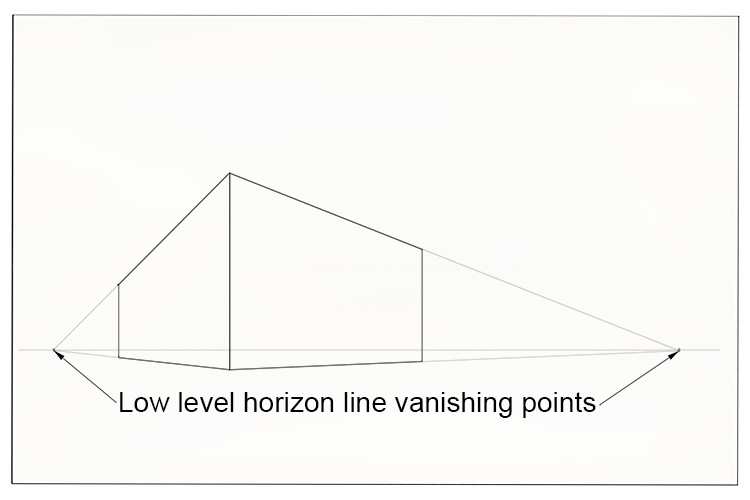
Low Level Horizon Line Project 2
Now we are going to draw the same house above but this time with a low level horizon line.
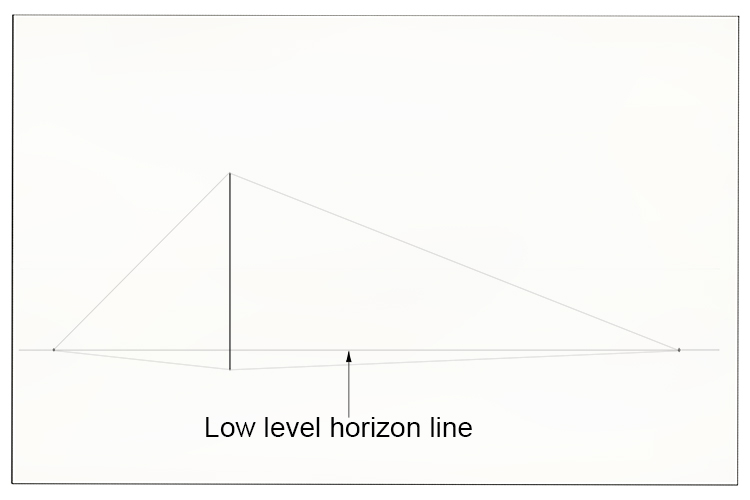
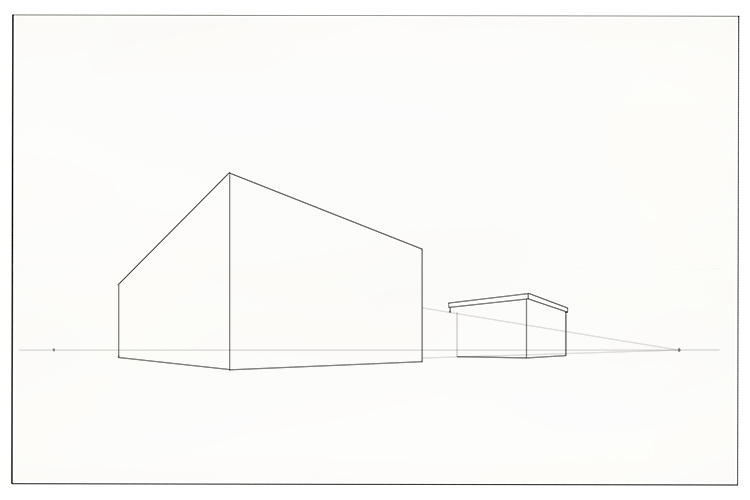
Start by drawing a horizon line somewhere on the bottom half of the page, but remember not to draw it lower than the bottom of the building, or it will look like it's floating. As we are drawing the same house which features in two point perspective, draw the same vertical line which is closest to the viewer. This will be our starting point. Draw your vanishing points and then connect those with the vertical starting line.
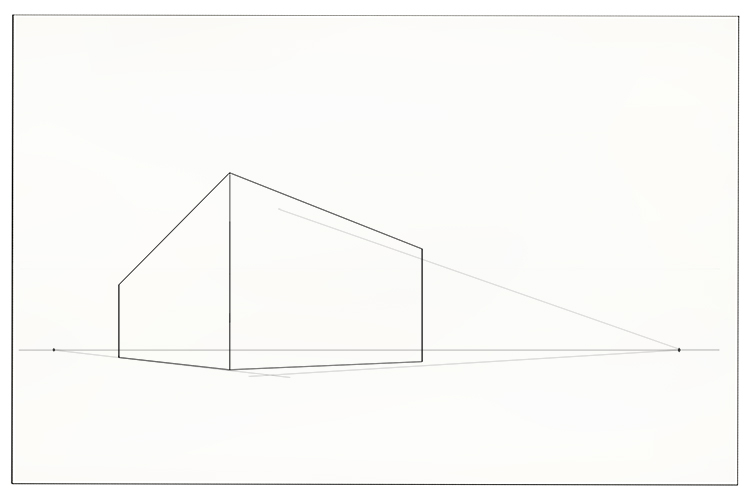
You can now add the other main vertical lines of the building.
The garage to the right of the house is slightly further forward. Draw a line from the left vanishing point to along the line that is already there, but over shoot the end slightly. Connect this line with the right vanishing point.
Draw the vertical lines to form the garage.
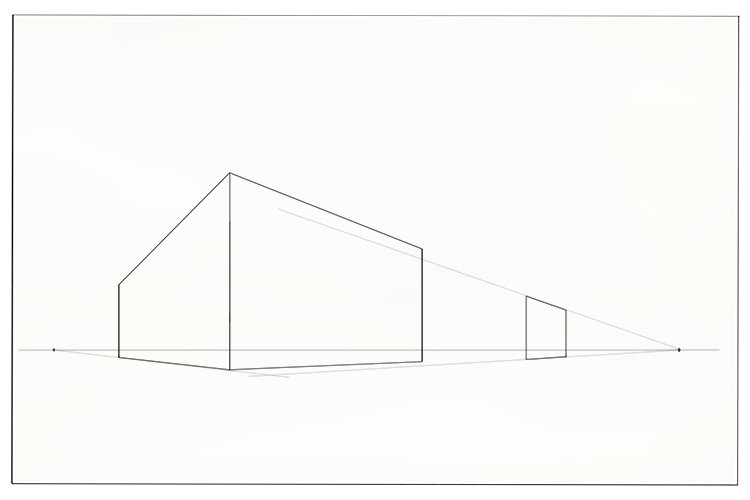
Using the vanishing points, draw the roof. To give the roof the look of being slightly further out from the building, draw the vertical lines of the roof a little further right than the rest of the building as shown below.
Draw an X from corner to corner of the house to find the middle. Draw a line up through the middle of the X to create the point of the roof. You won't be able to see the left hand side of the roof from this angle.
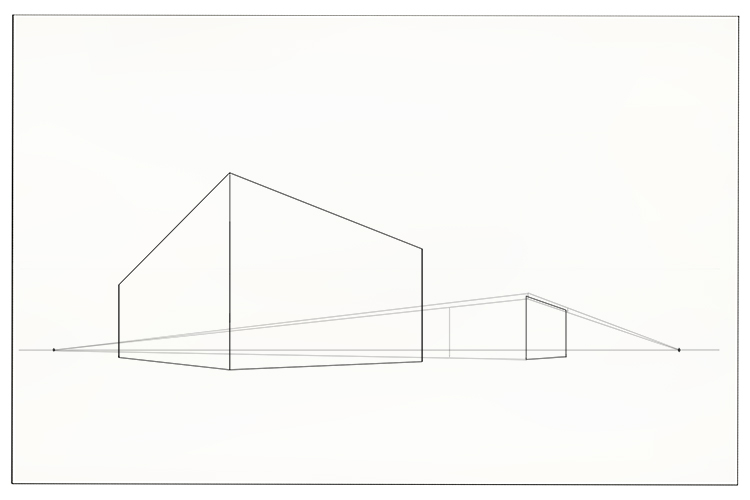
Now that we have our house and garage drawn in, we need to think about the middle building. Looking at the original, you will see that the middle building is much further back and lower down. We already have the vertical guide for where it attaches to the right hand building. From the vertical ends extend the vanishing points.
Use the vanishing points to draw in the front lines for the veranda.
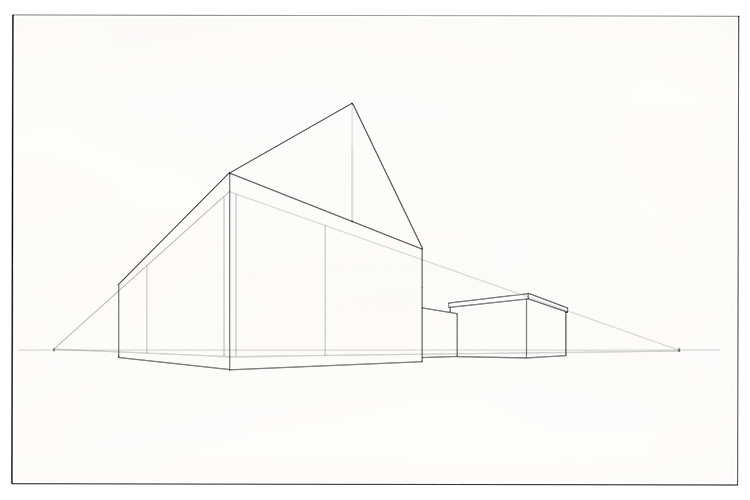
Then, draw in the lines for the back of the veranda. You should just be able to see the floor.
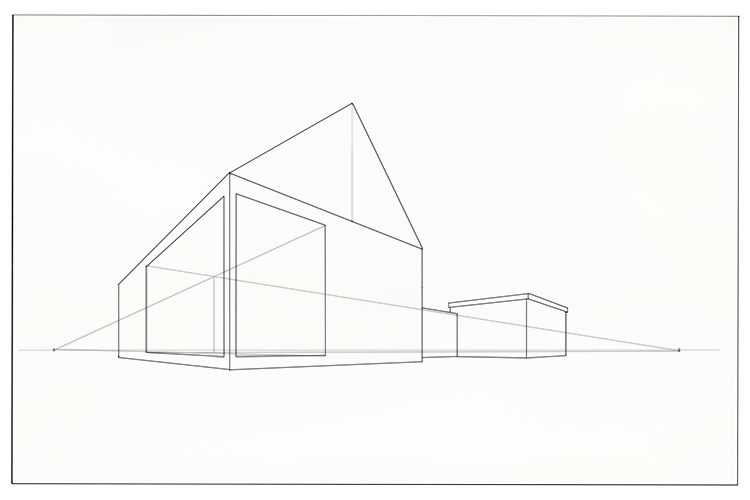
Use the vanishing points to add the window in the garage.

Next, add the doors and windows using the same technique as before and details such as the lines to show the depth of the windows using the vanishing points again.
Finally, you can add the finishing touches.
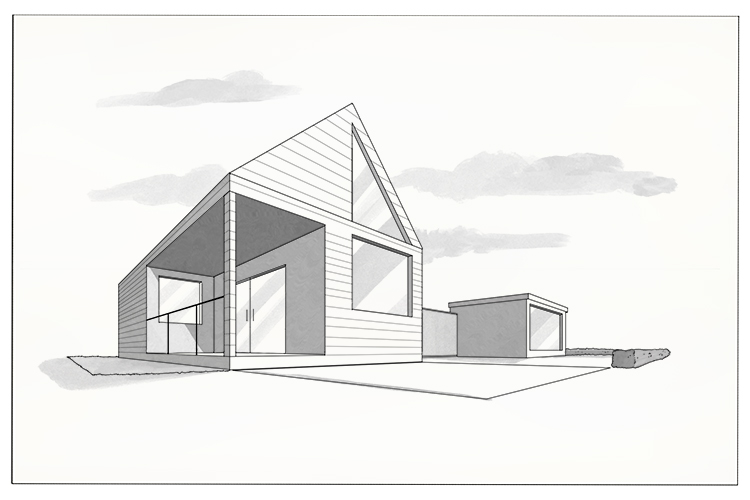
Summary
You can now compare project 1 and project 2 to see how a high and low horizon line alters the look of the same house. See below:


