
Auguste Rodin Art Project
By far, Auguste Rodin's most famous work of art is his sculpture The Thinker. In this project, we will walk you through the process of creating a small, clay version of the sculpture step by step.
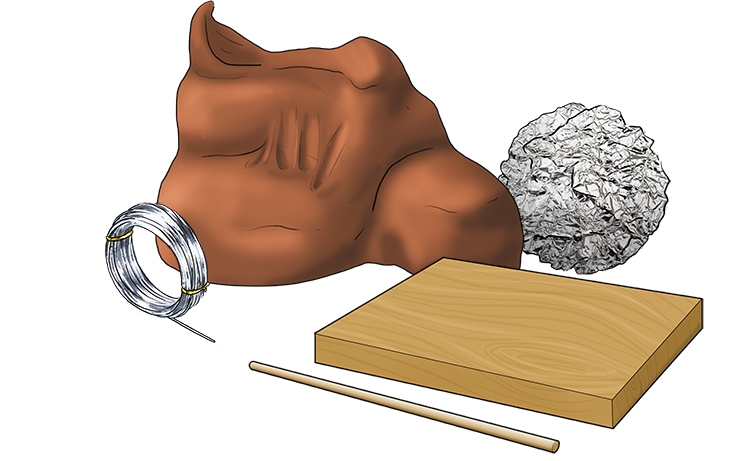
For this exercise, you will need air drying clay, a wooden base, a length of 6mm diameter dowel, aluminium foil and sculpting wire. You will find these in most craft shops.
The first step when using clay is to create what is known as an armature. The armature is the scaffolding within a sculpture that gives you something to work around and gives support to the clay as it dries.
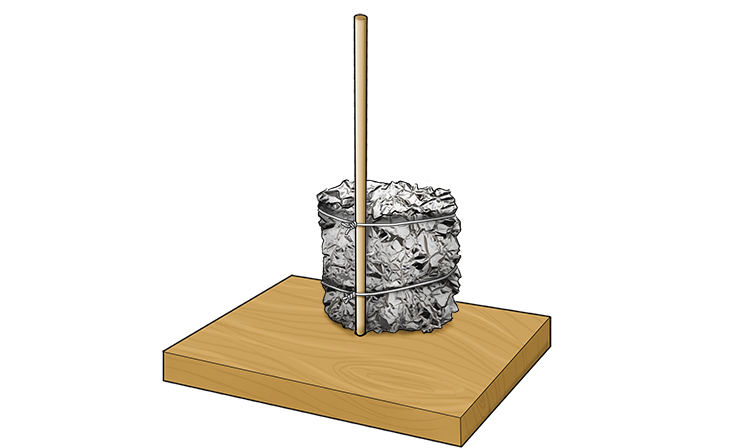
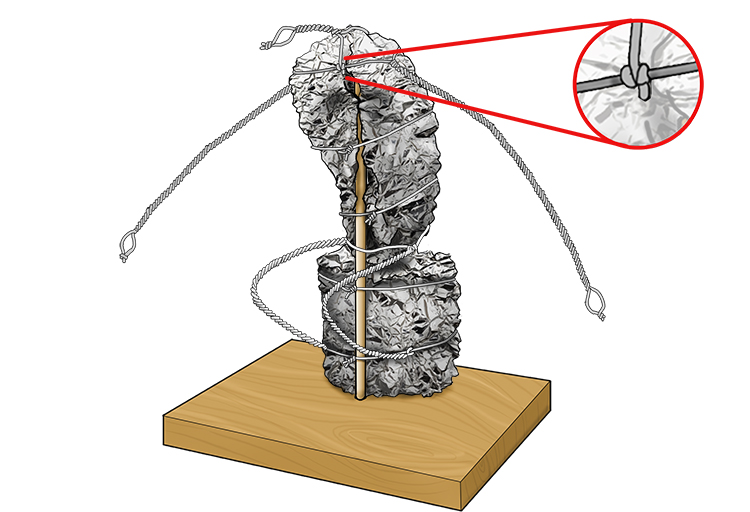
To start creating this armature, use a flat piece of wood, around 20cm square, and 3cm deep. In the centre of the wood, drill (safely and supervised) a 6mm hole.
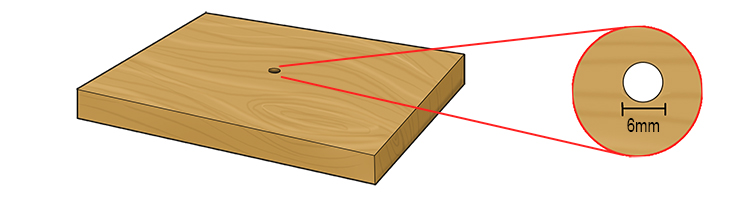
Cut the 6mm diameter dowel to 20cm in length and tap it into the hole.

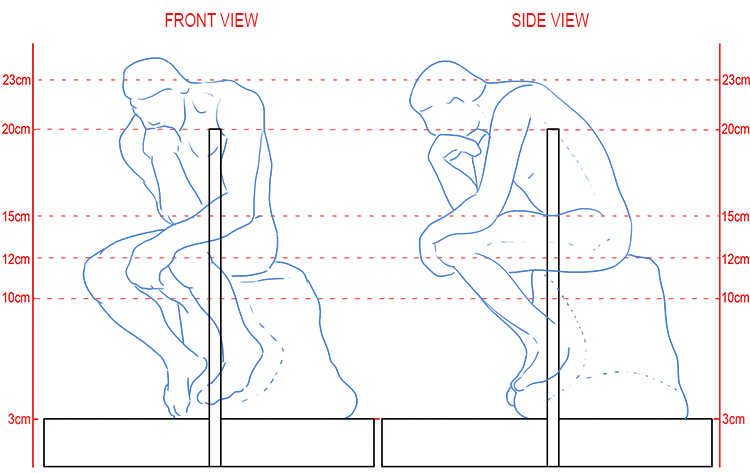
This dowel, firmly in the base, will act as the main support for the sculpture. The other elements of the armature can be attached to this and held in place.
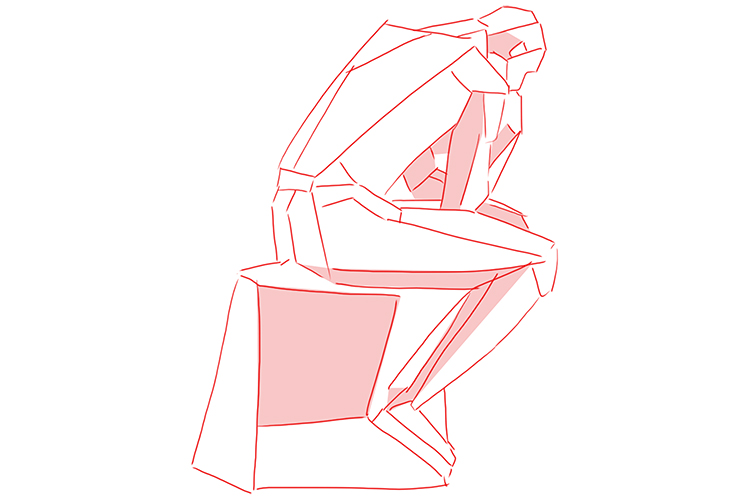
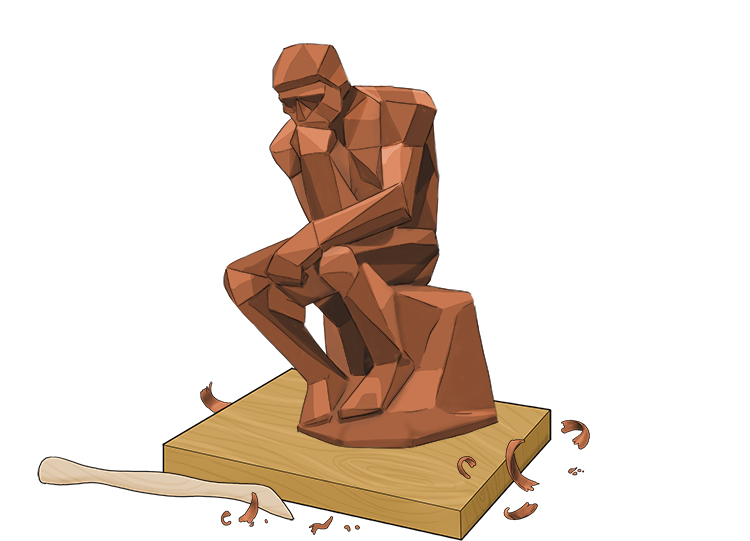
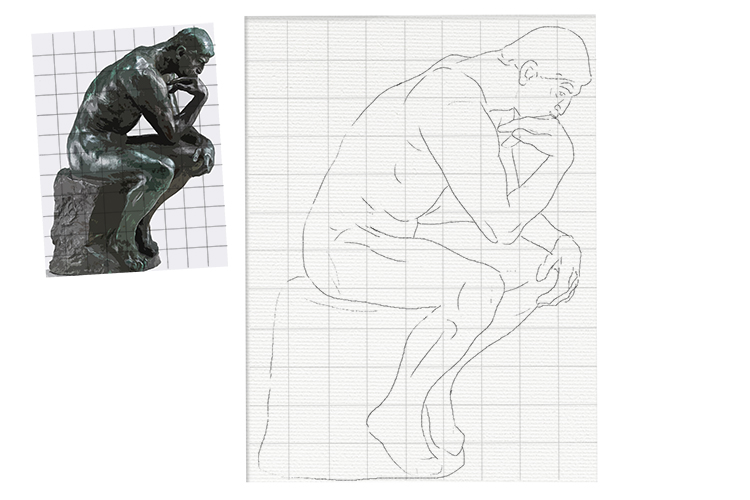
As you can see below, the dowel will be at the centre of the clay, holding it in place.
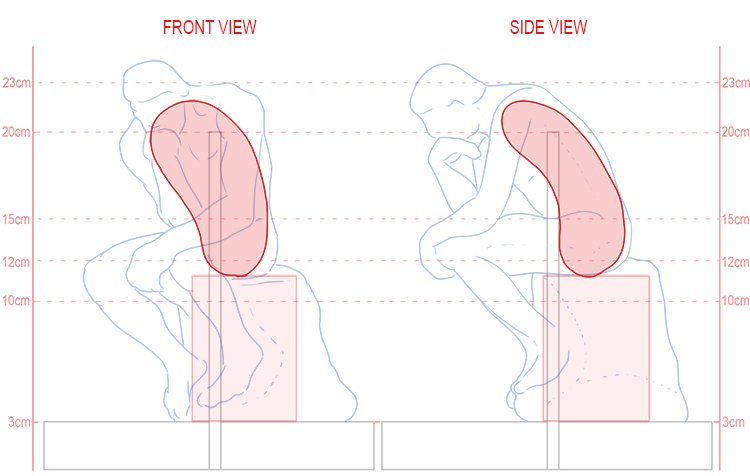
We will refer back to the below image regularly whilst sculpting as the dimensions are helpful throughout the process.
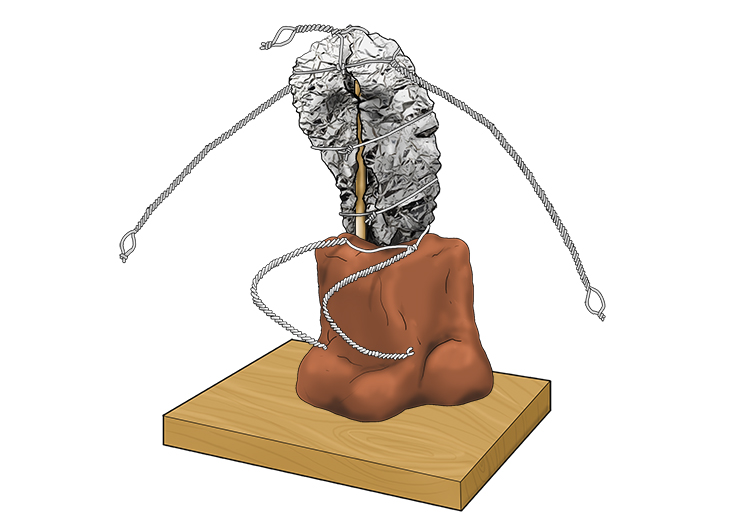
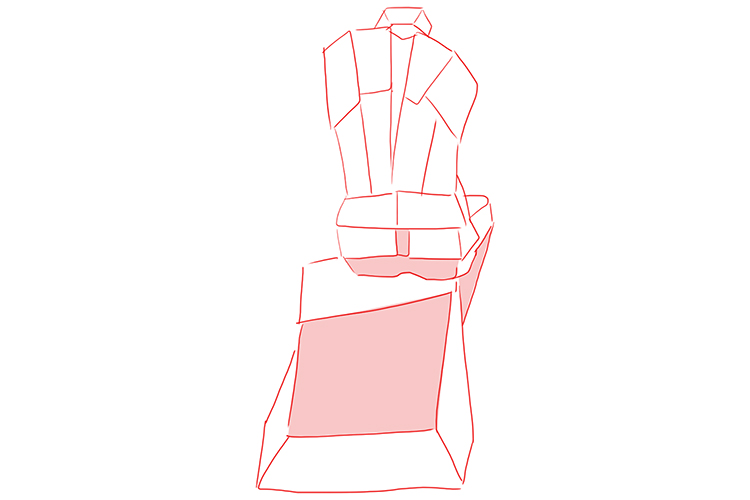
We can now start adding scrunched-up foil to the dowel, fastening it with wire, in order to bulk out the larger areas of the sculpture. The first of these is the stone on which The Thinker is sitting. We need to create the following form:
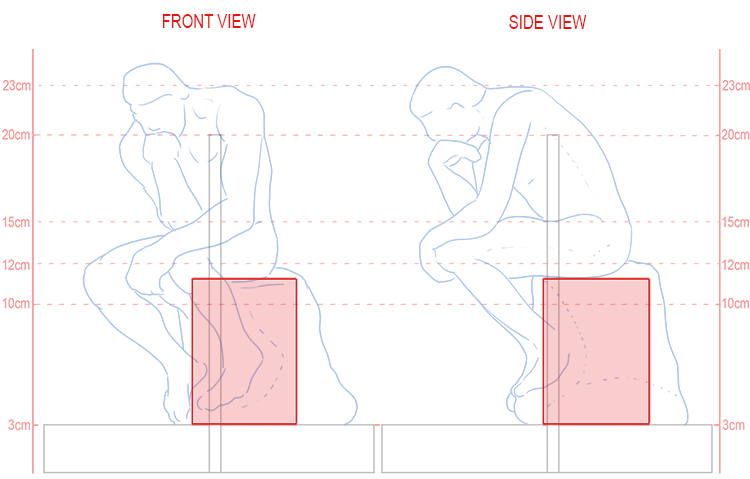
In order to create this, scrunch up the foil to form a block around 6cm square and 8cm high. Place the foil block next to the dowel on the base and secure it to the dowel using the sculpting wire.
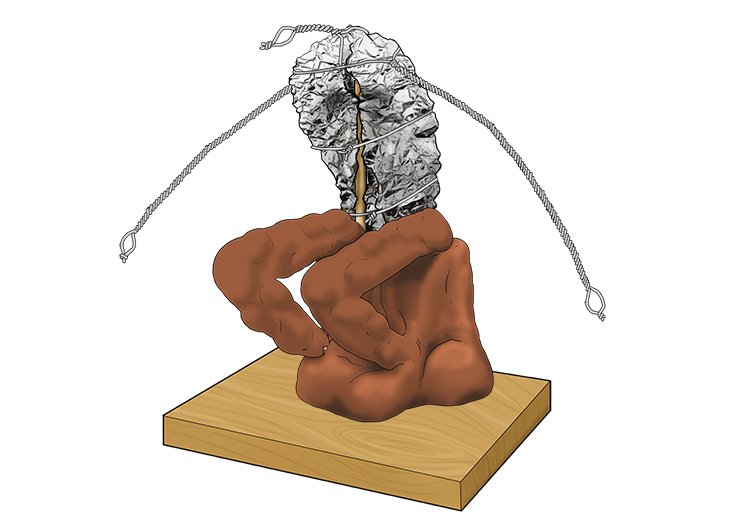
The other bulky area on the sculpture is that of The Thinker's torso. The arching back and chest are essential in achieving the correct positioning.
We can repeat the process for this area, using a sausage-shaped mass of foil coming from the top of the stone he is sitting on and wrapping around the top of the dowel slightly. Again, attach this to the dowel using the wire.
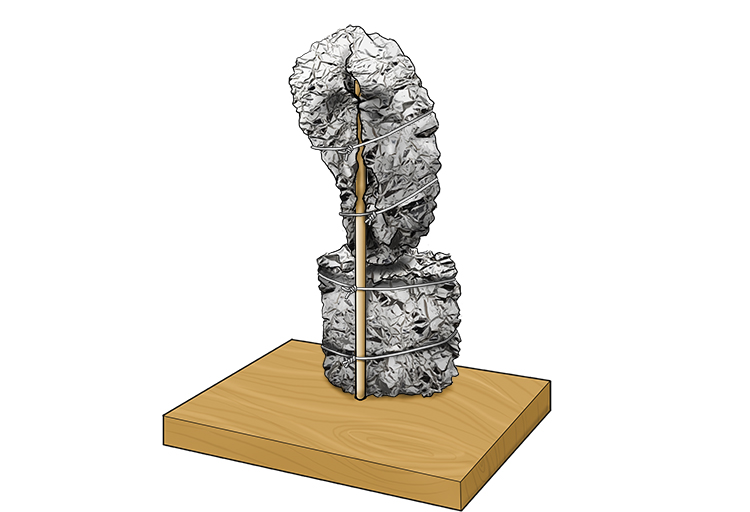
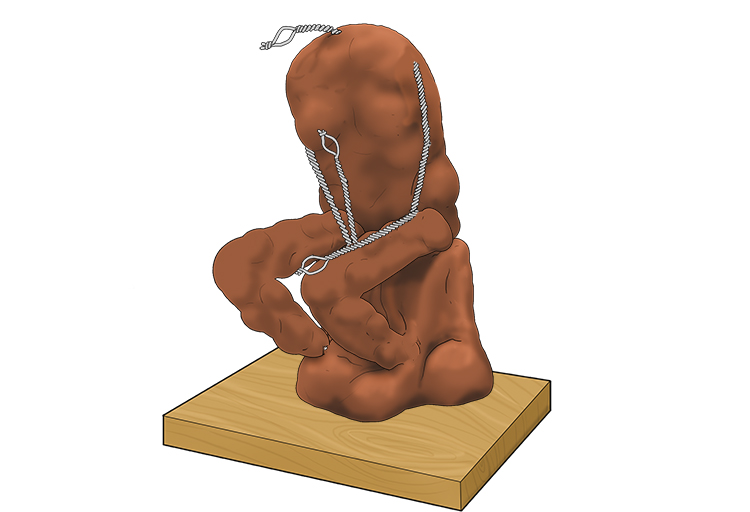
These foil masses can now act as a support for the arms and legs.
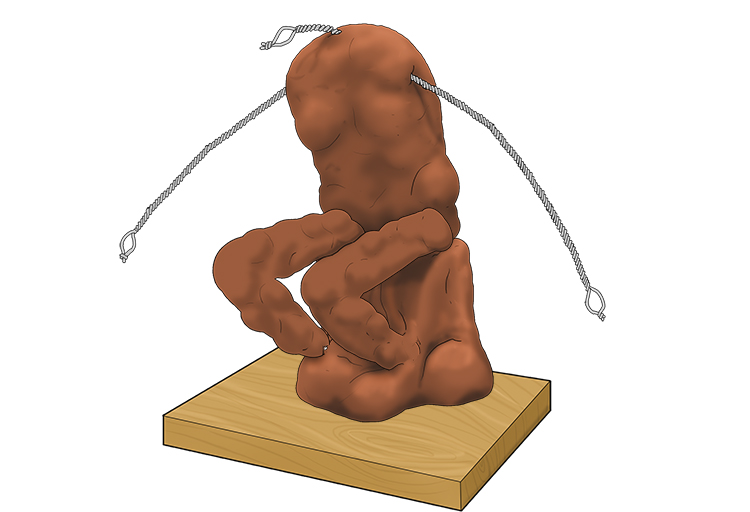
Using two lengths of wire, which you keep twisting together for support, form a loop for each of the legs, attached at the waist point and at the base of the rock.

To form the arm supports, wrap two more lengths of wire around the top of the foil sausage at the shoulder point. Keep twisting them together on either side to create the double-thickness wire and form a small loop on the ends.
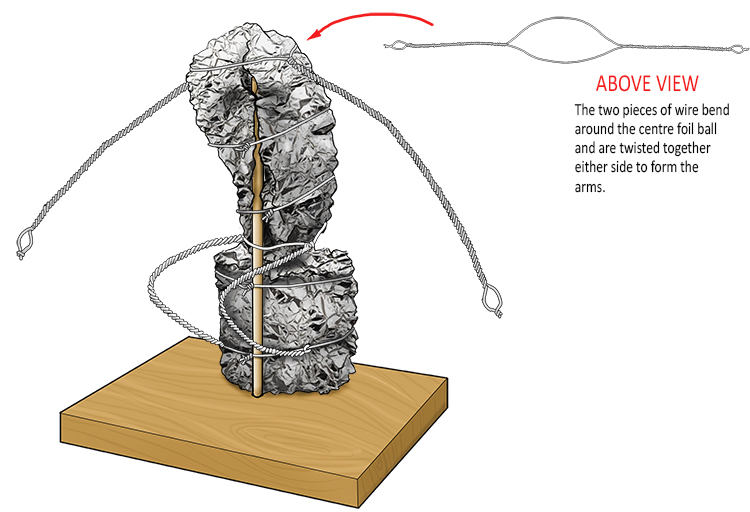
The final piece of structural work is adding wire to support the head.
Add wire to the front and back of the chest, bending it around the arm wires you have already created to attach it. Bring the two lengths of wire together at the top of the foil, twist them together and form a loop at the end.
You now have all of the structural aspects of your sculpture finished.
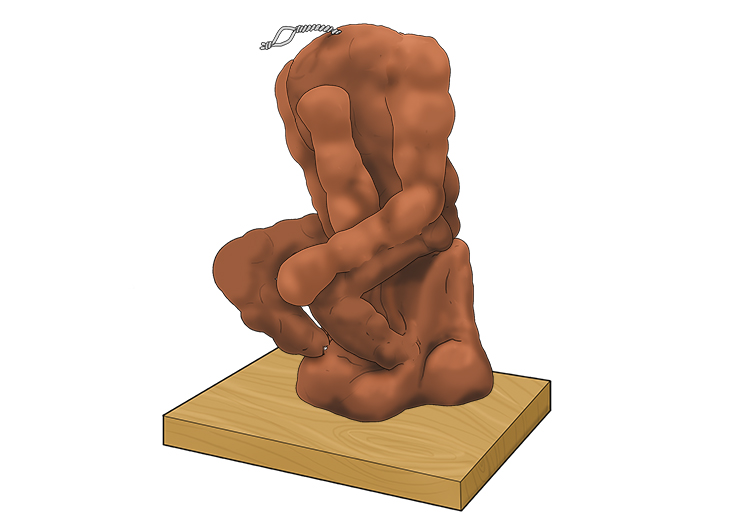
We can now start adding clay. Start by building up the rock that The Thinker sits on. Apply the clay to the foil and build it up slowly until it roughly forms the shape of the rock. Don't worry about it looking perfect, once the basic shapes are built up in clay, that's when we can think about details.
Wrap the leg wires in clay, forming two sausages from the midpoint to the base.
The next area to wrap in clay is the torso. Try to keep the forward curve when doing this as it will make it easier to envisage the end result.
The next section to focus on is the arms. The first stage when doing this is to bend the wires into position. On The Thinker, both arms are resting on the same knee, with one arm lying flat and the other supporting the head.
As you did with the legs, wrap the arm wires in sausages of clay, smooth it onto the other sections to seal the joints. Remember, make the sausages thicker at the top of the arms than the bottoms, the upper arms should be wider than the lower arms.
Once your arms are in place, they will help to support the head.
The head and neck should come out at a forward angle but not sticking up into the air. The top of the neck is only a little higher than the shoulders on our plan, as you can see:
To attach the head, add another two balls of clay, wrapped around the wire that is sticking out the top of the torso. Attach a smaller ball first for the neck, and then a larger one for the head.
Bring the clay down until it meets the hand and smooth it to the hand clay to connect them.
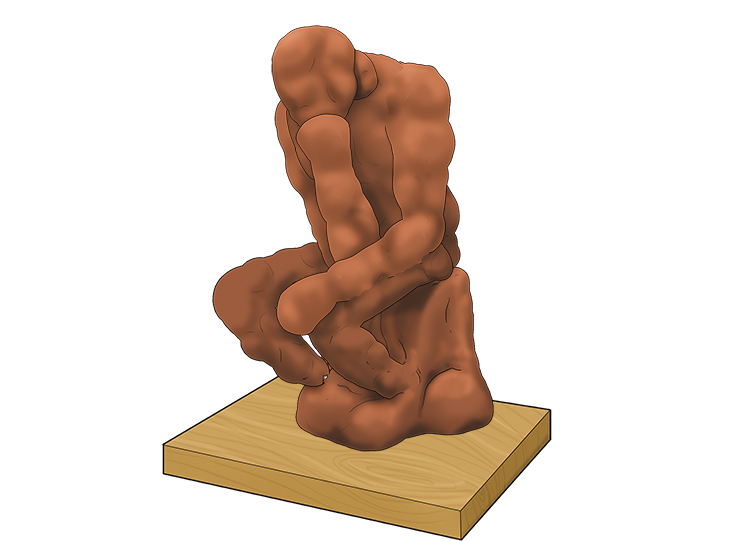
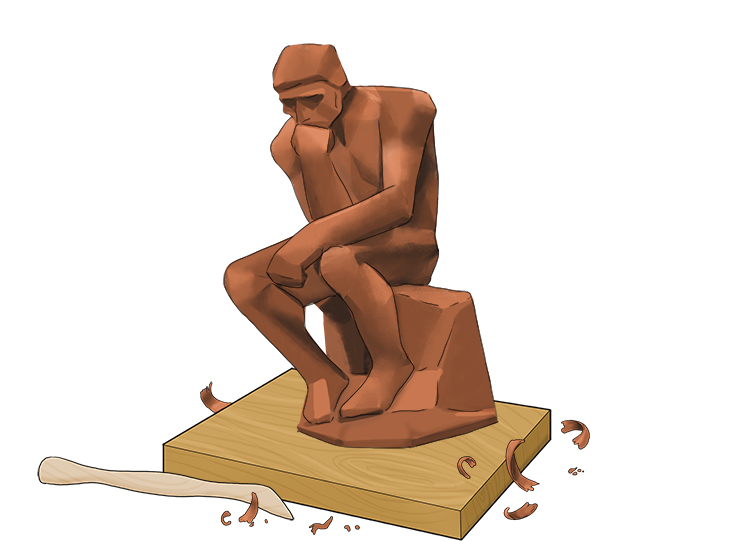
The rough shape of The Thinker is now visible. Before we can start cutting into the clay to create details, we need to add any extra clay to areas that require it. Smooth clumps of clay onto areas such as the feet to add material for us to work with.

Before we start carving details into the sculpture, it is easiest to cut it down into visible planes, to show the angles we are working with.
The Thinker, in his forward-leaning pose and slight twist, has an array of different angles to work with. We need to look at these planes before we continue.
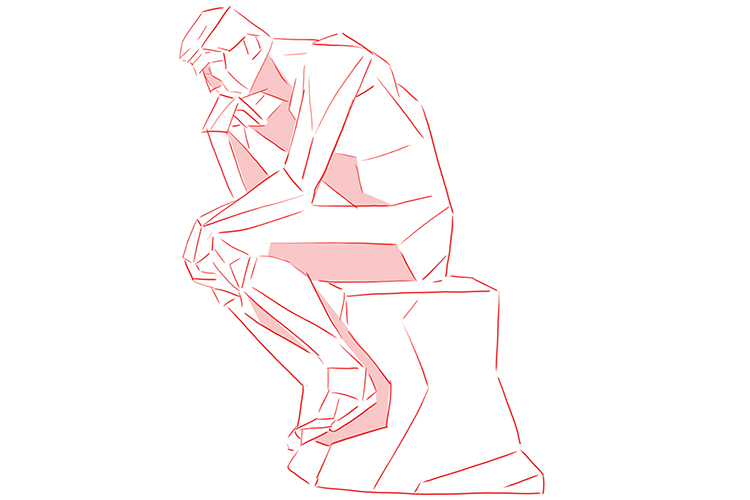
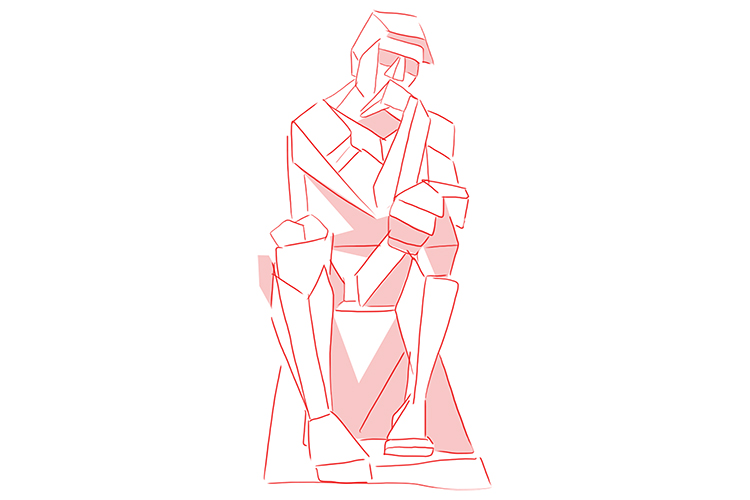
Using the above diagrams as a guide, carve out the planes using a clay knife.
Now, with your clay knife and your fingers, you can smooth down the shapes.
You can now add your final details. Remember things like the toes and fingers, muscle formation, eyes and the texture of the rock The Thinker is sitting on.
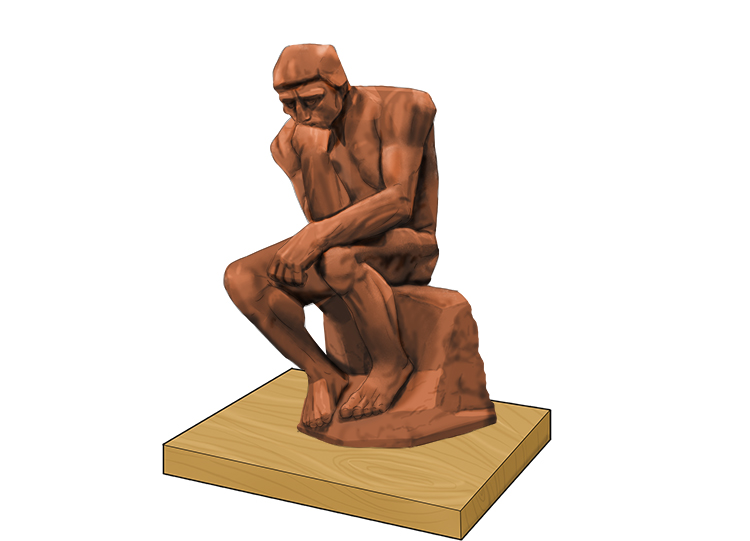
Allow your sculpture to dry.
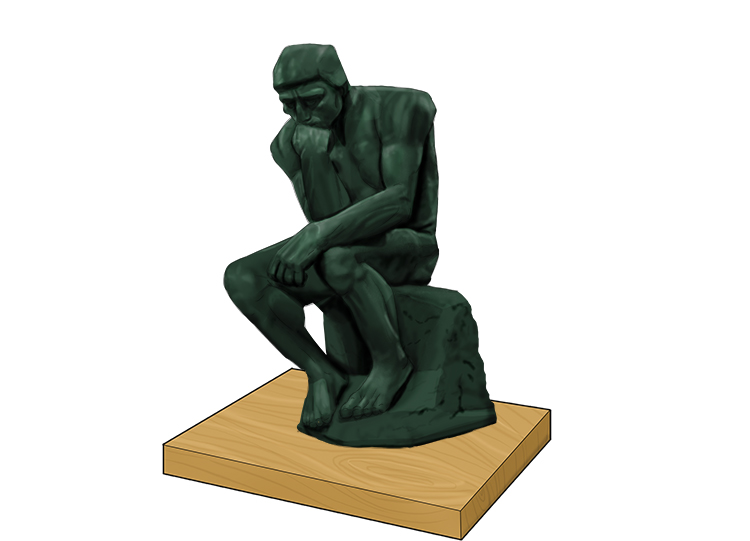
Once dry, you can apply a layer of dark green paint with a brush and then dab on a lighter green with a sponge. This paint effect will reflect the colour and textures of the original sculpture.
Auguste Rodin
Auguste Rodin Art Project 2
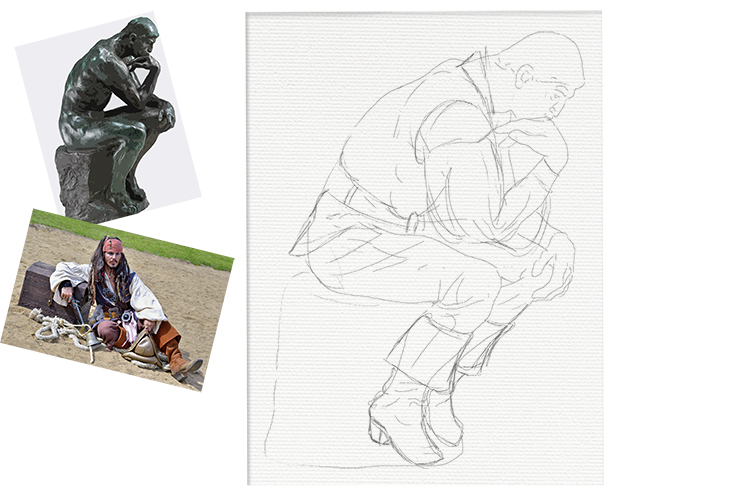
The Thinker, Rodin's most famous sculpture, is iconic and instantly recognisable. Its head-on-hand pose can be adapted and changed in order to create work inspired by the artist.
In this project, we will use The Thinker's pose in a different scenario, in order to create a drawing or painting.
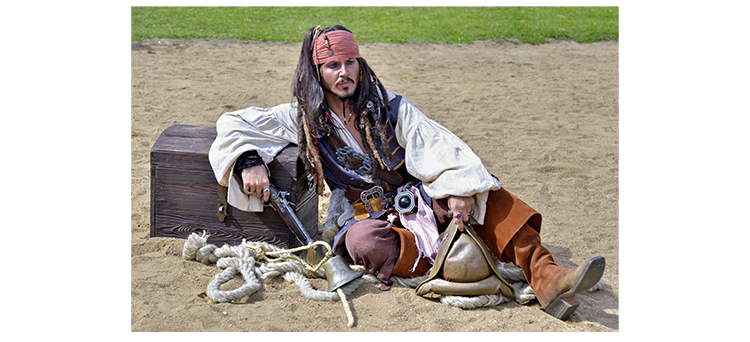
To add a funny twist to the usually naked Thinker, draw him wearing an outfit. Any outfit would work, from an astronaut to a chef, a vicar to a fireman. For this example, we are going to use the clothes of a pirate.
The first step to creating this artwork is to lightly draw an outline of The Thinker on our canvas or paper. Use the Mammoth Memory grid method to help you.
For now, we can forget about the drawing. Look online or in books to find a character or outfit you like and keep the image to hand. Find a character that is interesting, an outfit with accessories and different elements – these aspects will all make your final piece more interesting.
We now need to turn The Thinker into the character we have chosen by applying the clothing to the drawing we already have.
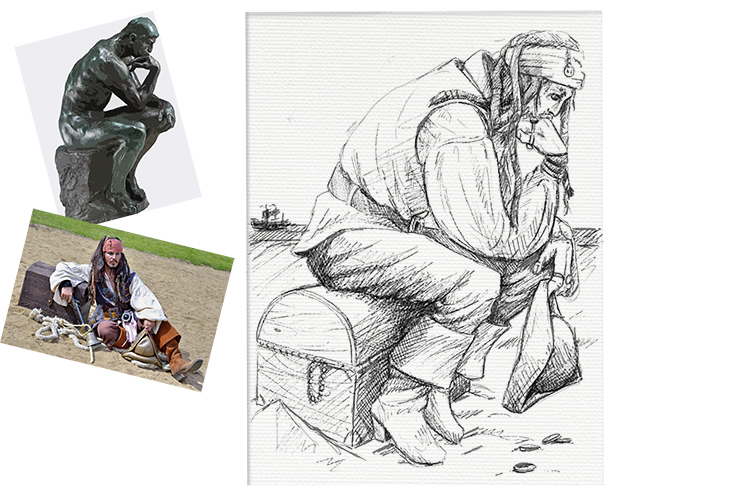
Using the lightly applied drawing as a guide we can think about how the outfit would fit. Clothing changes when sitting down, so look at images of people sitting in order to understand how clothes fit. Try to look at images in a similar pose to, and from a similar angle as your drawing of The Thinker.
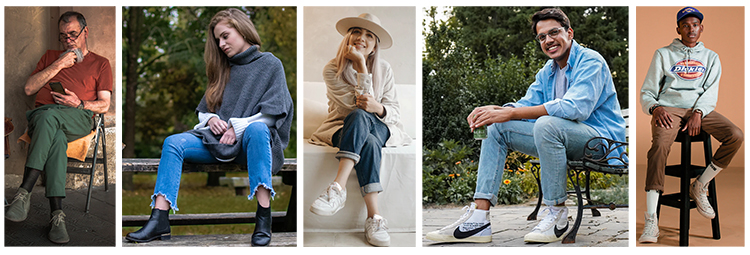
As you will notice, when sitting, the trousers rise at the bottom, shirts fall to the sides, clothes scrunch up and stretch in different ways to when someone is standing.
Mark out where the waist, cuffs, collar and ankles of an outfit would fall based on the position of your drawing.
Now you have a rough plan to work around.
When drawing the clothing in, think about the materials you are drawing. Softer materials will fall more loosely, stiffer materials will fold and crease, leather will bend and jeans may stretch.
Once your clothing is drawn in, you can add accessories to the image. Small details like this make a painting more interesting.
Our pirate could be holding his hat like he is in the reference image, and could be sitting on a treasure chest rather than a rock.

If you are happy with your drawing, shade it in and add details, or if you prefer painting, use it as a plan for a painting.
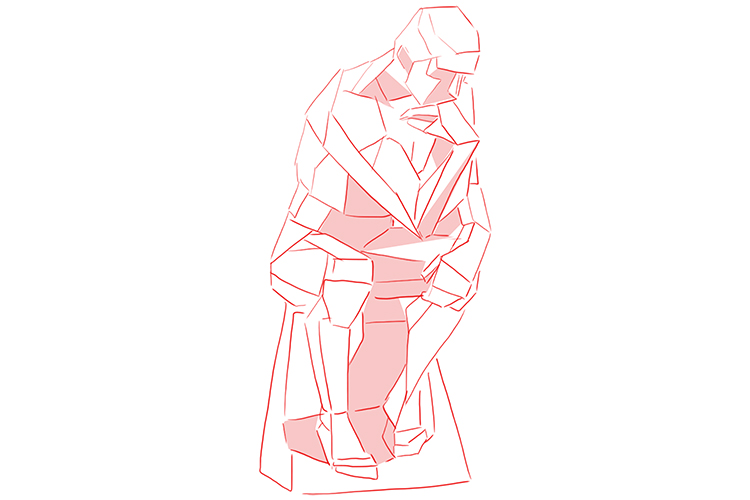
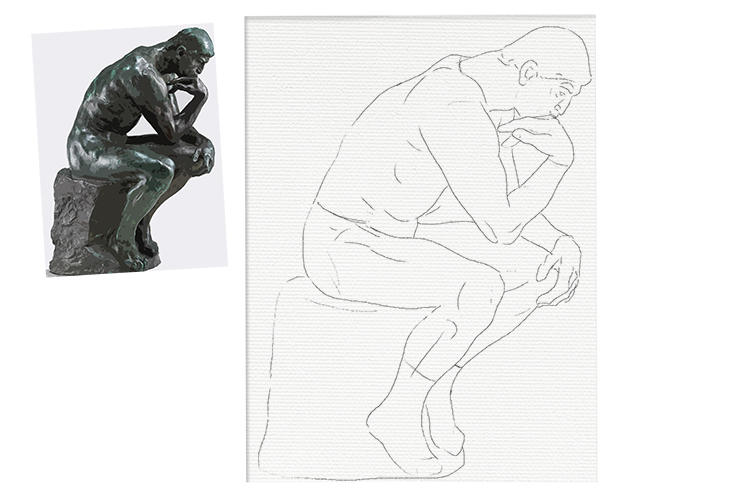
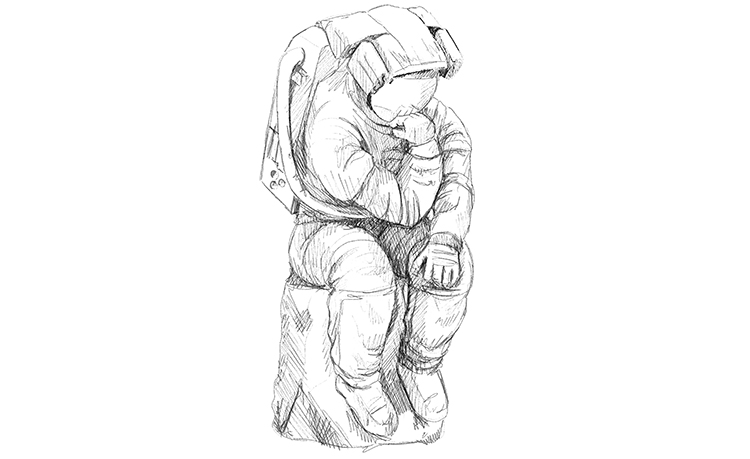
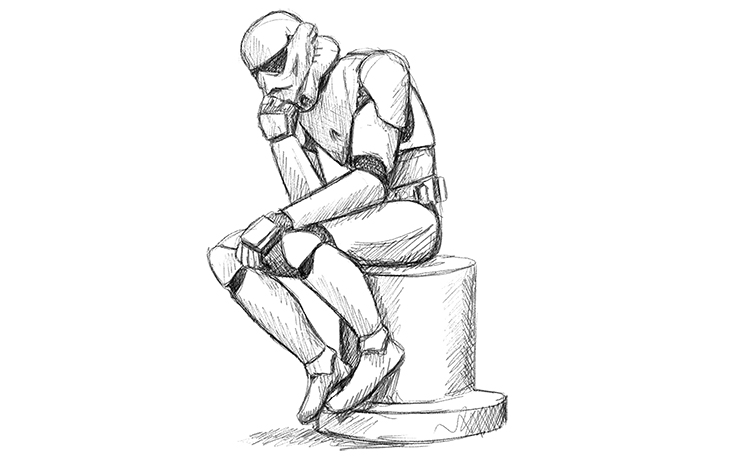
Here are two more examples:
Auguste Rodin


