
Pablo Picasso Art Project
Pablo Picasso's artwork is instantly recognisable and some of the most famous in the world. A defining feature in his cubist work is the morphing and changing of perspective in his portraits.
In this exercise we will create a portrait using this iconic Picasso technique, merging two different views of a face into one in a cubist style.
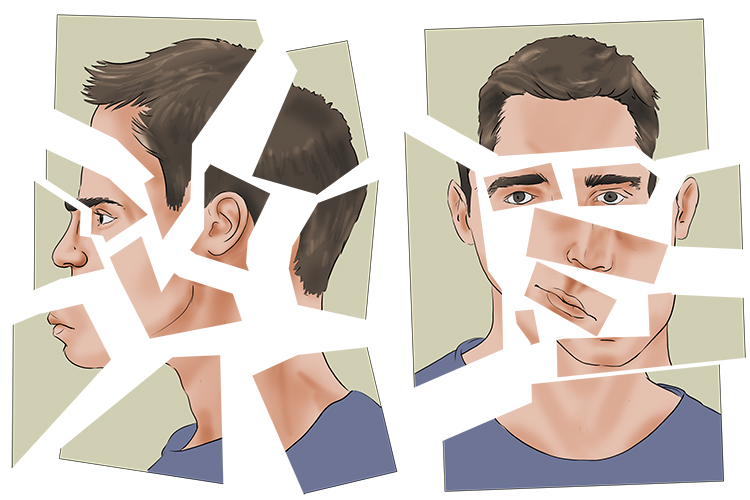
To start, get two photographs of a face – one from a front-on view and one from a side profile.

Cut the photographs up into smaller pieces, isolating one key facial feature in each segment.
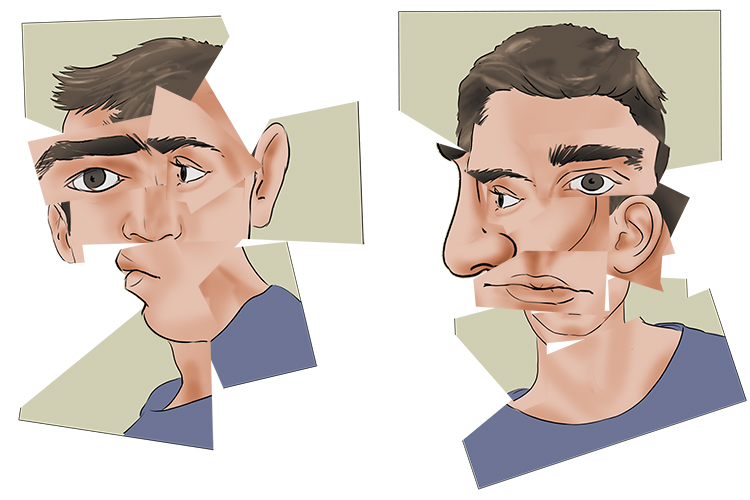
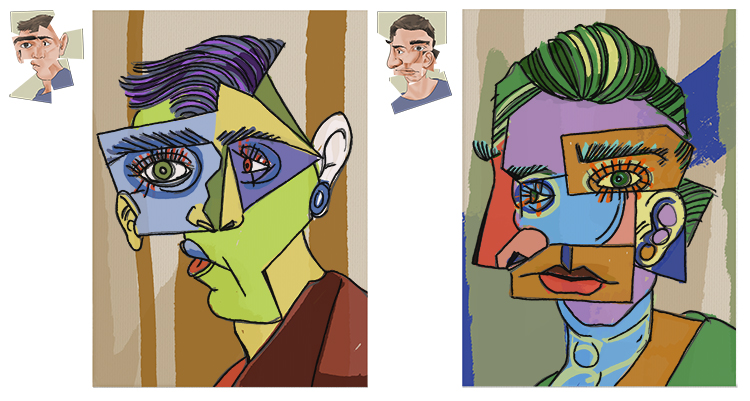
Once you have your photos separated into sections, you can play around with their positioning. Try and build new faces with the features from BOTH faces, rather than just the one. We have created two separate images, to show just how creative you can be with the positioning.
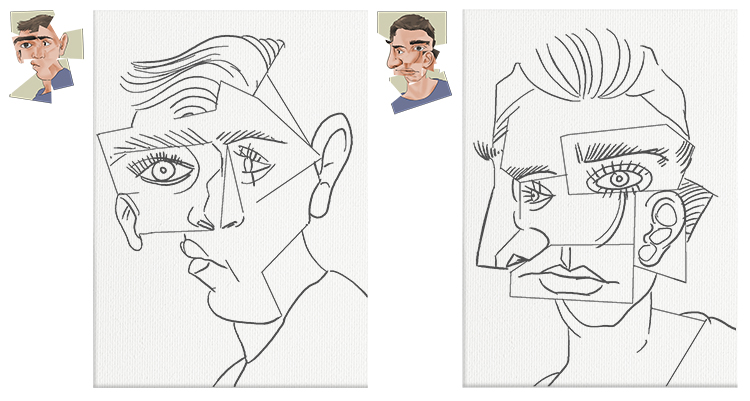
We now have a starting point for our Picasso-style images. Use the portrait you have just created as a reference to draw up your new cubist face. If it is hard to know where to start, you could use the Mammoth Memory grid method to help with the drawing.
To add more reference to Picasso's paintings, add details that appear in his work. We have accentuated the eyelashes in ours and added lines in the direction of the hair. Use the lines of the cut paper to add some dividing lines through the faces – this reflects those that appear in many cubist paintings.
You can now add colour to the image. Paint each section, using bright, bold colours with little-to-no shading or blending. Picasso is famous for his vivid colours so be as expressive with colour as you can!
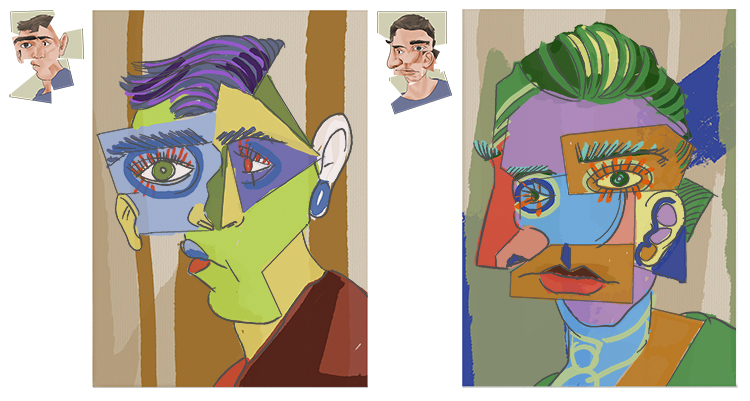
When you are happy with the colours, use black paint to outline the image. The lines don't have to be too neat – Picasso wasn't too precise.
Pablo Picasso.
Pablo Picasso Art Project 2 (simple continuous line drawing)
Another technique used frequently by Pablo Picasso was line drawing. When drawing and sketching, he would often limit the number of times he lifted his pencil. This technique forces you to simplify a subject and pick out key sections, whether it be the arms and curves of a standing figure or the placement of the features on a face.
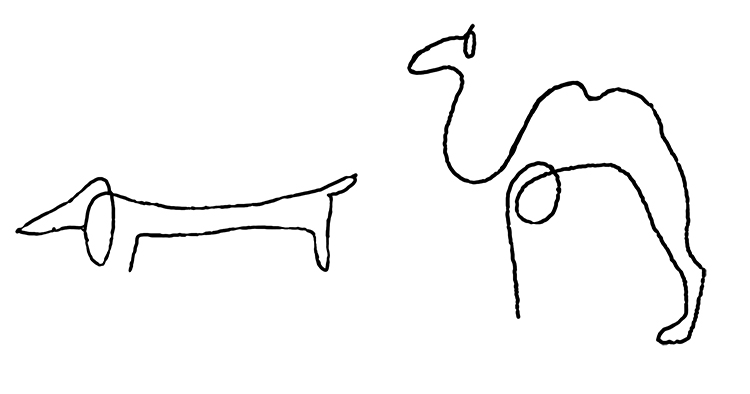
As you can see above, Picasso greatly simplified the subjects, but without making them unrecognisable. Try and use as little detail as possible in your drawings without losing the form too much.
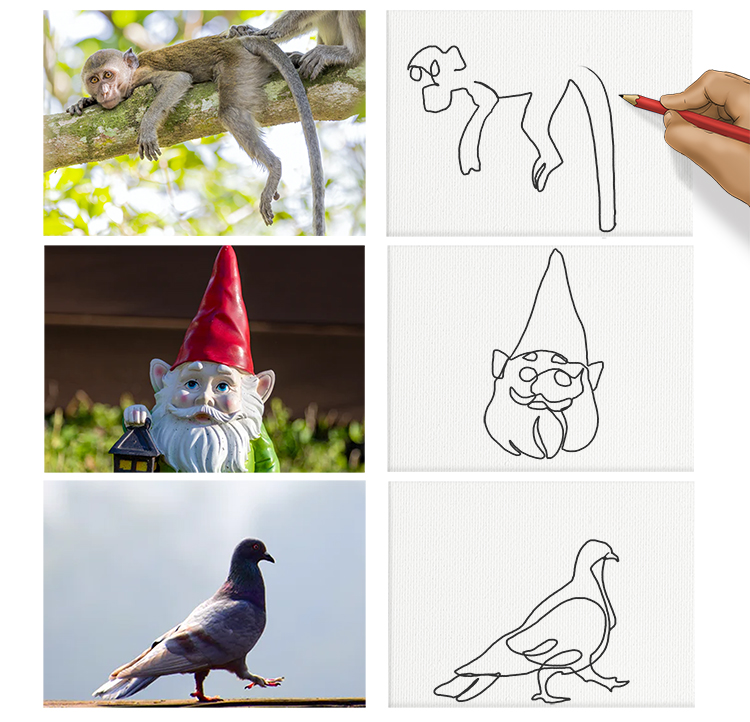
Get a pencil and paper and an image you wish to copy. Place the pencil on the paper and draw, without lifting it until the end.
We have done a few examples alongside their reference photos:
Pablo Picasso.
Pablo Picasso Art Project 3 (advanced continuous line drawing)
For a more difficult single-line drawing, try to show a higher level of detail with a continuous line.
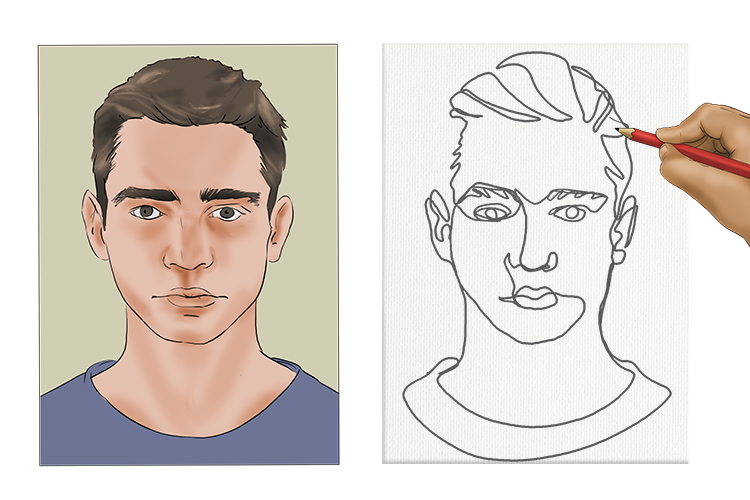
Find a reference image with enough information to use. A portrait will work well, as the hair and features offer a lot of detail to pick up on.
It's best to imagine a route around the image, either clockwise or anticlockwise, joining each feature together with the line.
Without lifting the pencil, go in and add more detail. Don't be afraid to cross over other areas of the line you have already created – this adds to the overall style.
Over time you will notice the images start to make more sense, and your eye begins to pick up on different elements to focus on.
It helps, when you start, to draw a few without looking down at the pencil – only look at the reference image. The key to continuous-line drawings is observing!
Rather than a step-by-step tutorial for this technique, we have provided an example alongside its reference image.
Pablo Picasso.


