
Barbara Hepworth Art Project
Although Barbara Hepworth is best known for her carved string sculptures, many of her works are simpler in design but the end result is still bold and striking. These installations comprise what appear to be separate elements stacked on top of each other, some with hollowed-out areas and some with holes all the way through them.
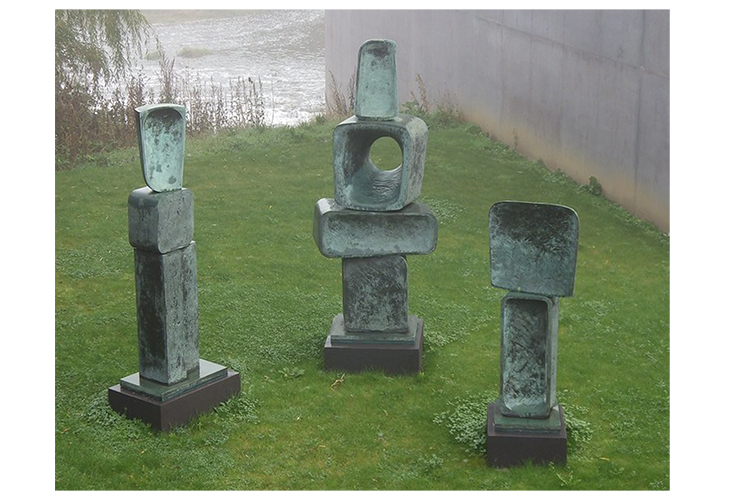
It is possible to recreate this style of sculpture on quite a large scale using cardboard boxes. In this project, we will guide you through the method of doing so, step by step.
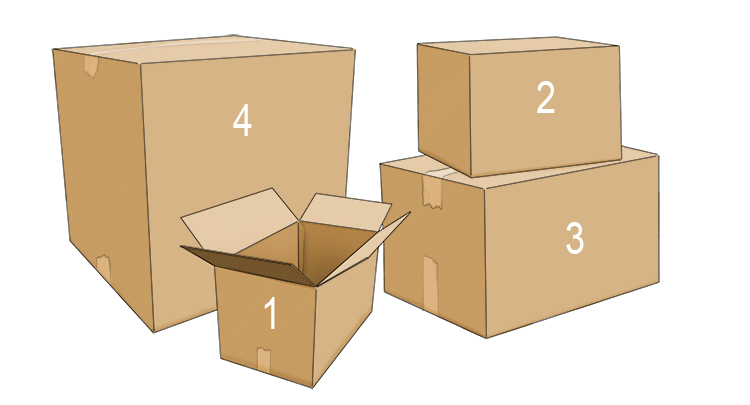
To start, get four different sized cardboard boxes.

To make the process easier, number the boxes from smallest to largest:
Before we go about stacking the sculpture. we need to create a 'void' in one of the boxes, similar to those seen in Hepworth's work.
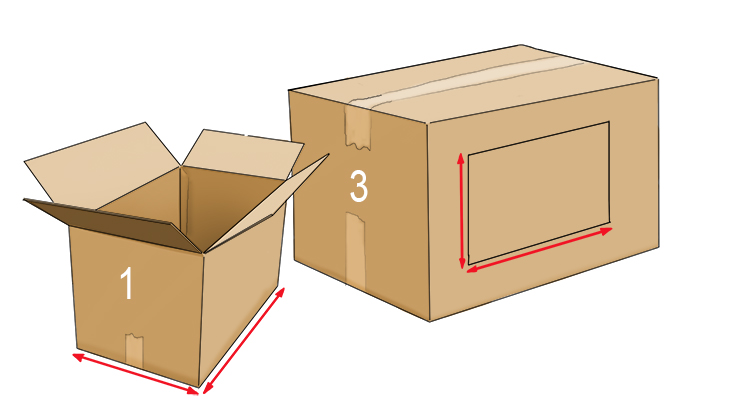
Put boxes 2 and 4 to one side and keep boxes 1 and 3.
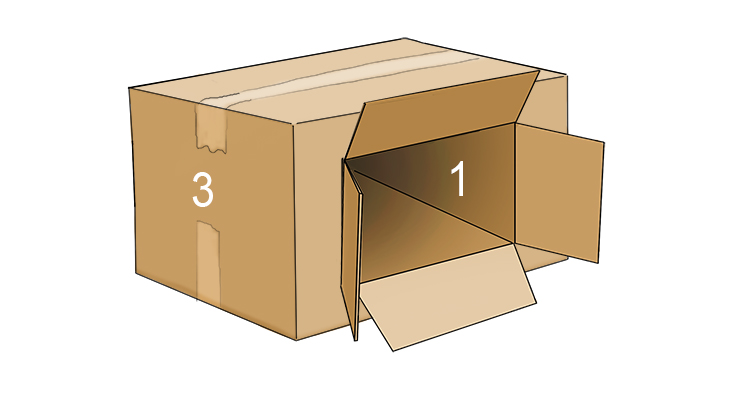
Measure around the base of box 1 and draw a rectangle the same size on the large face of box 3:
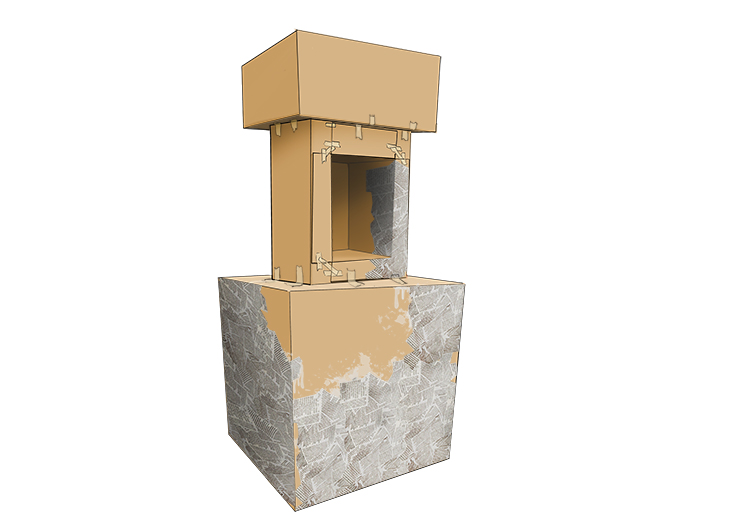
Cut out the section you have marked out from box 3 in order to slide box 1 into it.
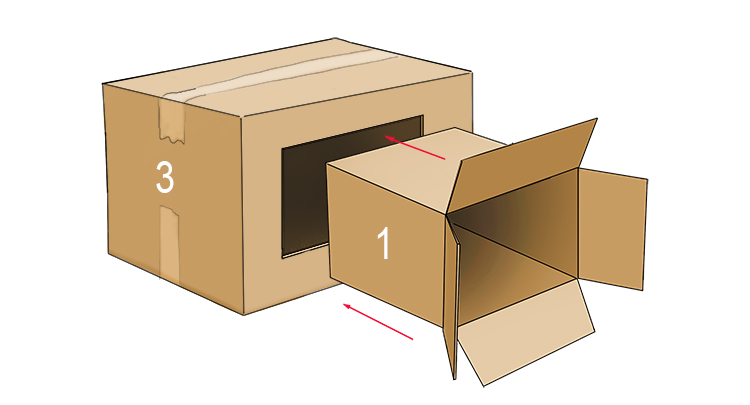
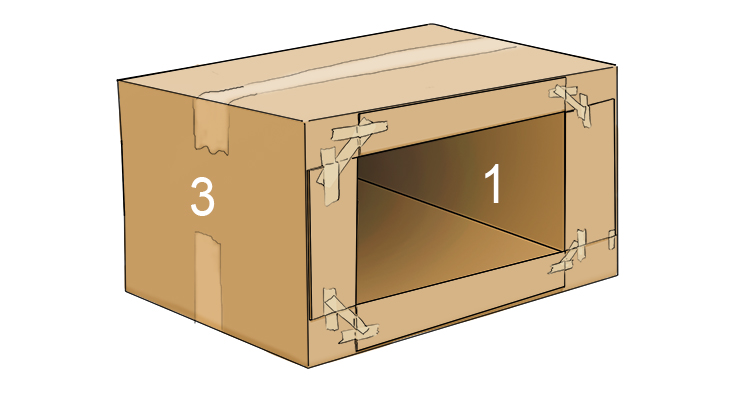
You can then use the visible flaps from box 1 to attach it to box 3 using masking tape. Cut off any parts of the flap that stick out further than the edges of box 3:
You can now bring back boxes 2 and 4:
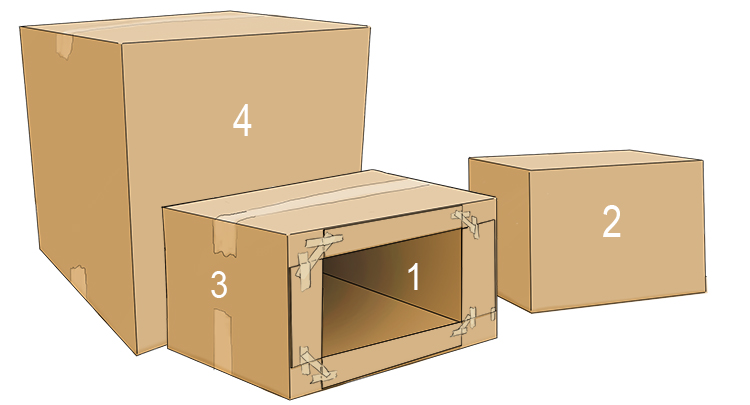
You now have the three sections for the stacked sculpture you are going to create.
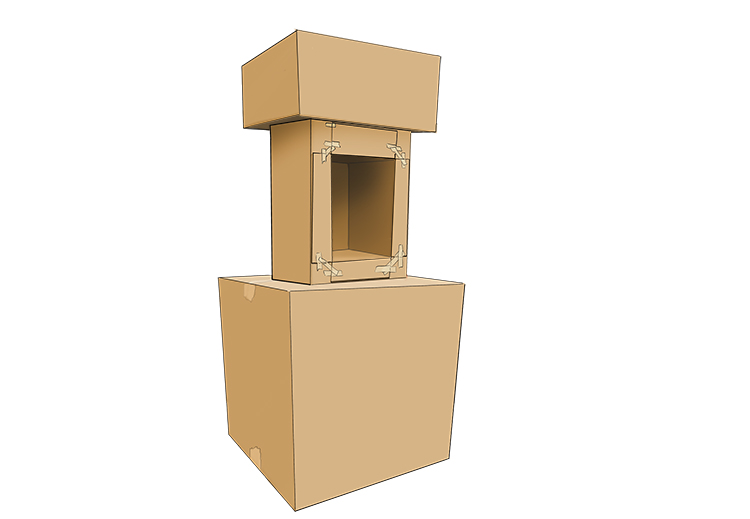
Stack the boxes in an interesting format, play around with the orientation of the boxes and decide on the placement you feel best reflects Barbara Hepworth's work.
Stick the three sections together with more masking tape and cover the whole surface with a layer of paper mache in order to conceal any joints and add texture to the sculpture. To do this, stick multiple pieces of torn newspaper over the surface with PVA glue. Repeat the process twice, allowing it to dry between the two layers.
The hardened paper mache will help hold the pieces together seamlessly, adding to the hand-carved appearance.
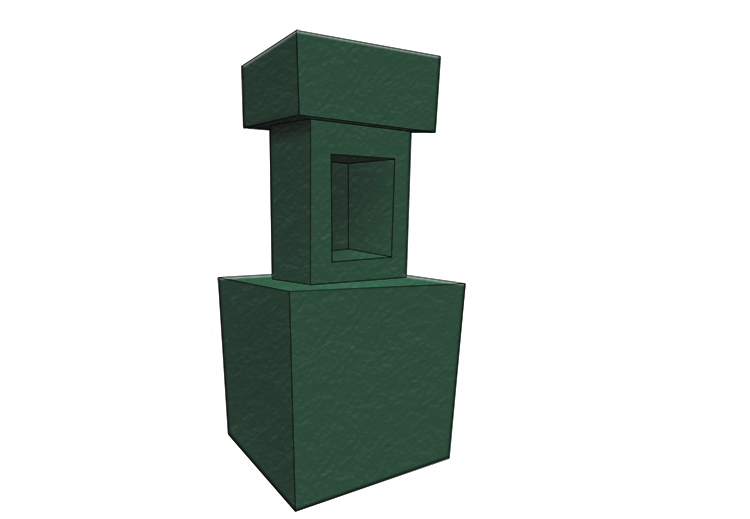
Cover the whole sculpture in a layer of dark green paint to resemble the aged bronze in Hepworth's work.
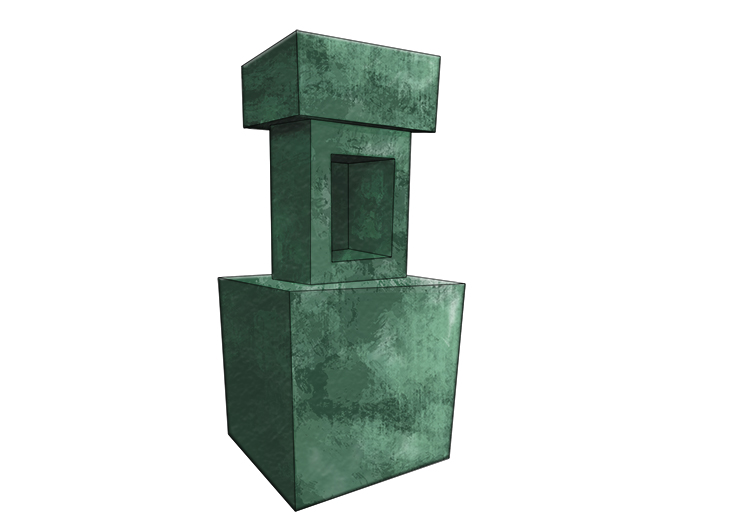
For the final detail, add areas of lighter green paint to add to the aged verdigris (the patina formed when bronze is weathered). You can apply the paint by dabbing it onto the surface with a dry sponge or an old rag. This will add interesting texture rather than brushstrokes.
Barbara Hepworth.
Barbara Hepworth Art Project 2
Barbara Hepworth's string sculptures combine materials such as wood and stone with lengths of string laced to form geometric patterns.
We can create a rendition of these sculptures using aluminium foil and Modroc bandages (plaster of Paris that is used for modelling and is available from most arts and craft shops). The foil acts as a solid base and the Modroc is used to create the smooth surface ready for painting.
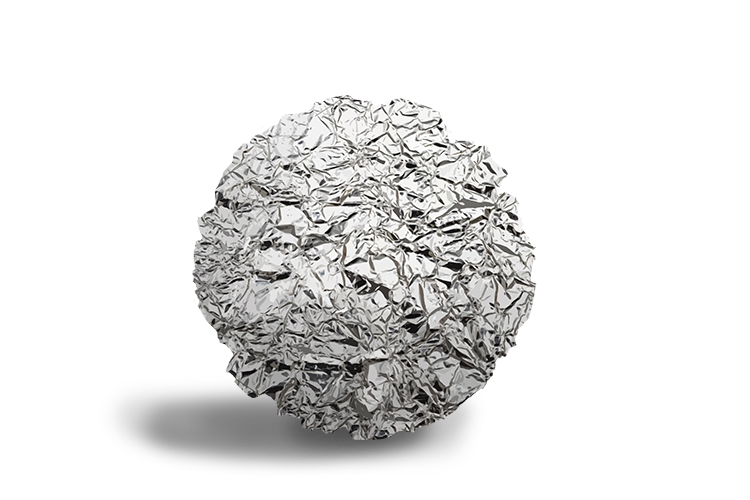
The first step in the process is to form a ball by scrunching up large amounts of aluminium foil.
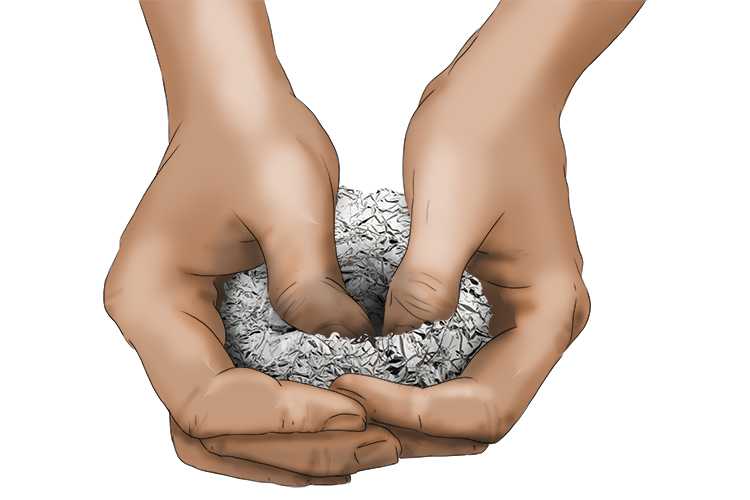
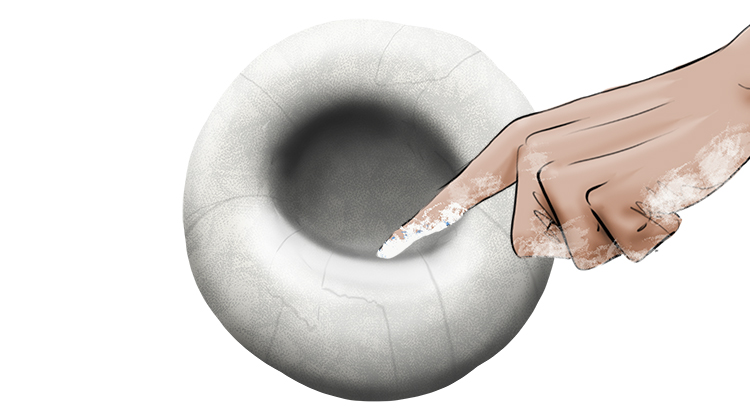
Once your ball is formed, hold it in your hands and use your thumbs to push a deep void into the centre, hollowing part of it out.
You should now be left with a foil shape similar to this:
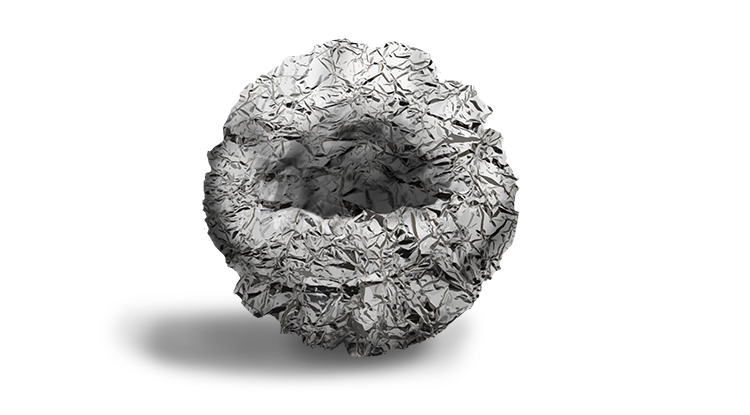
This foil will act as the scaffolding within our sculpture.
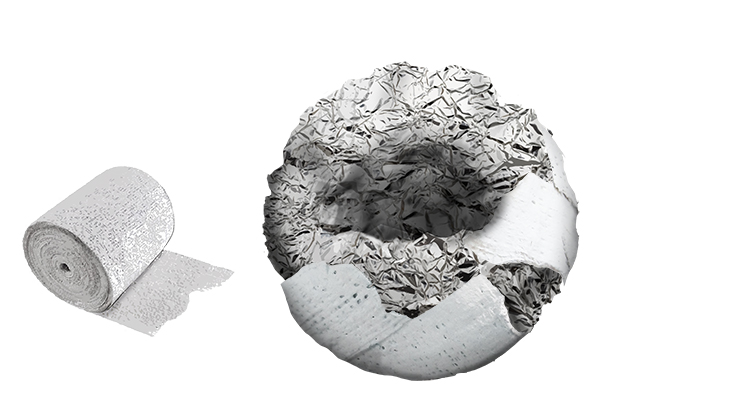
Take sheets of the Modroc bandage, dip them in water for a second and lift them out. This will be enough moisture for it to adhere to the foil and itself.
Begin wrapping the foil base in the Modroc, smoothing it into the curves of the foil.
Once the whole surface is covered, rub it with a wet finger and you will be able to create a smooth surface.
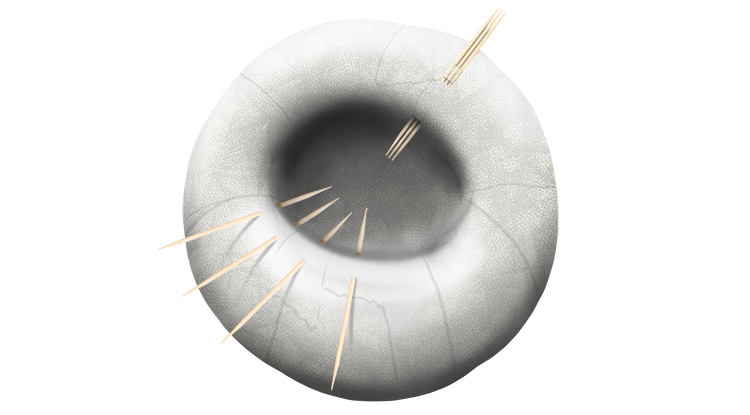
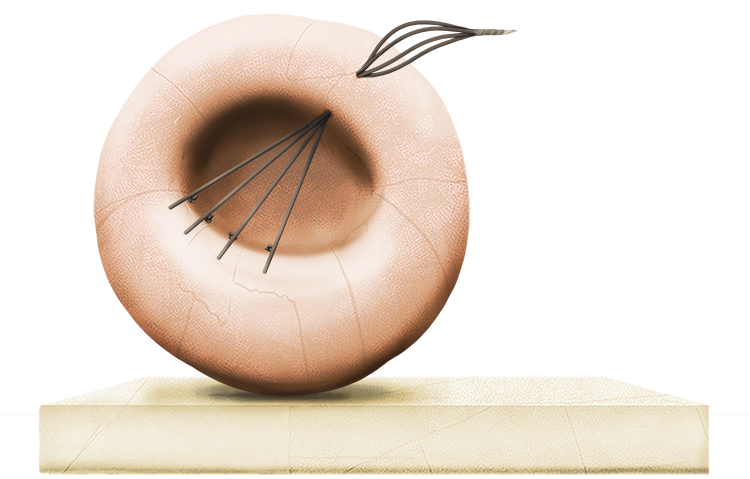
While the Modroc is still wet, push four cocktail sticks, evenly spaced, through the bottom left lip of the inner void.
Now tape three cocktail sticks together and push those through the top right lip of the inner void, as shown below.
Allow the Modroc to completely dry.
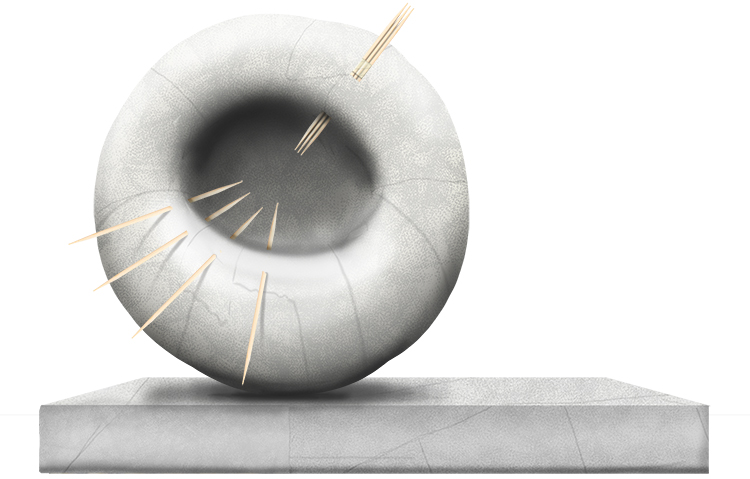
In the meantime, repeat the Modroc process with four stacked rectangles of cardboard, This will form the base of the sculpture.

Once both elements are dry, glue them together. You can use PVA glue for this, or a heated glue gun.
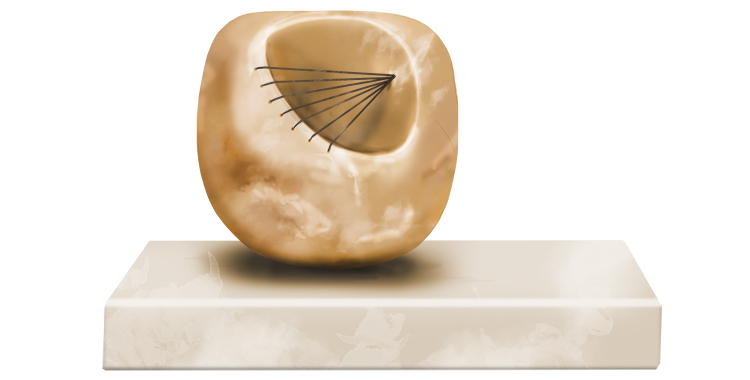
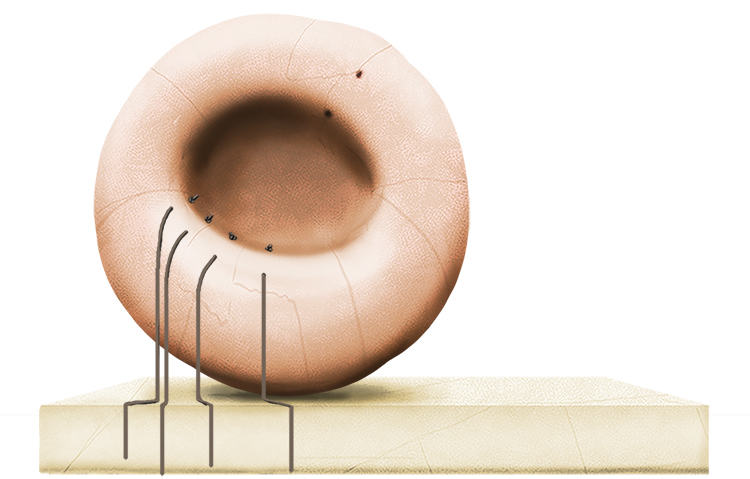
Before removing the cocktail sticks, paint a base layer of colour on the two elements of the sculpture. We have opted for the pink and cream hues of the Barbara Hepworth example at the start of the project.

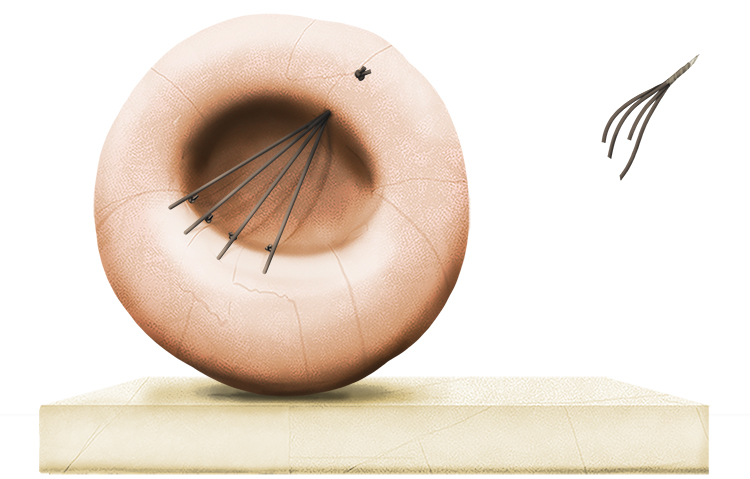
Once the paint is dry, remove the cocktail sticks to leave five holes through the sculpture.
Through the four holes on the bottom left of the inner void, thread four separate pieces of string.
Tie a knot on the inside end of each of the strings.
Tape the other ends of the four strings together and thread them through the top right hole.
Tie a knot on the outer side of the top hole, holding the four strings into place, then cut off the excess.
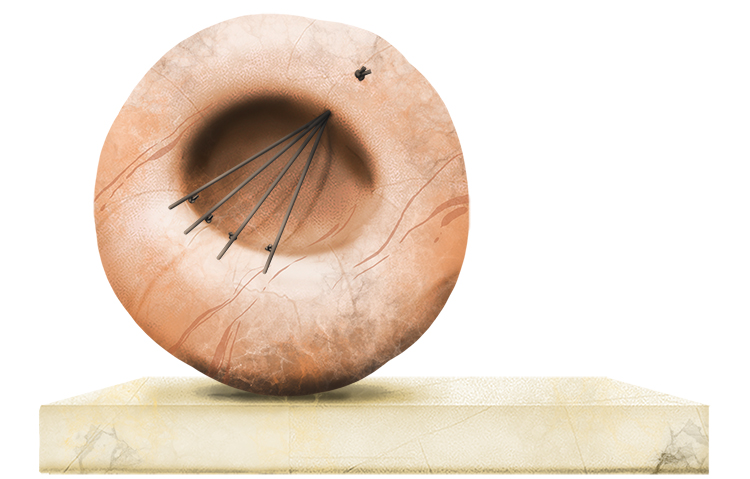
Now all that is left to do is to add some final details in paint. Try using a sponge to add mottled detail and a fine brush to create the veins you find in marble and other precious stones.
Barbara Hepworth.


