
Salvador Dalí Art Project
Salvador Dalí's paintings are instantly recognisable for the scenes and imagery he depicted. He often repeated subjects in multiple paintings: clocks, eggs, his own image and that of his wife, Gala.
Another of his hallmarks was the contorting of animals, specifically elongating their legs. There are examples of this style in his paintings of horses, rhinoceroses and, more commonly, elephants. You can see the way he extends the elephants' legs on this detail from his painting The Temptation of St Anthony:
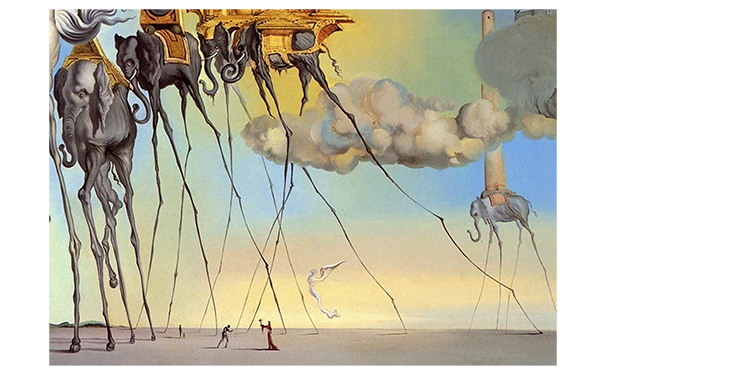
In these images, Dalí manages to maintain a high level of detail while morphing the shape of the animals to fit his dreamlike scenes.
However intricate Dalí's work seems, here's a step-by-step method to drawing an elephant inspired by him.
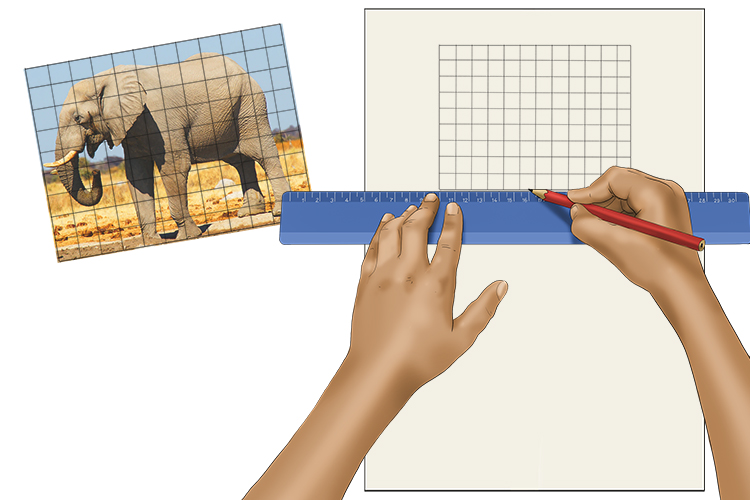
Start by finding a photo of an elephant. A side profile of an elephant is best for your first attempt; other angles are more difficult.

Use the Mammoth Memory grid method in preparation for your drawing. Think about the placement on your paper when doing this – you want to place it high up to allow room for the exaggerated legs below.
Once you know the dimensions (in grid squares) of your reference image, draw a matching grid in a box at the top of your paper (a grid doesn't always have to fill the canvas).
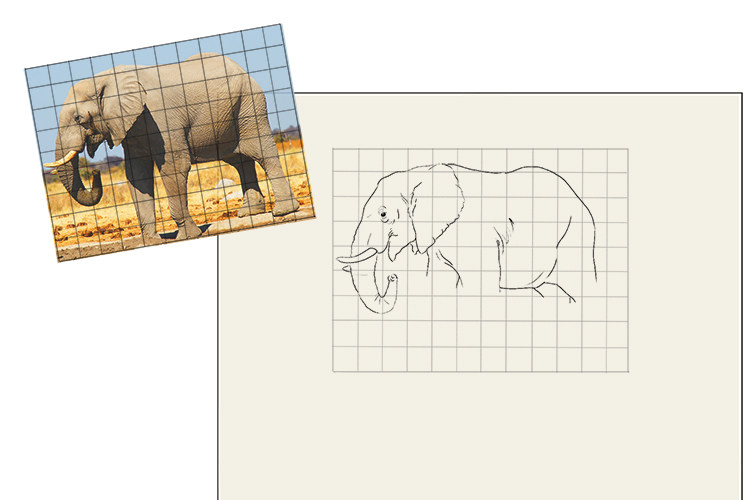
Once your grid is prepared, use it to draw your elephant's head and body, leaving marks where the top of the legs will start.
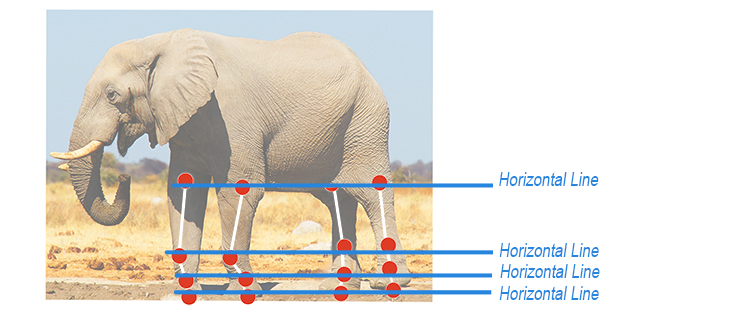
Refer back to your reference image and look at the elephant's legs. You will notice that there are clearly visible joints. Mark them with a circle to remind yourself of the placement of each joint. Also, mark the base of the foot with a dot.
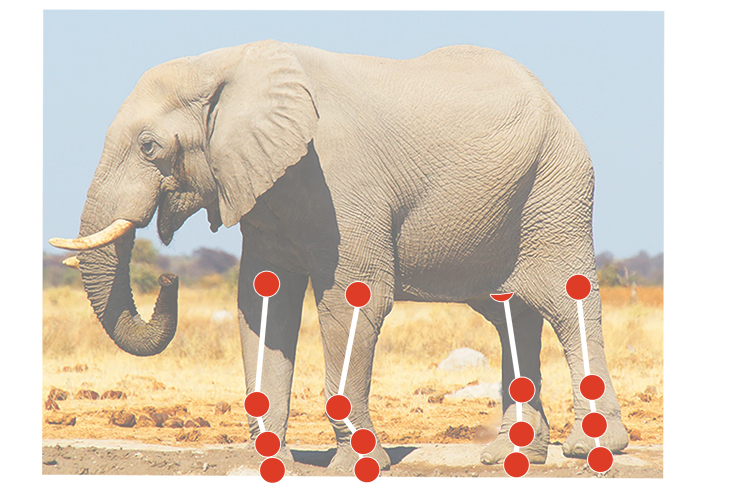
As you can see below, the dots fall into clear horizontal lines. These lines are what keeps the form in your drawing working well: as long as each horizontal line is still level, the distance between each one can be changed.
Now you are familiar with the anatomical features, you can go back to your drawing.
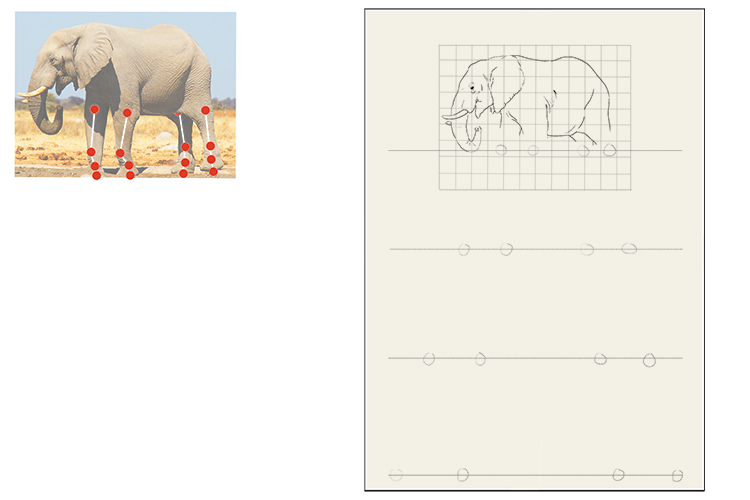
On your paper, faintly draw four horizontal lines under your elephant. The bottom line (the feet) should be sitting low down near the bottom of the page and the top just under the marks you left for the legs on the elephant's body.

These lines will be your new horizontals for the elephant's joints and feet. Lightly draw in the circles from your reference image on each line. The top line's circles can be closer together in proportion with the elephant and the circles on the other lines can get wider apart at each stage.
Now you have your joints in place, you can lightly draw in the shapes of the legs. Dalí's drawings and paintings of elephants have long and extremely thin legs, getting wider at the joints, so try to create the same look.
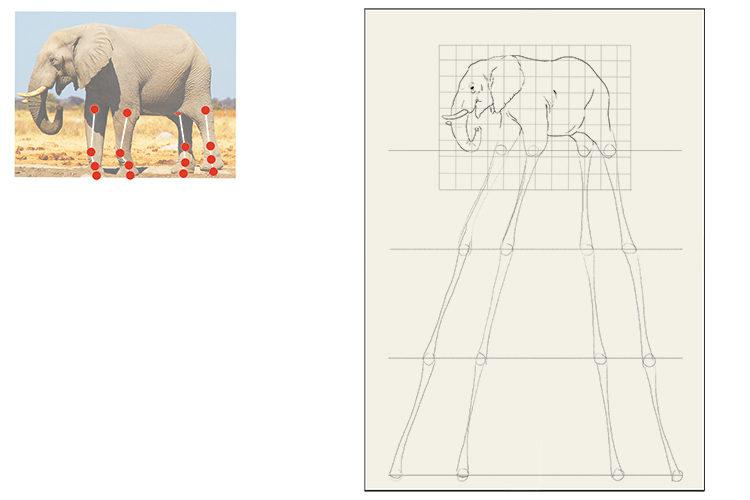
If you are happy with the placement of the legs, you can draw them in darker, adding details to the knees and the feet.
You can then erase the grid and the horizontal lines.

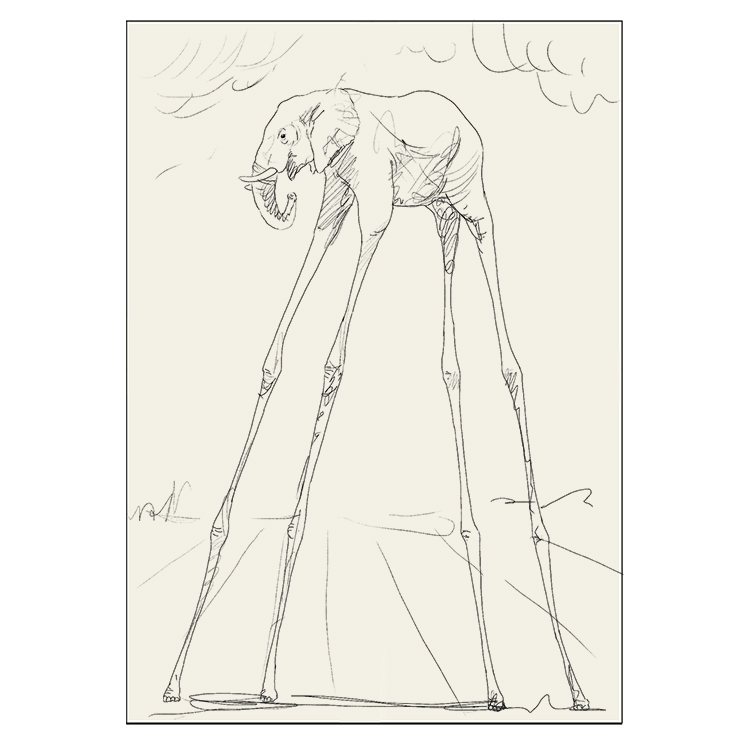
You may wish to paint your elephants in the highly realistic style of Dalí's finished paintings.
A more expressive method would be to add details in simple, lively marks that reflect Dalí's quick drawings and sketches, like we have here:
Salvador Dalí.
Salvador Dali Art Project 2
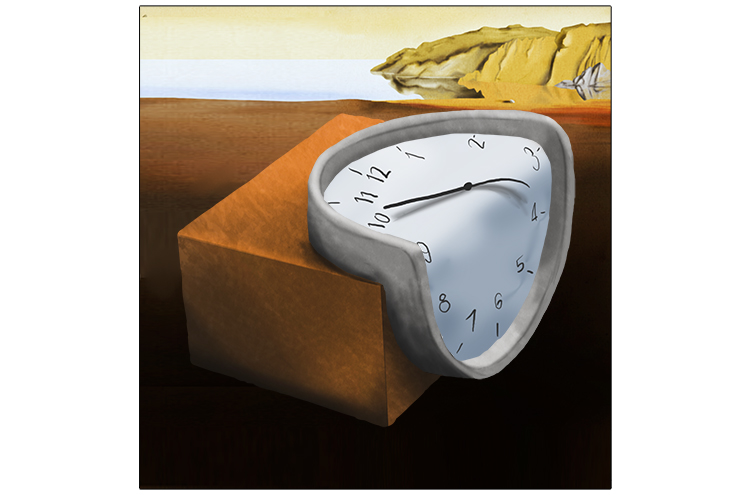
Another recurring element in many of Dalí's paintings is a melting clock. The clocks always appear almost liquid, hanging from objects or flowing over items. The most famous example of this is his painting The Persistence of Memory. As you can see in our version of the painting below, all three of the clocks shown have this trademark 'melted' appearance.

The clock hanging over the edge of the ambiguous object on the left of the painting is the one we are looking at in this project.
In order to draw a clock falling over an edge at a right angle like this, you can treat it as two separate drawings.
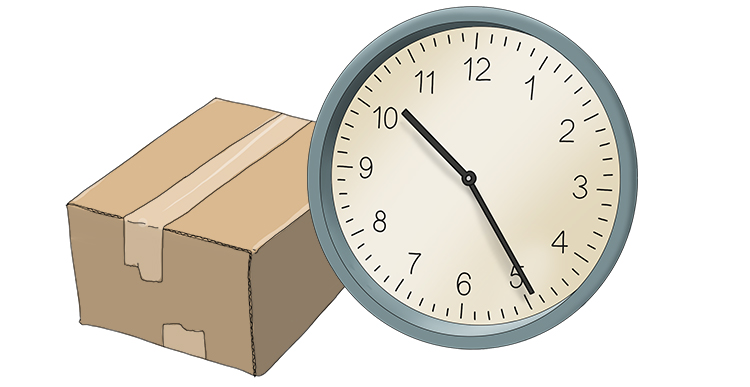
You will need a clock and a box. The box should be half the height of the clock.
When looking at the clock in Dalí's painting, you can see that there are two perspectives visible:
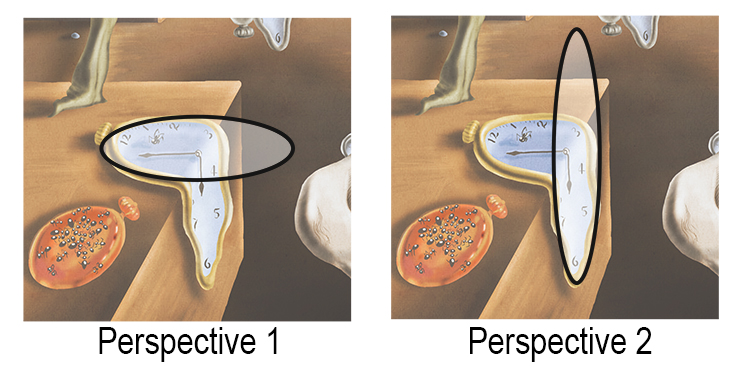
We can use this to help us when drawing our clock. Placing your clock in each of these positions separately when drawing it will ensure that the angles you see are correct.
You could take photos of this process throughout and use the Mammoth Memory grid method for each stage, but drawing from reality is brilliant practice, so try it out.
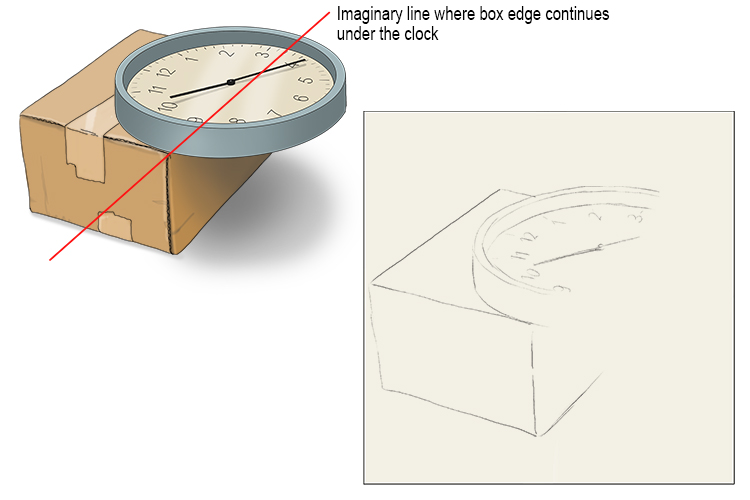
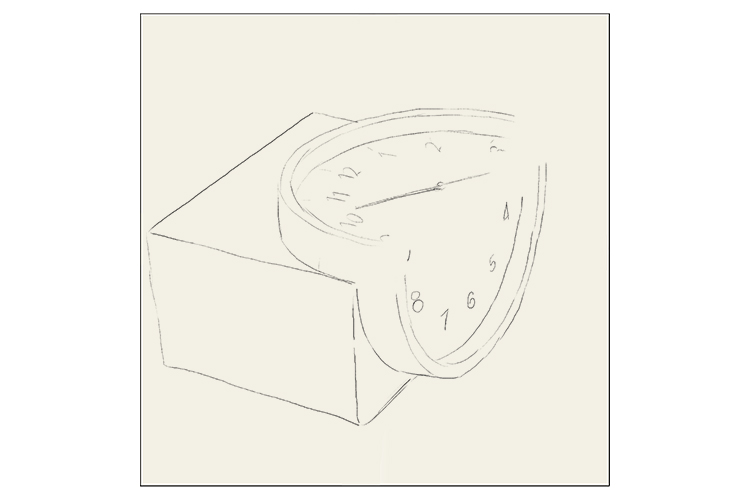
Start by placing your clock in the horizontal position and drawing what you see. You have to imagine the line of the box corner continuing through the face of the clock in order to stop your drawing at the right place.
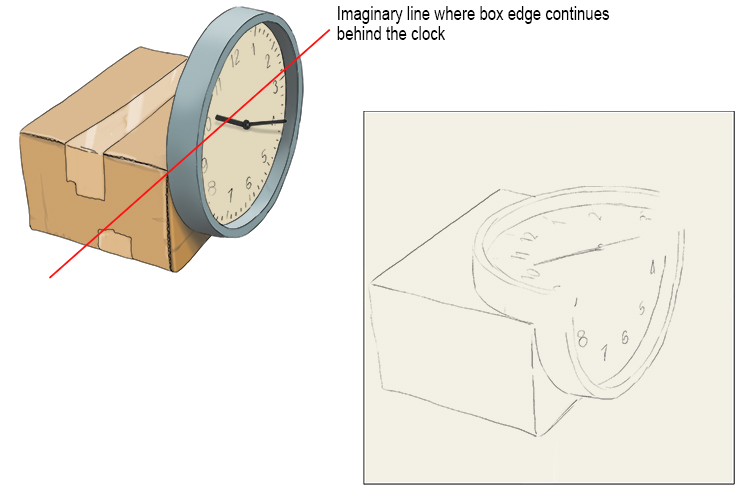
You can now stand the clock in an upright position against the right-hand face of the box. Be sure not to move the box when you do this, you want to be drawing it from the same angle to make sure it lines up correctly in your drawing.
Continue with your drawing, and again stop drawing the clock before it passes in front of the previous section.
Now you have the two views of the clock marked out around the same box and a gap through the centre like this:
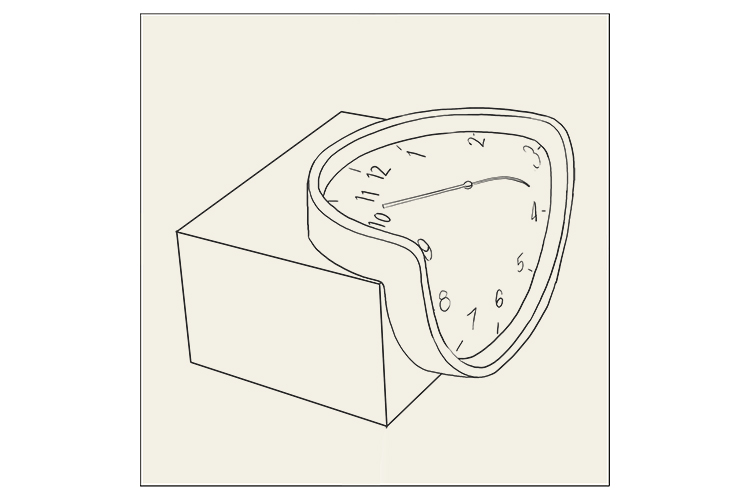
The two halves of the clock can now be connected. Remember, Dalí made his clocks look melted, so make the joins curved. It needs to look as if the clock has melted and fallen over the edge of the box. Remember to make the numbers and the hands of the clock distort over the corner too.

Once you are happy with the way your melted clock is placed, you can erase anything you don't want, draw in the lines you want to keep a little darker, and make the box line straight.
You can now add colour to your drawing, whether it be with coloured pencils, pastels or paint. Once the light and shade are visible on the clock face, the melting clock will look even more effective.
You can add other details around it, such as a landscape, similar to those in Dalí's paintings (using the Mammoth Memory grid method if you wish).
Salvador Dalí.


