
Ambient Light – already existing light surrounding a subject
Note: ambient light is the light that is already present, whether it's created naturally or artificially (for example, from a street lamp), as long as it's continuous.
To remember what ambient light is, recall the following mnemonic:
I am being lent some light (ambient light) but the light already present is all I need.
Ambient light is such a broad subject as it refers to any available light in the area where you are taking your photo or drawing.
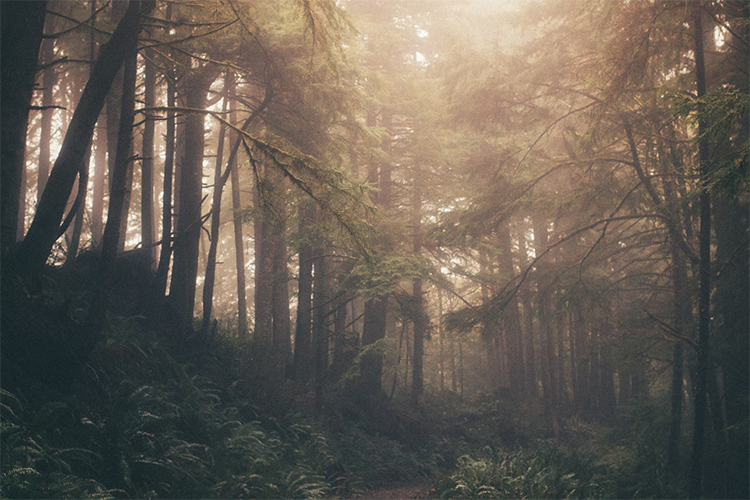
As shown above, you don't need to add any light to a scene to create a beautiful photo. The natural sunlight makes the forest appear to glow.
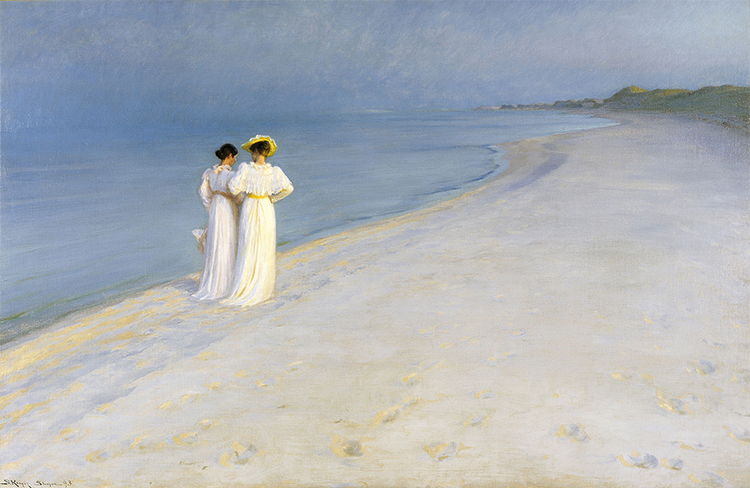
Summer Evening on Skagen's Southern Beach, by Peder Severin Krøyer
The piece above was painted without any light artificially added in and used the natural light of the summer evening.
Ambient Light Project
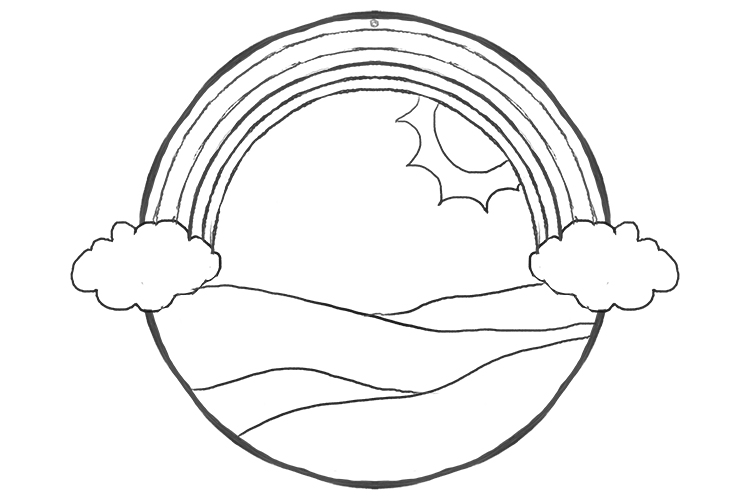
For this project we will be making a light catcher (or sun catcher) which is a decorative see through material that is hung in a window that disperses the ambient light from the sun onto the walls of a room and creates colourful patterns on the surrounding surfaces. You will need: coloured acetate, black card, scalpel, a hole punch, a piece of ribbon, glue (PVA or a glue stick should be fine), pens, coloured pencils and paper.

Sketch a simple pattern or design, make sure it has several sections for different colours. We have chosen a rainbow with a stylised landscape underneath.
Colour your design with the coloured pencils.

Once you're happy with your design, use the Mammoth Memory grid method to copy your design lightly in pencil over to your black card.

Cut out the design with your scalpel. Make sure the lines are thick enough to allow you to glue the acetate on later.


Put the cut out black card over each of the acetates for each colour you need and with a dry eraser pen mark the edges of each design. Remove the black card and for the yellow acetate you should be left with the following:

Cut around each piece you need leaving sufficient edge to be able to stick the acetate onto the black card. But first wipe the pen marks off with a tissue.

Stick the acetate to the black card using glue.

Use the hole punch to pierce a hole in the top of the design and thread some ribbon through and display your work!

Ambient light.


