
Composition – The arrangement of elements within a work of art
To remember what composition is, recall the following:
Compare positions (composition) and decide on the best arrangement.
Composition is important to consider as it will determine where the viewers attention is drawn, as well as influencing the story and emotions the piece conveys. There are various techniques for composition that will help you decide where best to position your focal points and areas of detail. Some of the most commonly used techniques are:
- Rule of Thirds
- Golden Spiral
- Golden Triangles
Which composition rule you use is purely down to the story you wish to convey.
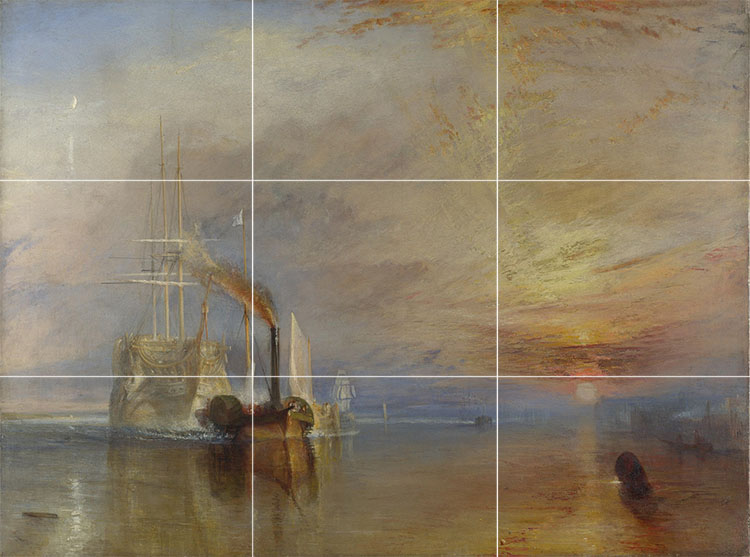
This painting below is an example of the rule of thirds. The main focal point of the piece is the ship which has been placed on one of the points where the horizontal and vertical lines intersect.
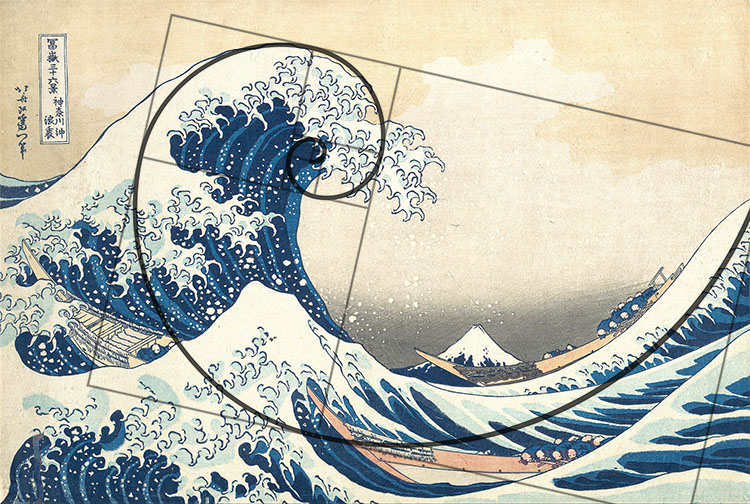
The next painting below is an example of the golden spiral technique. The main focal point is the peak of the wave, with all the elements leading the viewers eye towards this point.
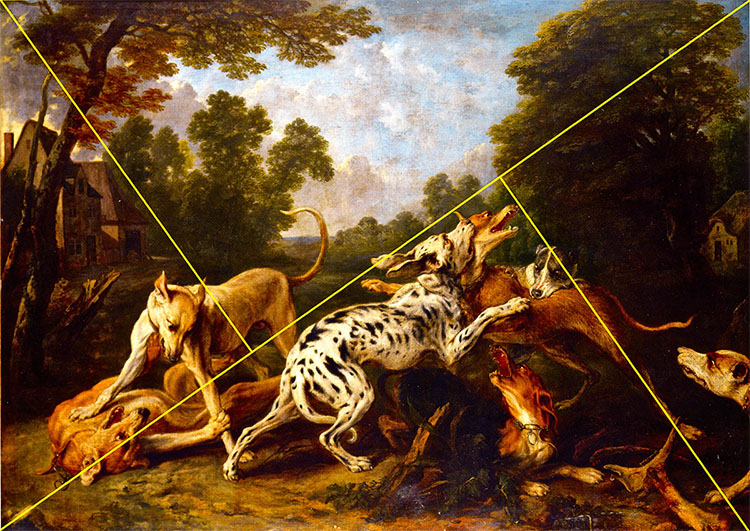
The painting of the dogs uses the golden triangles technique. In this image, the main focal points are the dogs fighting which are all gathered in the bottom triangle.
Composition Projects
For these projects we will be creating a view finder for each composition technique mentioned above.
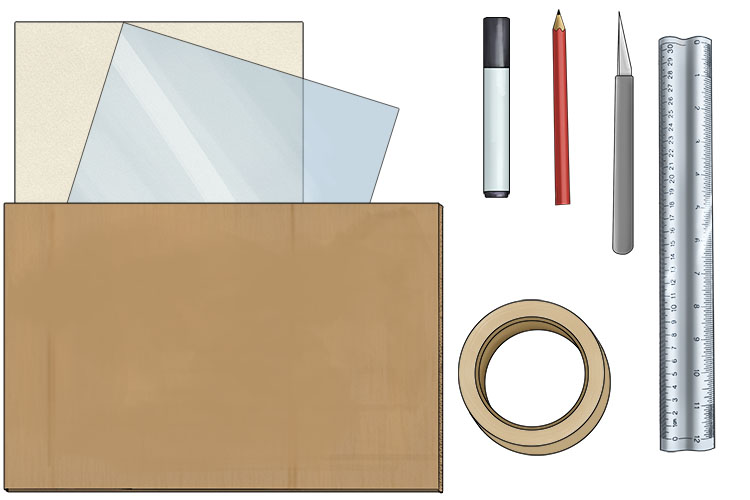
You will need cardboard, a craft knife, A4 sheet of acetate, safety ruler, permanent marker, pencil, paper and tape.
Rule of Thirds Project
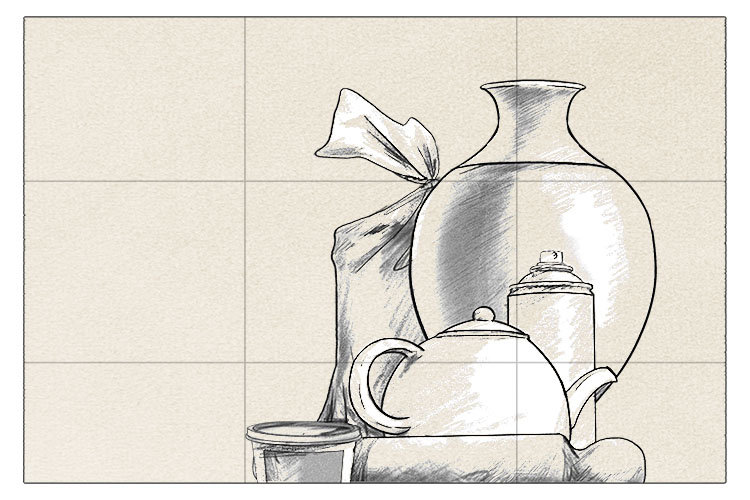
For our rule of thirds project, we're going to use our view finder to help us find the perfect angle to draw a still life scene from.
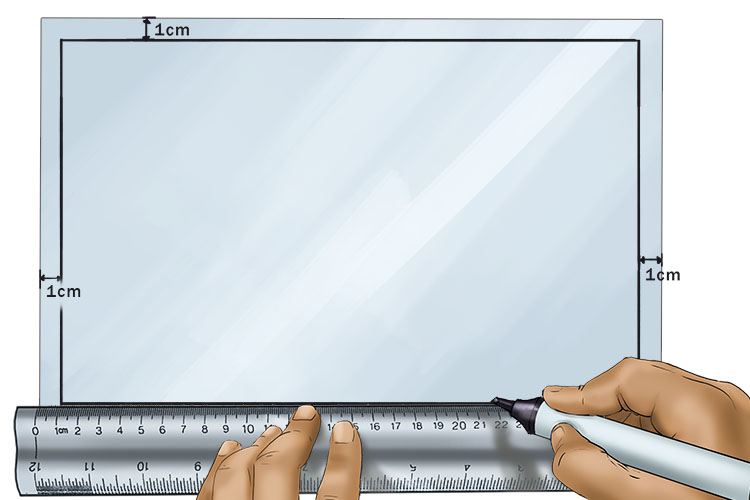
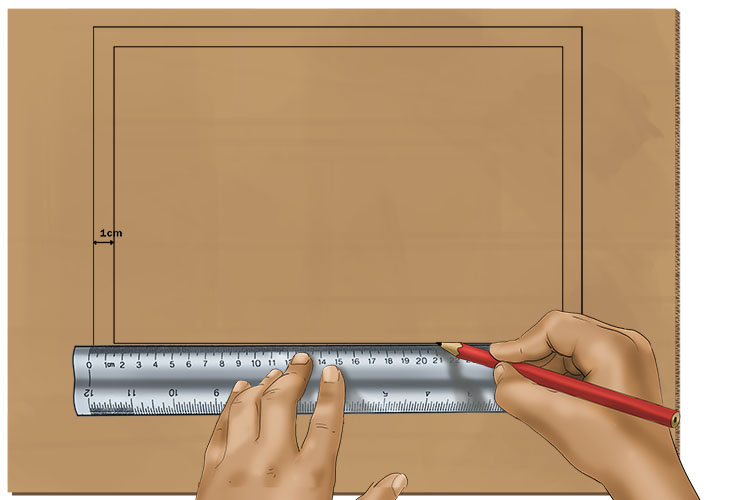
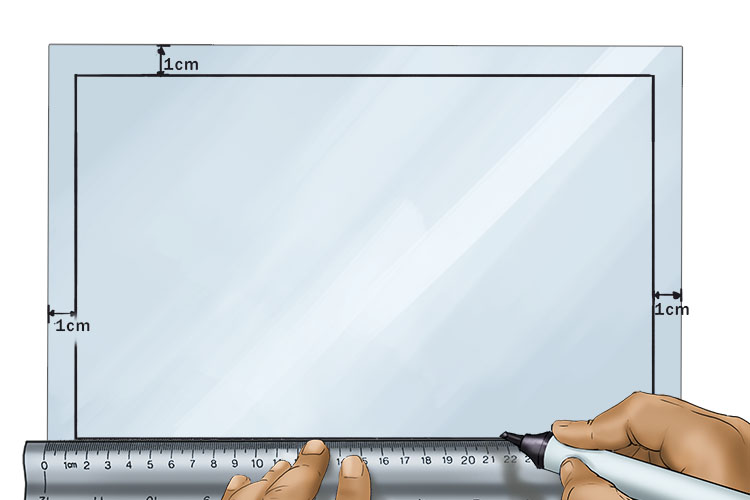
On your A4 acetate, draw a rectangle that's 1cm in from each edge.
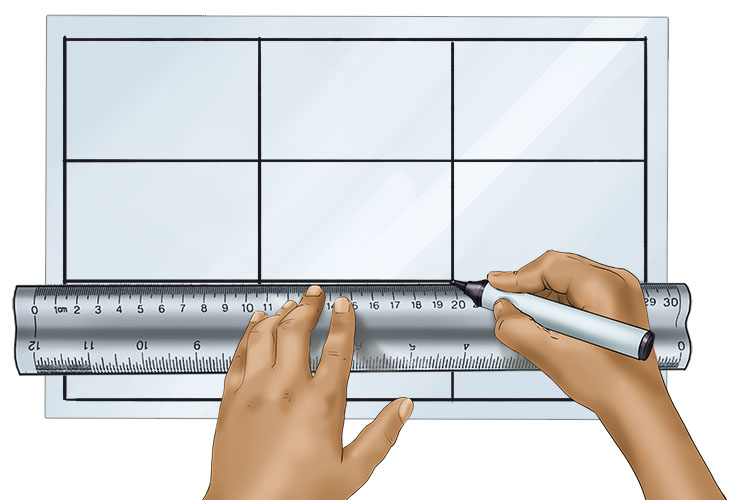
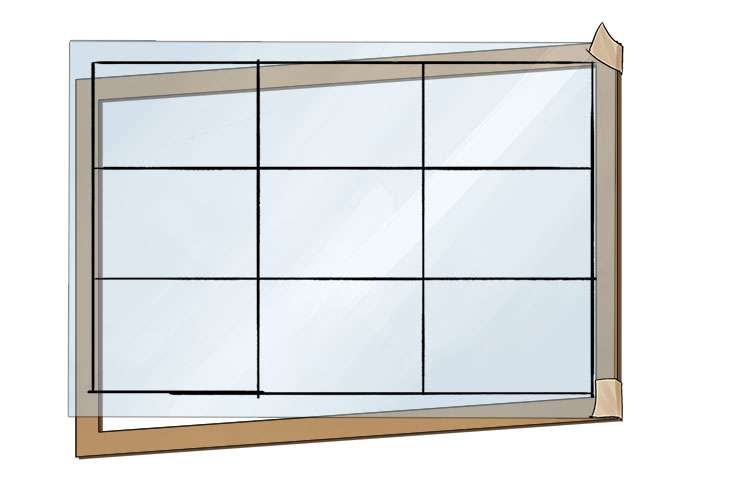
Now divide that rectangle into a 3x3 grid, this will give you your rule of thirds composition guide.
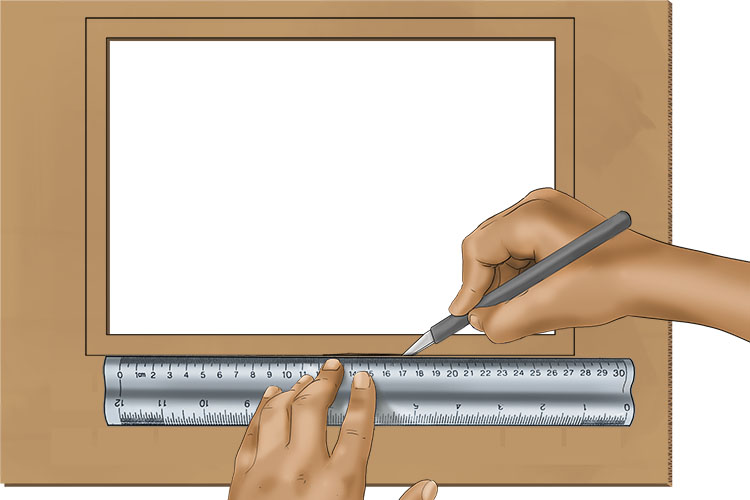
Next draw a rectangle on your cardboard that is the same size as your acetate.
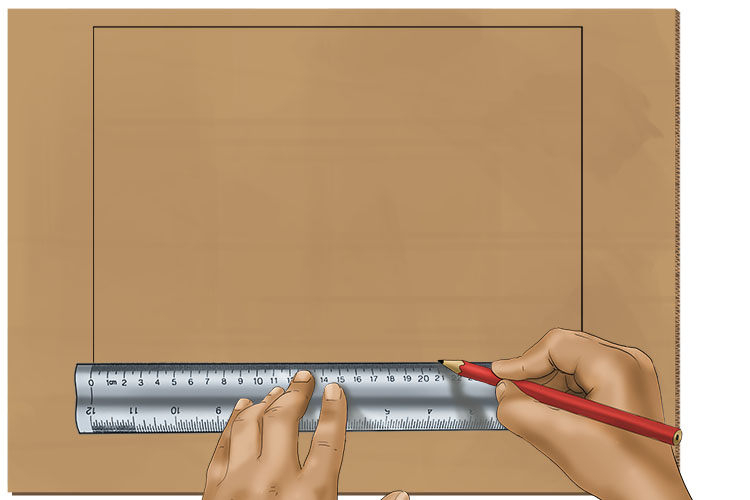
Then draw a second rectangle inside the first that is 1cm in from each edge, just like we did previously on the acetate.
Now cut these rectangles out, leaving you with a cardboard frame.
Tape this frame onto your acetate. This will be your view finder.
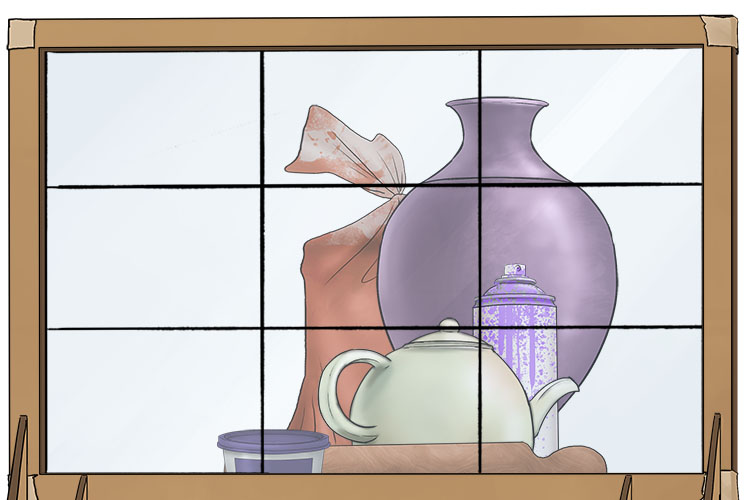
Gather some household objects to make up your still life scene (anything will work as long as there's some variety in shape and size).
Use your view finder to decide which angle will provide you with the best composition. You should be aiming to have the largest grouping of objects in line with one of the vertical guides.
Once you've decided on an angle to draw from, secure your view finder in place. You can do this with something like playdough, or you can make a simple stand using the tutorial at the end of these projects.

Now draw your still life as you see it through the view finder using a lightly marked out grid on the paper as a guide to the placement.
Golden Spiral Project
For our golden spiral project we're going to make a smaller view finder that we can use to help find the right angle for well composed landscape photography.
To start you will need to cut your acetate down to a 15 x 23cm rectangle.
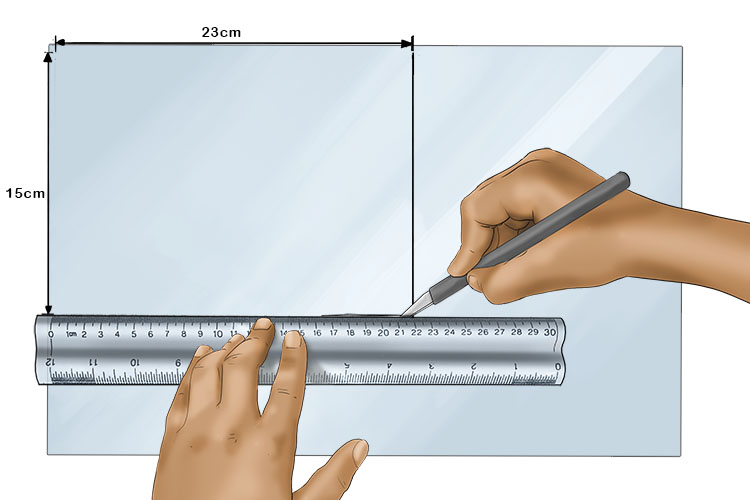
Next you will need to draw a rectangle 1cm in from each edge, like we did for the rule of thirds view finder. This should give you a 13 x 21cm rectangle.
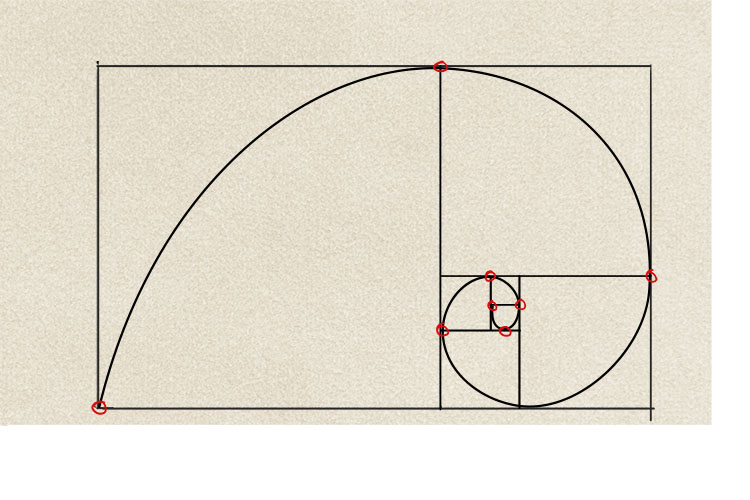
Before we draw our golden spiral on our acetate, we're going to plan it out in pencil on paper first so any mistakes will be easily fixed. Start by drawing a 13 x 21 cm rectangle.

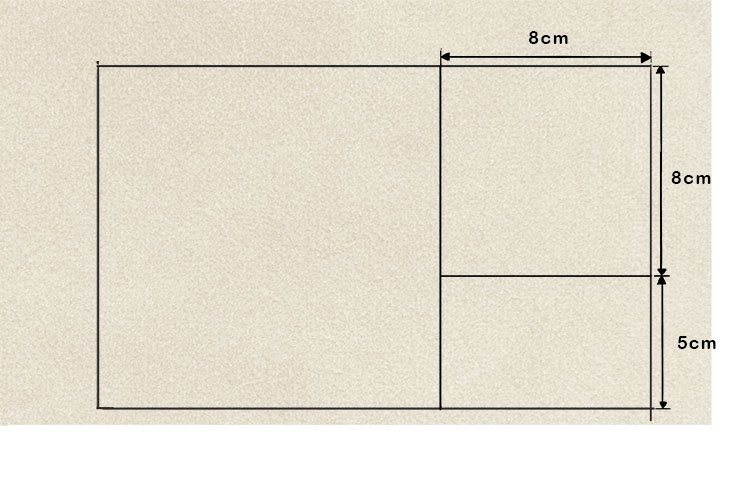
Then split the rectangle into a 13 x 13cm square and a 13 x 8cm rectangle.
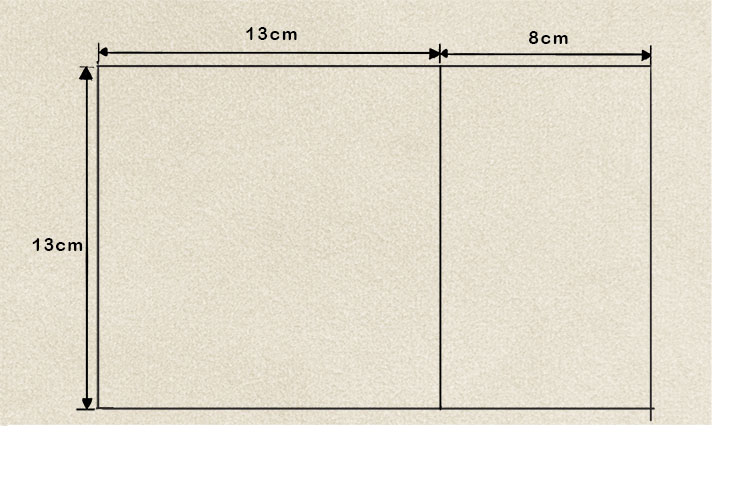
Now split the smaller rectangle into an 8 x 8cm square and an 8 x 5cm rectangle.
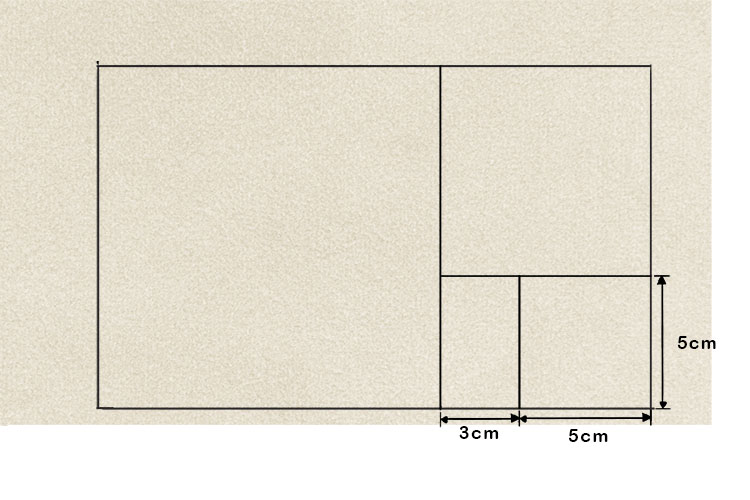
Split the smaller rectangle into a 5 x 5cm square and a 5 x 3cm rectangle.
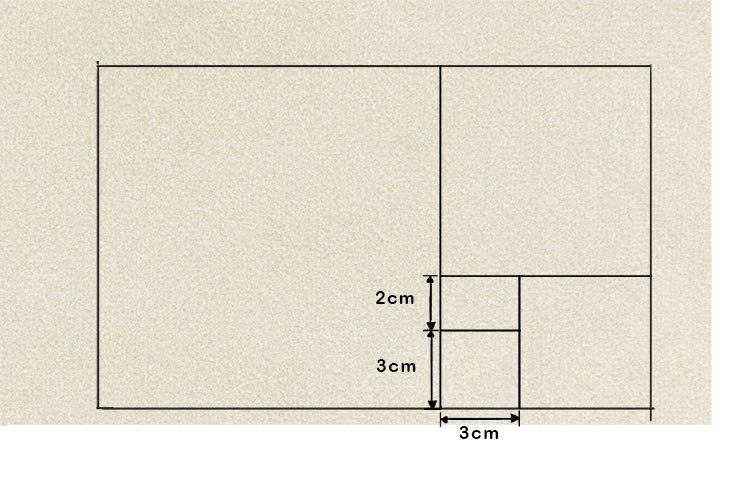
Next split the smaller rectangle into a 3 x 3cm square and a 3 x 2cm rectangle.
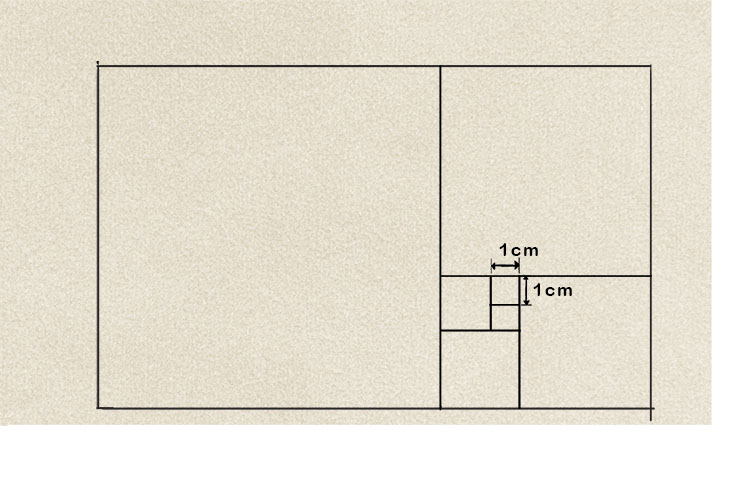
Again, split the smaller rectangle, this time into a 2 x 2cm square and a 2 x 1cm rectangle.

Finally split the smaller rectangle again so you have a 1x 1cm square. These will be your guide lines for your golden spiral.
Now you can carefully draw your spiral, making sure it passes through each of the points shown below. If you aren't confident drawing the spiral, you can use a compass to get a more consistent curve.
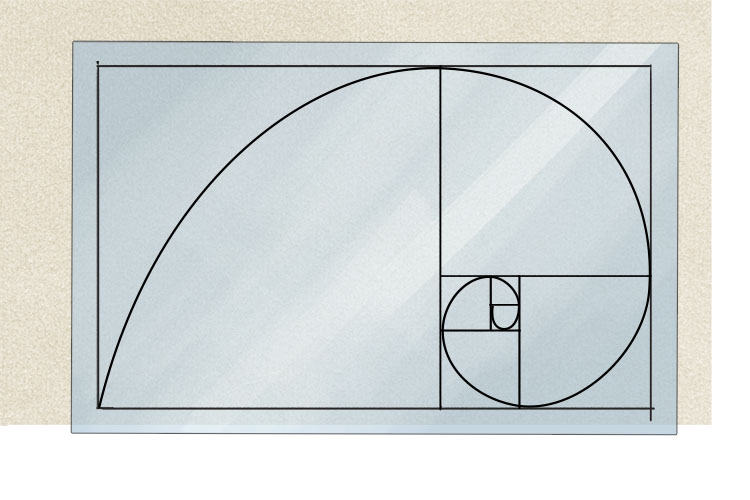
Now trace your golden spiral onto your acetate and follow the same steps as in the rule of thirds project to make a frame.
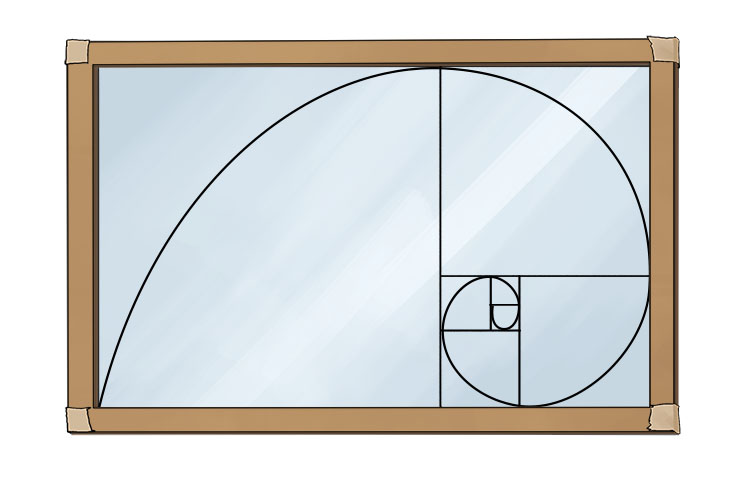
Now you can take your view finder out and use it to find compositions for your photography. When using your view finder you should be trying to find angles where the level of detail increases the closer you get to the centre of the spiral, with the main focal point being close to the centre of the spiral.

When you have set your camera up on a tripod with the acetate in the way at the correct position for your golden spiral, the acetate can then be removed and a photograph taken.

Golden triangles
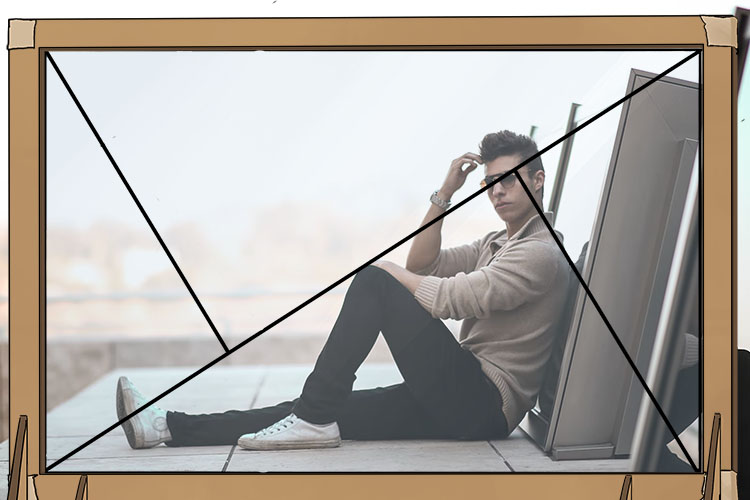
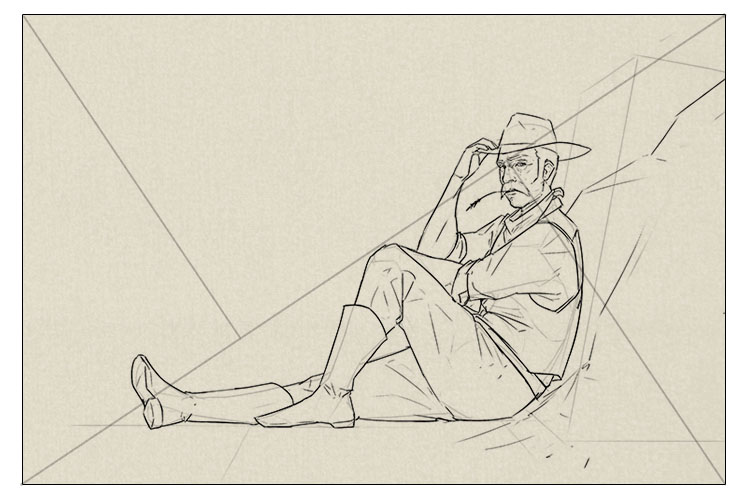
For our golden triangles project, we're going to use our view finder to help with the posing and placement of a figure for our character illustration.
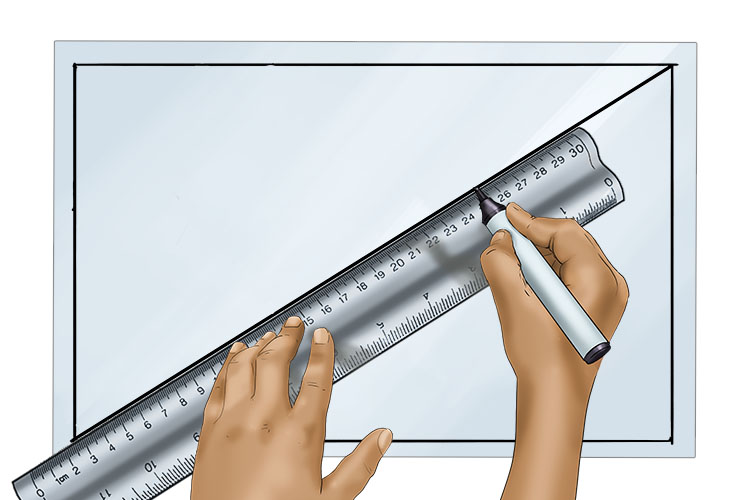
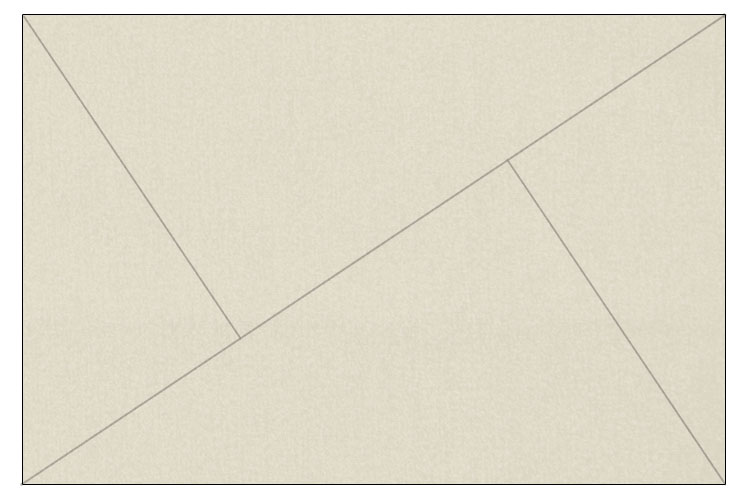
Start by drawing a rectangle on your A4 acetate, 1cm away from the edge.
Draw a diagonal line from the bottom left to the top right of the rectangle.
From the top left corner, draw a straight line that meets the diagonal at roughly 90 degrees.
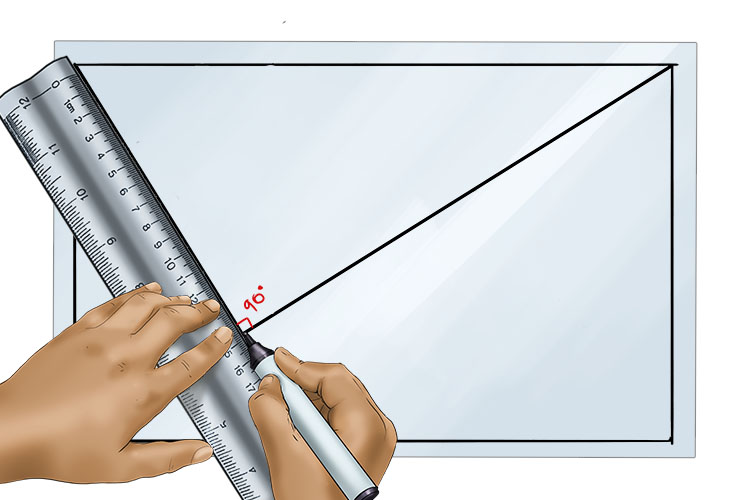
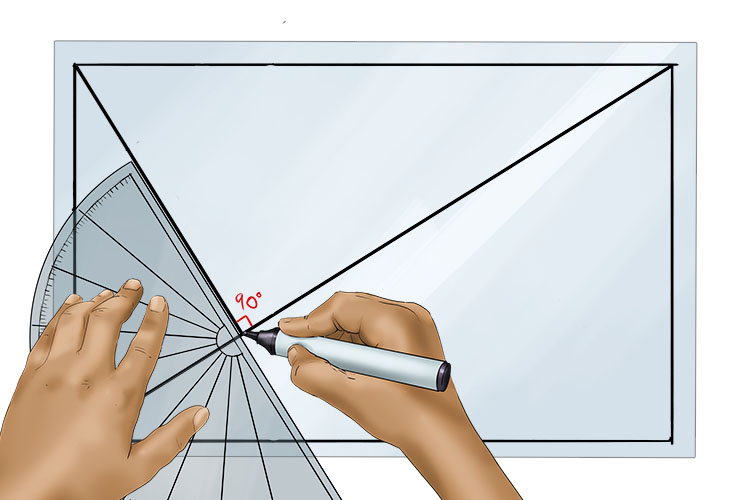
You can use a protractor measure this angle first if you aren't confident doing a 90 degree angle by eye.
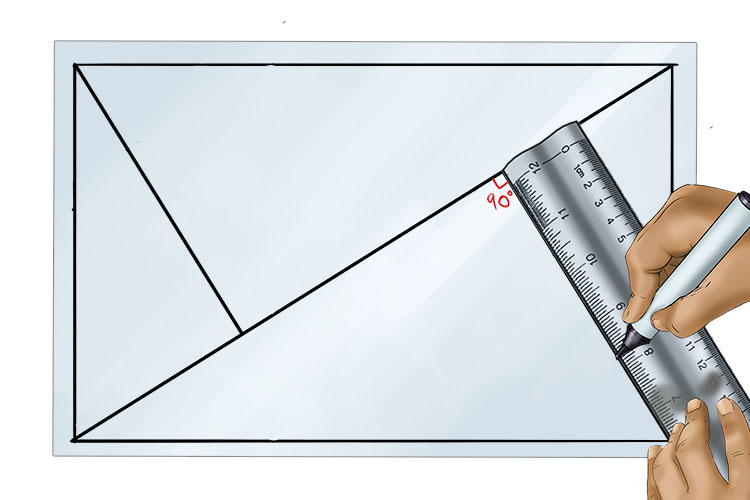
Repeat this step from the bottom right corner to the diagonal line.
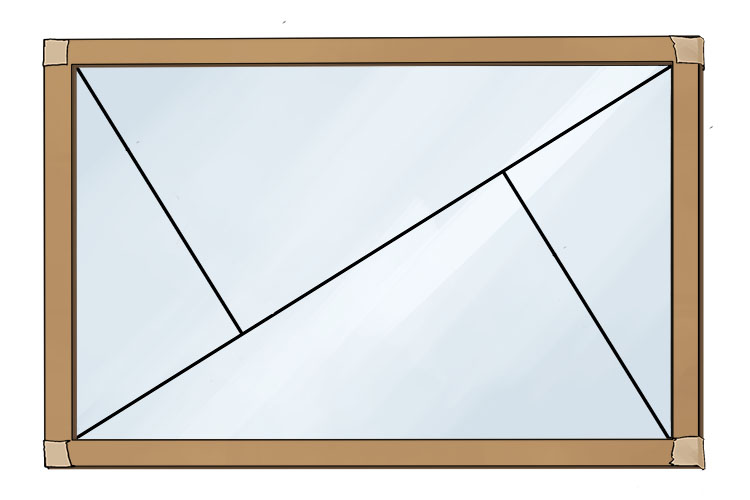
Now create a frame using the same method as the previous two projects.
Now secure your view finder in place using playdough or make a simple stand out of cardboard using the tutorial at the end of these projects.
Have a friend pose on the other side of the view finder, making sure their head is on one of the two intersection points on the grid and their body is in one of the larger triangles, or following the diagonal line.
On a separate piece of paper, redraw your golden triangle grid lightly in pencil.
Now complete a quick sketch of your friends pose, making sure to draw this lightly so it won't be visible on the final drawing. This shouldn't be a detailed drawing, it just needs to show the basic structure of the body. Once you've done this step your friend can stop posing as we're going to use the completed sketch as a base to draw whatever character we want.
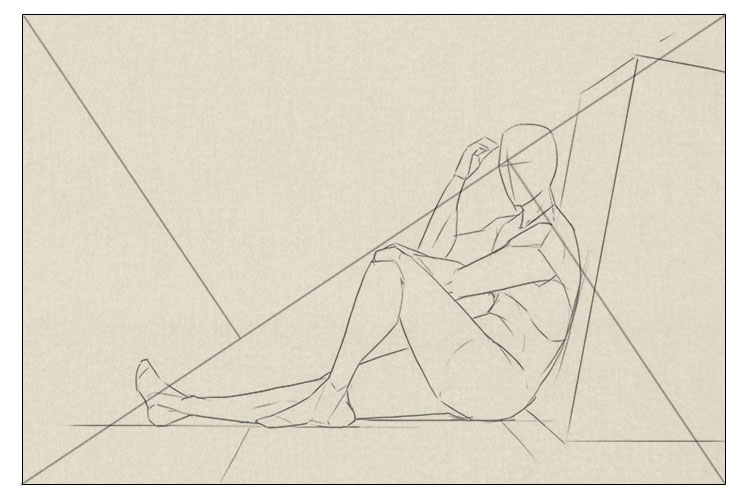
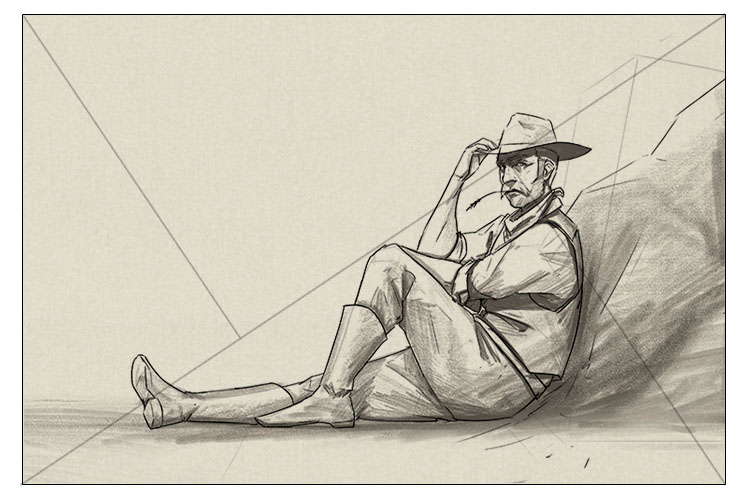
You can make the character as simple or as complex as you like, as long as the focal point of the drawing is still on the head.
Once you're happy with your character you can add some shading. Try to make sure the head has the most contrast, this will help draw the viewers eye to the focal point of your piece.
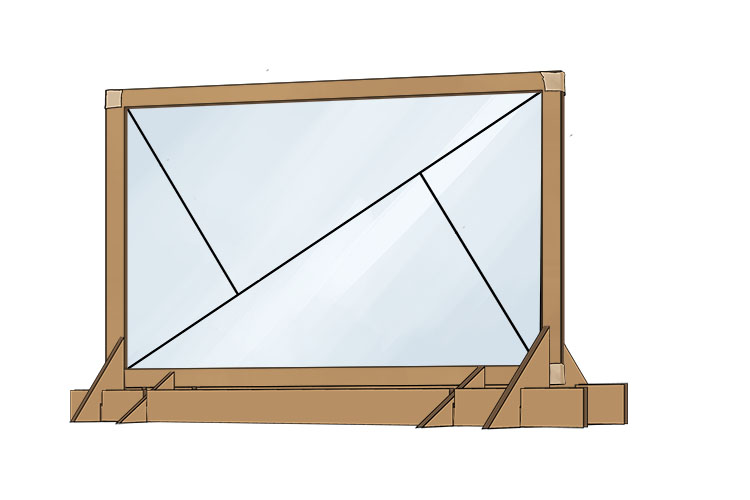
Cardboard Stand
To make a stand to keep your viewfinder in place, draw out the template below onto cardboard.
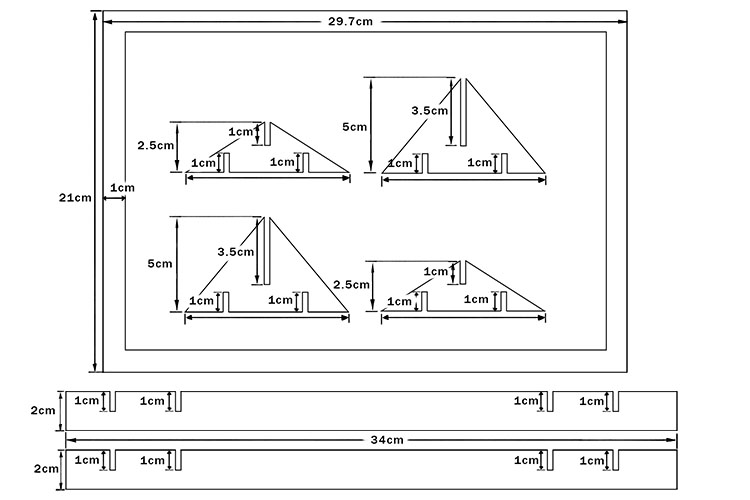
Don't forget to draw out the boarder too.

Now cut out the pieces using a safety ruler and craft knife.
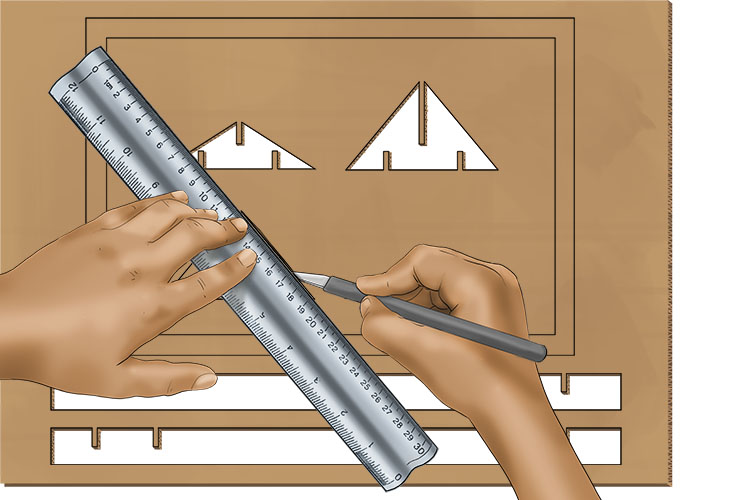
Next, assemble the pieces as shown below.
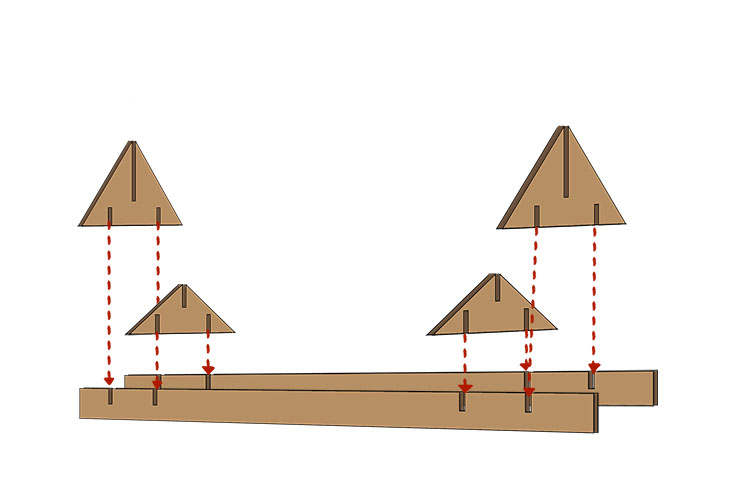
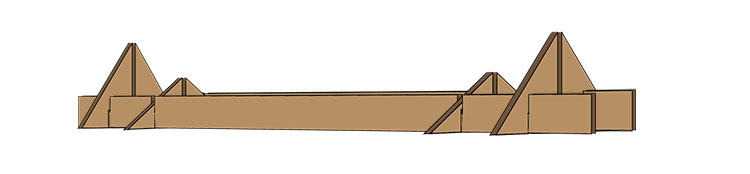
Your different view finders should now fit into the stand.

The above stand with the correct acetate will make it a lot easier to find a view that you prefer.
Composition


