
Collagraph – A method of direct printing in which materials such as string, cardboard and other found materials are stuck to card or board to enable prints to be taken
(Pronounced koll-ah-graf)
To remember what collagraph is, recall the following mnemonic:
On his collar he printed a graph (collagraph) from materials he'd stuck to a board.
Collagraphy is a relatively recent addition to the art world, developed in 1955 by Glen Alps. Although the practice itself was not new, Glen Alps helped bring it into the spotlight and experimented with what can be achieved with Collagraphy.
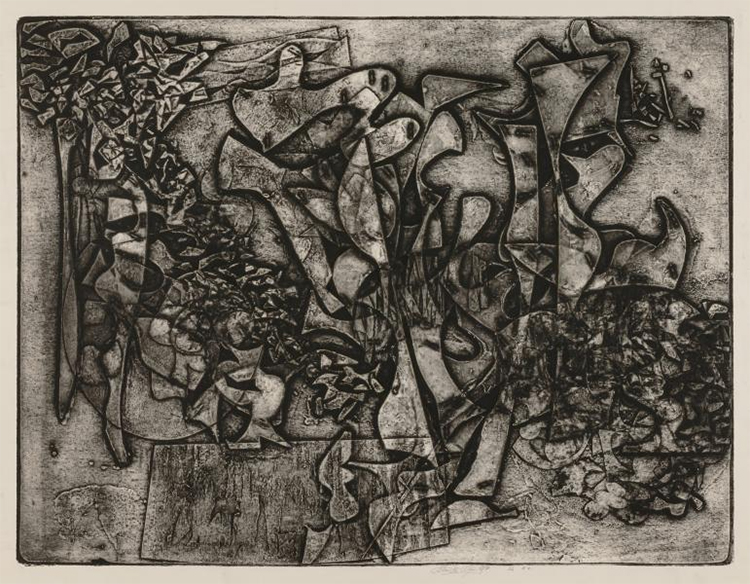
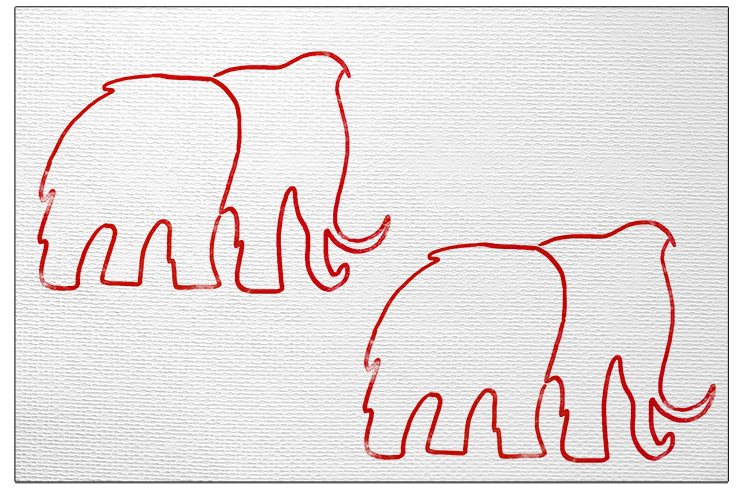
Space Tensions, 1978, Glen E. Alps.
The above black and white collagraph called Space Tensions has been printed onto paper. It has been made from a collagraphy block which has lots of shapes and textures. The layering in this print makes the print look slightly 3D. This piece is abstract so allows each individual to have their own interpretation of the message and design Alps is trying to portray through his collagraphy print.
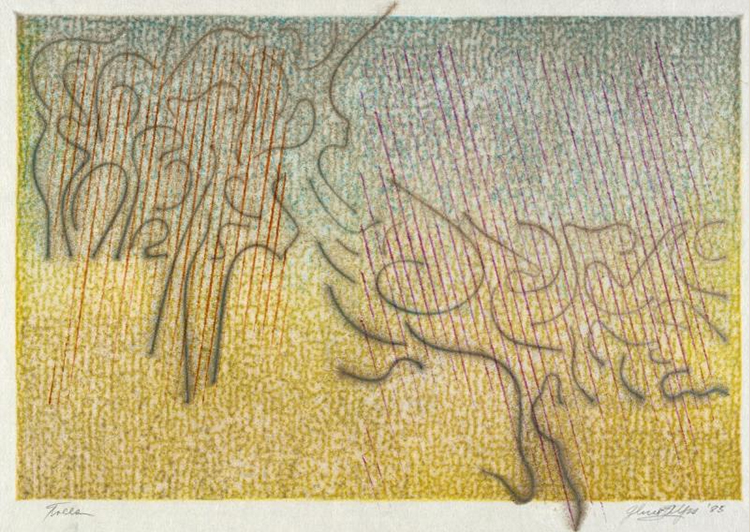
Trees, 1978, Glen E. Alps
It is unclear what objects Alps used to make these collagraphy paintings, but the one above could have easily used string for the grey squiggly lines.
Collagraph Project
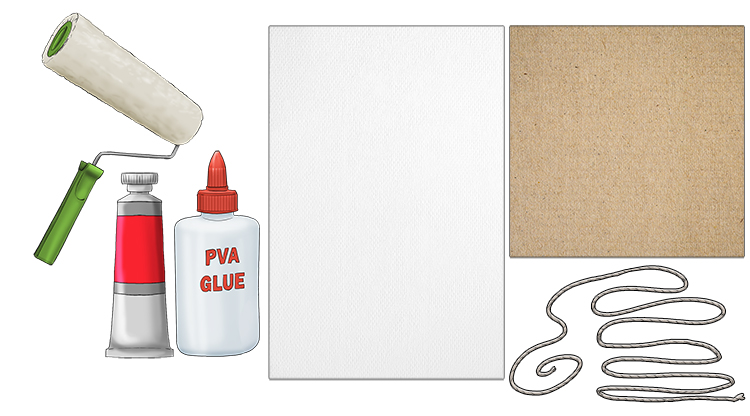
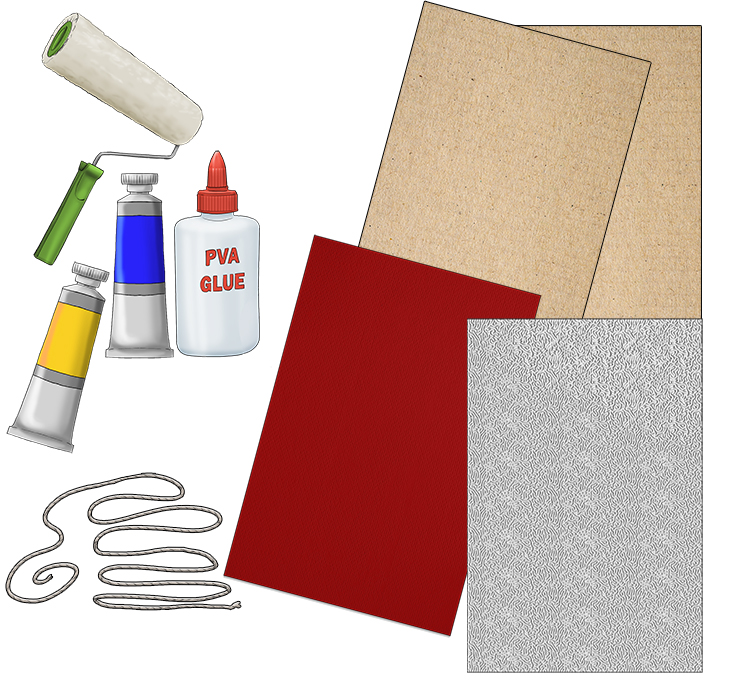
For this project you will need: strong card, glue, string, paper, a paint roller and acrylic paint.
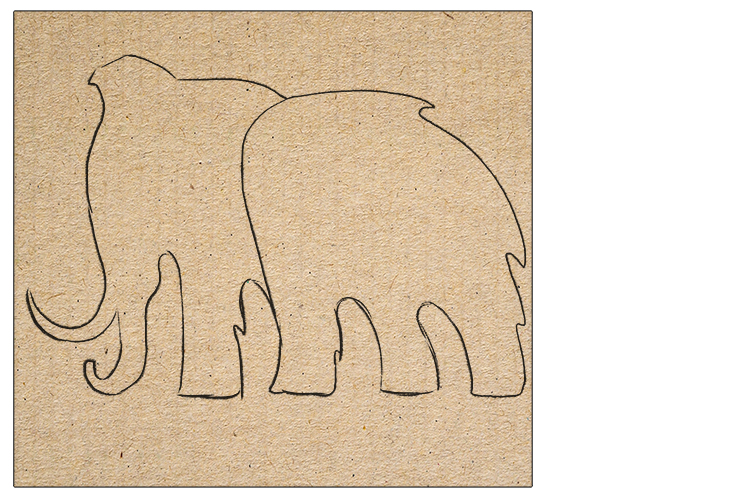
Firstly, you need to draw the design you'd like to print. Draw a simple design onto your card. It could be a stylised animal, person or flower, or a pattern or shapes. We have chosen the Mammoth Memory logo. Remember, if your design contains words, or anything that needs to be a certain way around, you have to draw it backwards, then it will be the correct way around when printed.
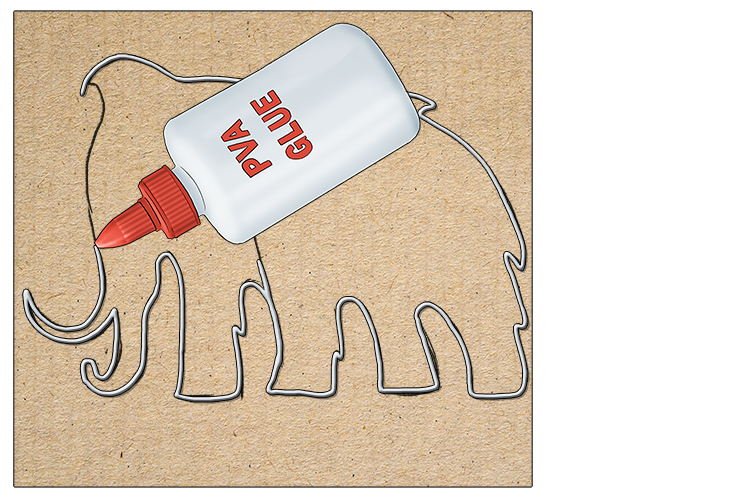
Then, use the PVA glue to draw along the lines.
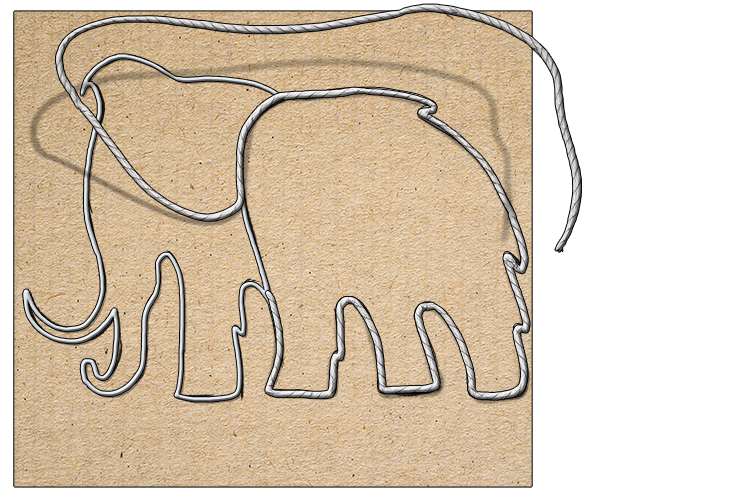
Before the glue dries, stick your string along the lines of glue. You may have to cut the string if there's any intersecting lines as that'll create uneven lumps if you cross the string over itself and the paint might not print evenly.
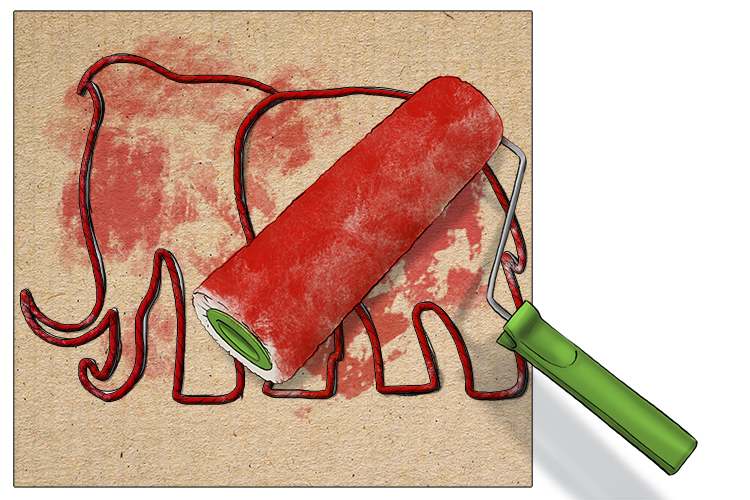
Once the glue is dry, use your paint roller to apply an even layer of paint across the whole of your design.
Place the painted design onto your paper and gently press it, trying to apply pressure as evenly as you can.
Carefully lift the card off to see your results!
Collagraph Project 2
Now you know the technique of collagraph printing, we are going to try and take it further to create a more interesting finished piece. For this project you will need: textured wallpaper (also sometimes called anaglypta), strong cardboard, glue, string, coloured paper, a paint roller and acrylic paint.
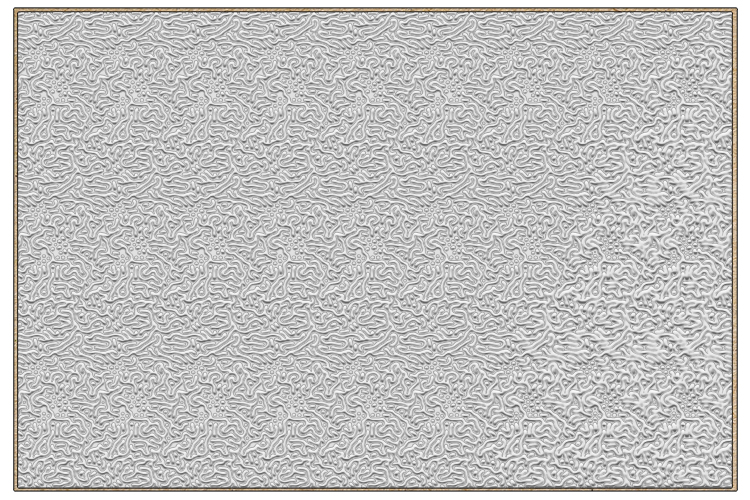
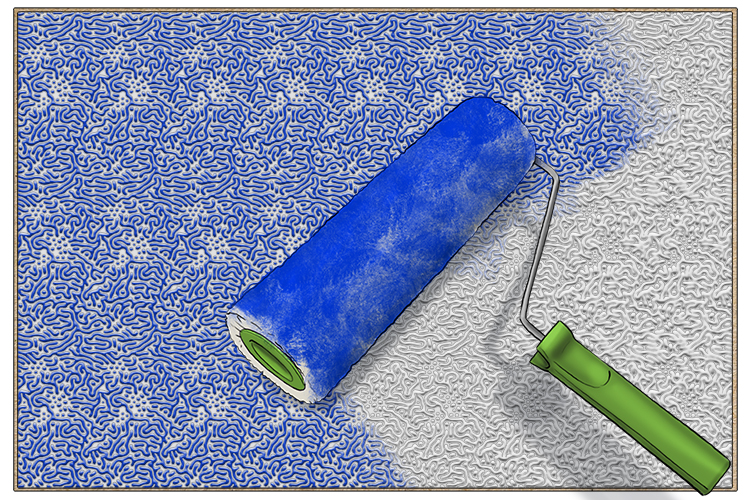
The red paper is going to be used as the base for our final design. We will use the textured wallpaper (pictured below) to press and print the blue paint onto the red paper to give it a unique pattern. To prevent the wallpaper rolling back up, stick it to some strong cardboard (the same size as the paper you're printing on). This will make it easier to handle while rolling the paint on and when using it to print.
We have chosen a dark red paper for the base colour with a brilliant blue pattern to cover it These two colours should contrast nicely, without distracting from the main subject.
Once the wallpaper is stuck onto the card, use your roller to apply the blue paint. Don't apply too much blue paint, as you only want the raised areas to print. Make sure you wash your roller afterwards, as you'll need it again soon!
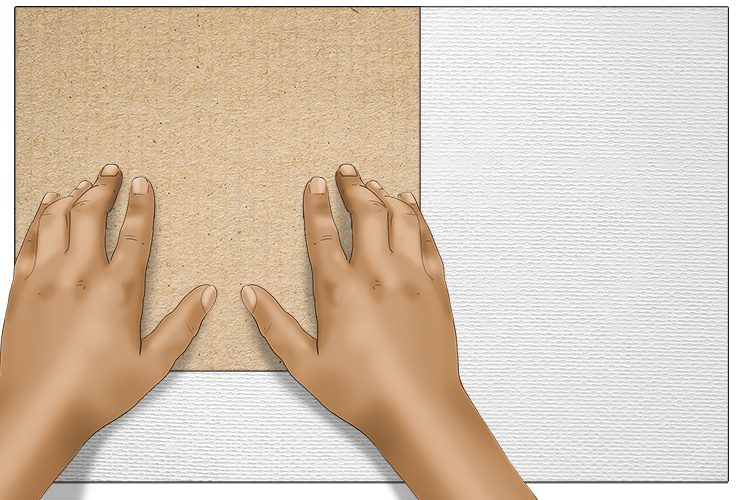
Flip the cardboard over with the blue printed wallpaper, line it up with your red card and gently press down.
Carefully lift the card off to reveal the print, as below:

While the blue paint dries, on another piece of strong cardboard, draw your design for the string. We're going to go with a stylised hare.
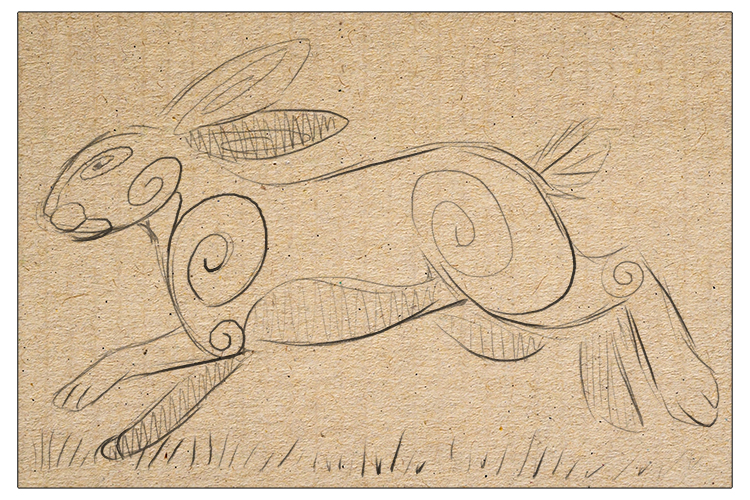
Use the PVA glue to draw along the lines of the hare.
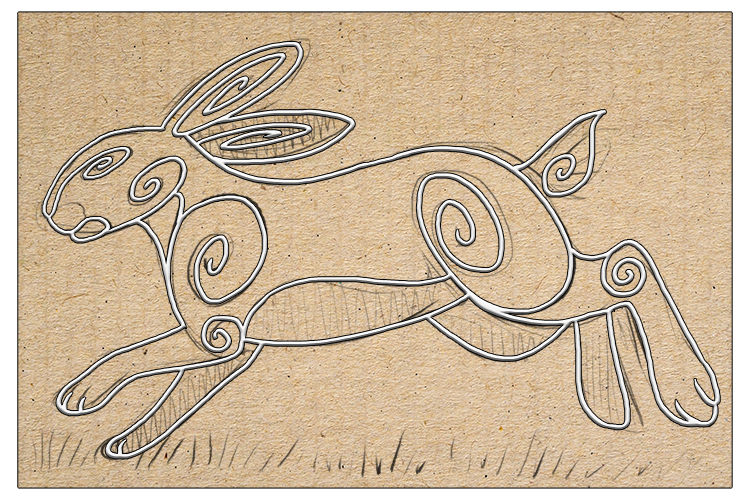
Stick the string along the lines of glue.
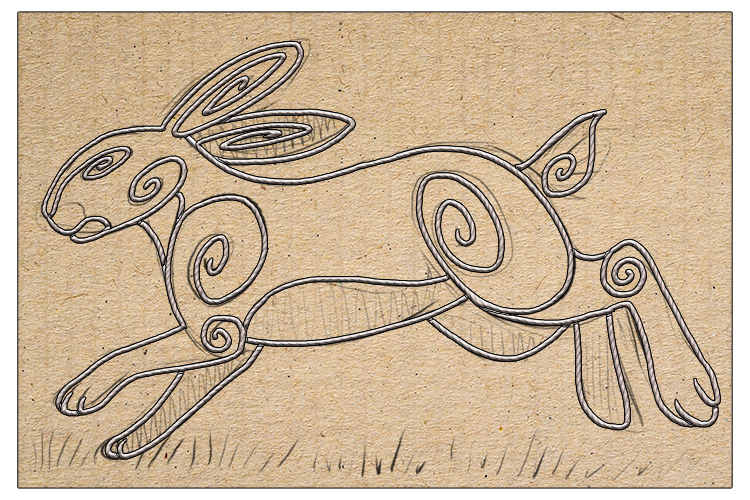
Once the glue is dry, use your paint roller to apply a bright yellow paint onto the string.
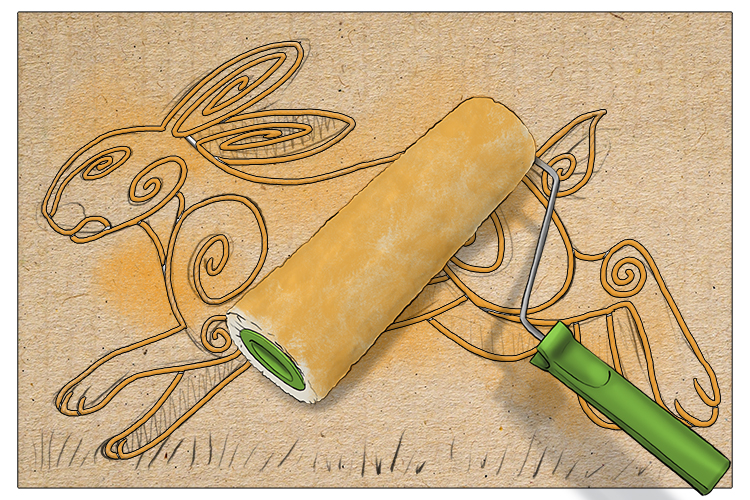
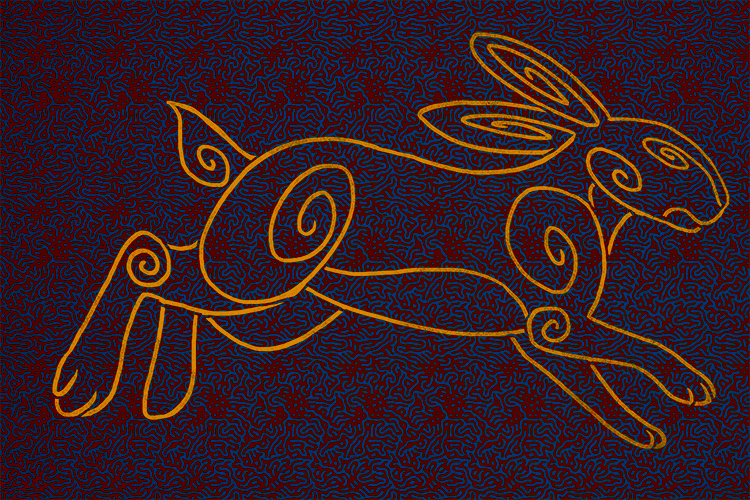
Turn this painted hare design upside down and press it gently to the red and blue textured paper.
Carefully lift the card off to see your results!
Collagraph.


