
Carving – A technique used by sculptors using tools to cut or scrape away a solid material such as stone or wood
To remember what carving is, recall the following mnemonic.
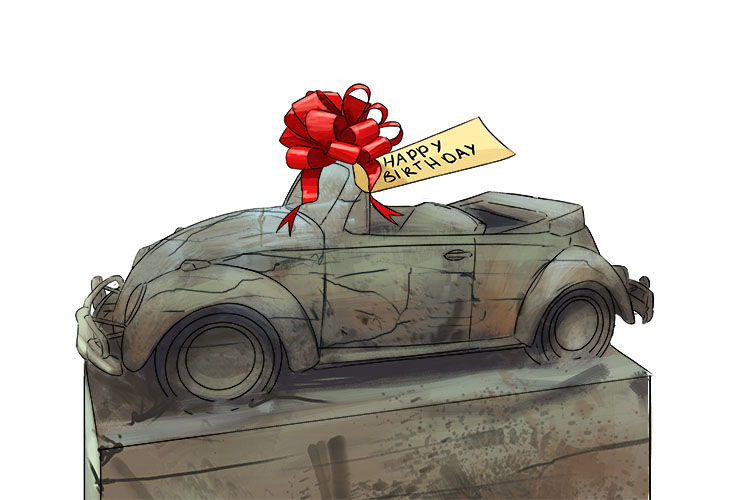
The car I'm giving (carving) you was made by cutting away material from a solid block of stone.
Carving is used to shape non-malleable materials such as wood and stone. The tools and process used for carving will vary depending on the material chosen for the sculpture, as will the difficulty and time the carving takes.
"Carving" by Jon Olav is licensed under CC BY 2.0.
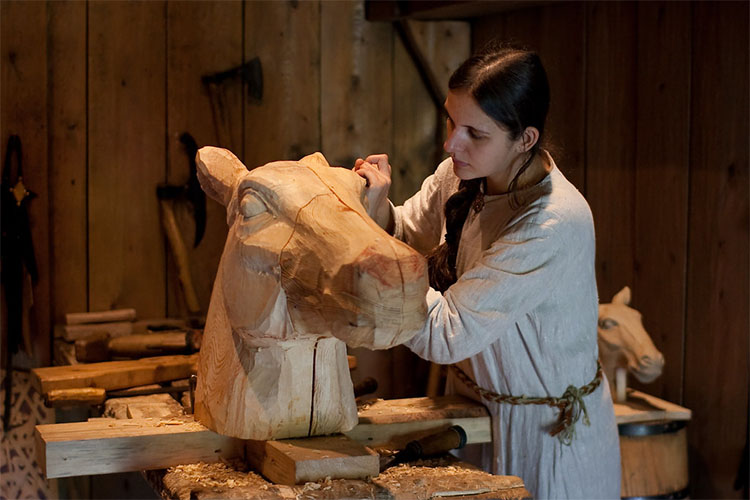
When carving a larger wooden sculpture like the one above you will generally start by creating the basic geometric shape of the sculpture using saws, axes, or any tool capable of cutting away large chunks of material. From here the sculptor would use increasingly smaller tools to cut away smaller amounts of material, gradually producing more detail on the sculpture. Some sculptures due to their size will require a sculptor to work in sections which are then joined together before the finer details are added. Joining sections together occurs when, for example, there are not sufficiently large enough blocks of wood to create a very large sculpture or because the smaller pieces are easier to work with when carving the rough forms.
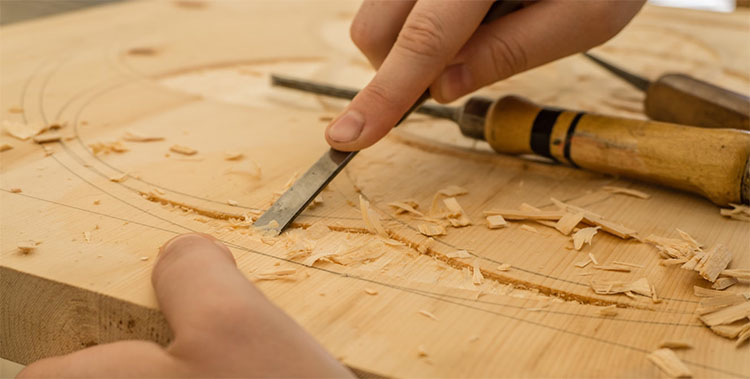
The image above shows a design being carved into a flat panel of wood which is also known as relief carving. For relief carving the design is usually drawn out in pencil first, then the sculptor will use a variety of chisels and gouges to carefully remove material around the design. These tools are often used along side a mallet to help drive them into the wood. Once the material around the design is removed the design can be shaped and detailed using more intricate chisels, gouges and various other tools. The finished piece is usually sanded to remove any unwanted sharp edges.
Carving project
For this project, we're going to be making a simple owl carving out of polystyrene.
You will need a block of polystyrene foam (this can be purchased from most arts and craft shops), a ruler, a craft knife, a pencil and some paints.

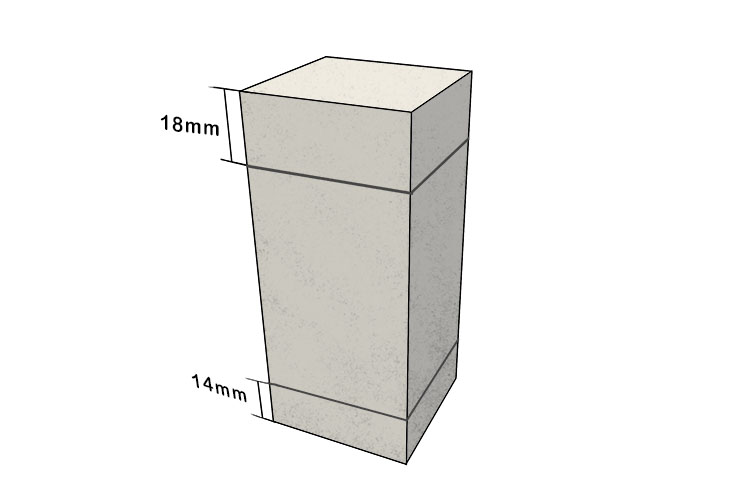
First, we're going to cut our block of polystyrene to size. We're going to use a 90mm x 40mm x 40mm block, but you don't have to follow these measurements exactly, as long as it's the same proportions.

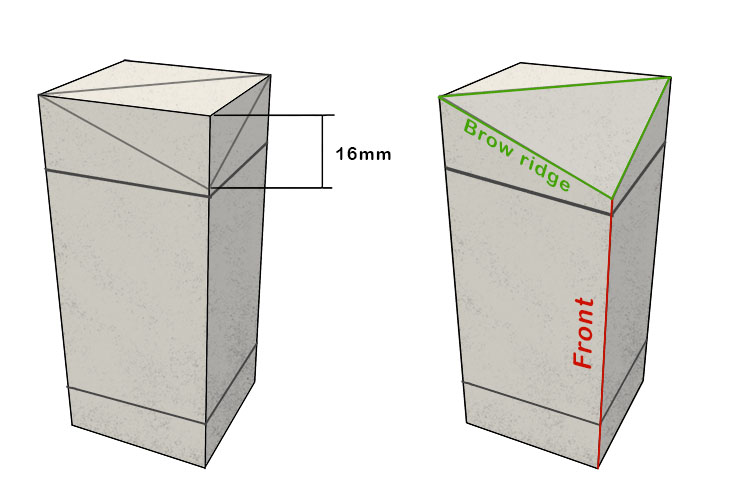
In pencil, draw two lines all the way around the block, one 18mm from the top, the other 14mm from the bottom. The top line will be the neck line, and the bottom line will be the base line.
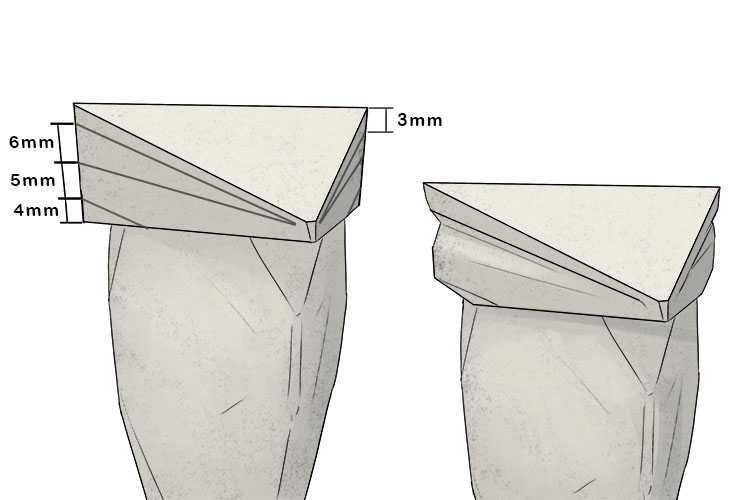
Next, remove one of the corners by cutting from just above the neck line to the middle of the top face, as shown below. You may find it easier to mark this area off in pencil first. This cut will determine which edge of your block is going to be the front of your owl. The new diagonal edges are going to be referred to as the 'brow ridge' as these will eventually become the owl's brow area when we sculpt the head and face.
To start rounding out the body, cut triangular sections out from below the neck line and above the base line as shown below. Make sure to only make these cuts of the front and side edges.
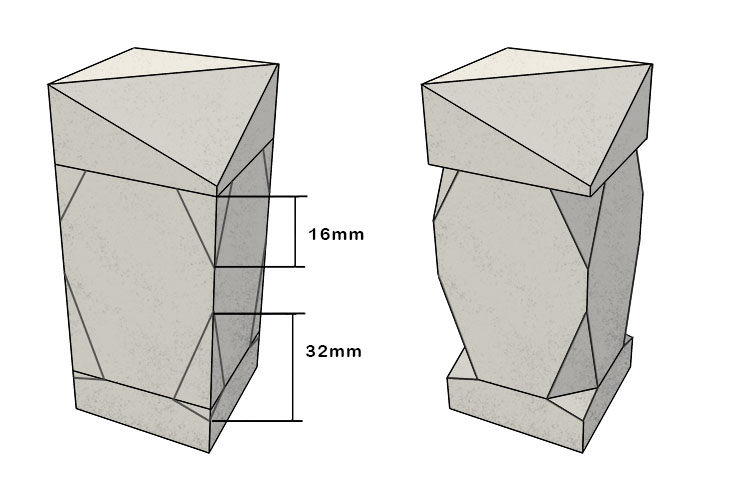
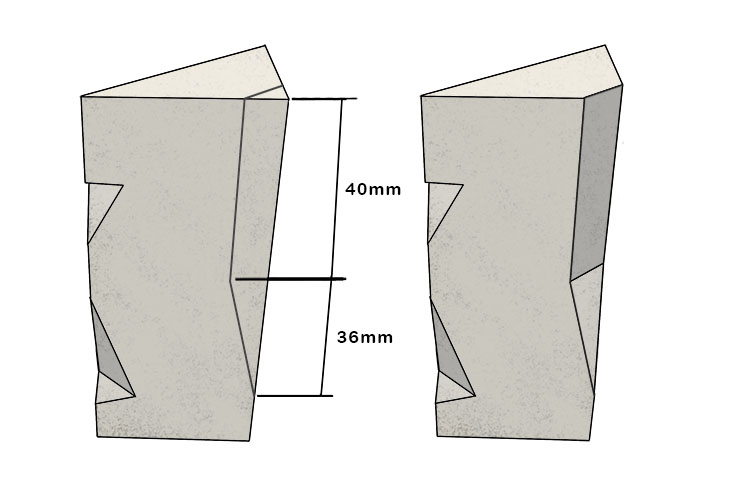
Now we'll start shaping the back of the owl by cutting a section away from the back edge. This cut should be at a slight angle until about halfway up the body (36mm from the base line on our model), then straight up to the top of the sculpture as shown below.
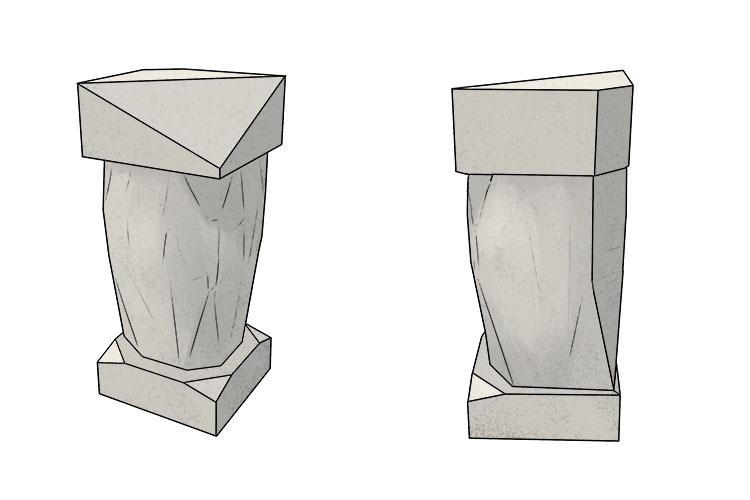
From here you can start to carefully smooth out the shape of the body. Do this by continuously slicing small pieces of foam off, adjusting your position and angle slightly each time and gradually turning the flat surfaces into curves.
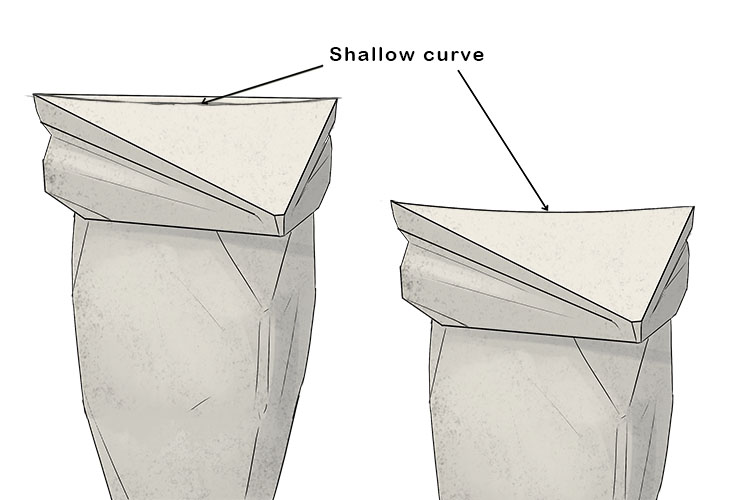
You can now start defining the shape of the head by cutting the lower corners on either side of the head. Then you need to cut a shallow channel just below the brow ridge as shown in the following image, make sure this channel stops just before the front edge of the head, leaving room for the beak to be defined later.
Next carve a shallow curve (no more than a couple millimetres deep) into the top edge of the head.
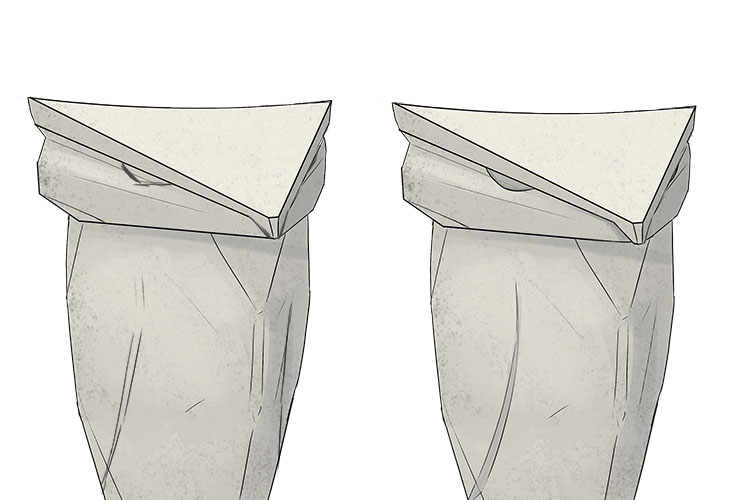
To finish the carving, add the finishing details to define the wings, eyes and beak. For the wings and beak, mark these areas out in pencil, then carve a narrow channel along these lines. For the eyes, draw a semi-circle in the channels previously carved under the brow ridges and cut them out.
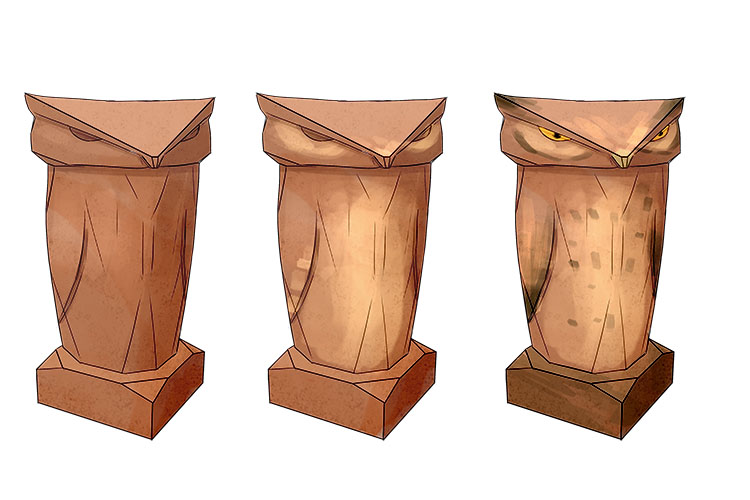
Your finished carving should look something like this.
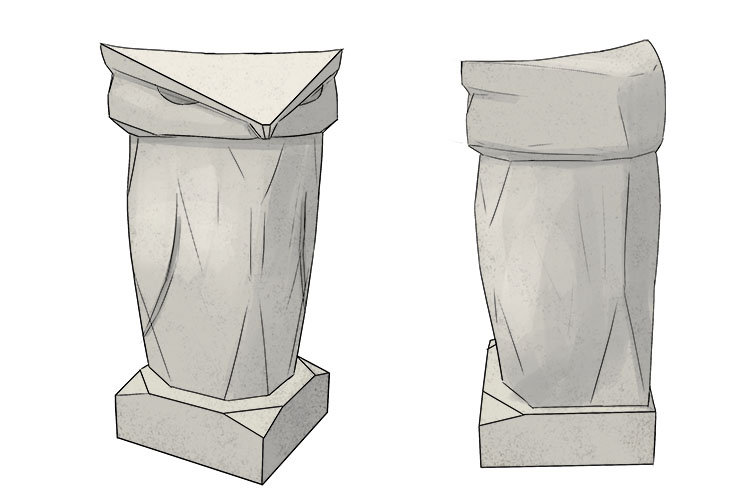
From here you can paint the sculpture. When painting your polystyrene make sure to use either acrylic or water based paints as some paints can contain chemicals that can dissolve or melt the foam.
Carving.


