
Photorealism – A genre of art that encompasses painting, drawing and other graphic media in which an artist produces an image that looks as realistic as possible
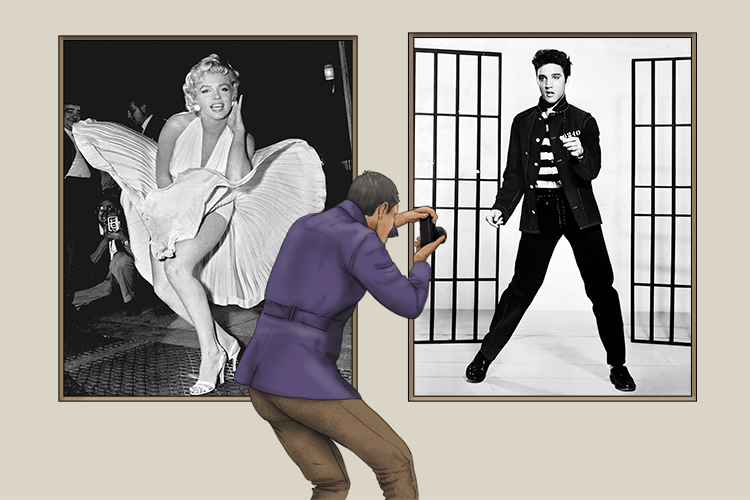
To remember the meaning of photorealism, recall the following mnemonic:
He goes to take a photo until he realises it is not them (photorealism). Art can look so real!
Below are two examples of paintings that could be described as photorealism:
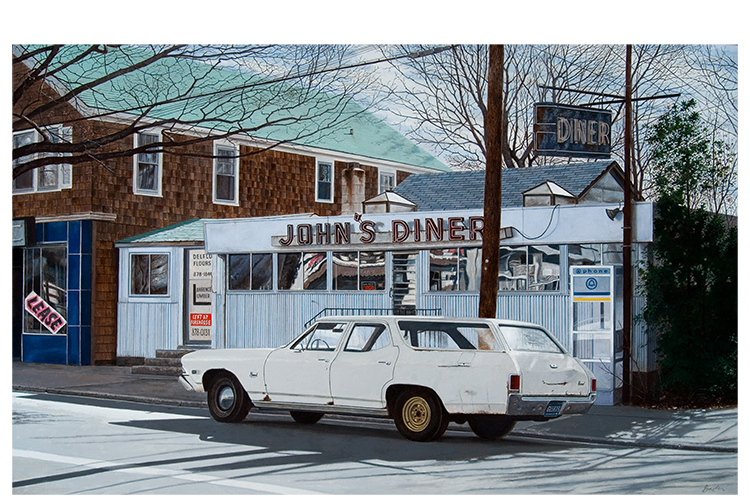
John Baeder, John's Diner, 2007, CC BY-SA 3.0
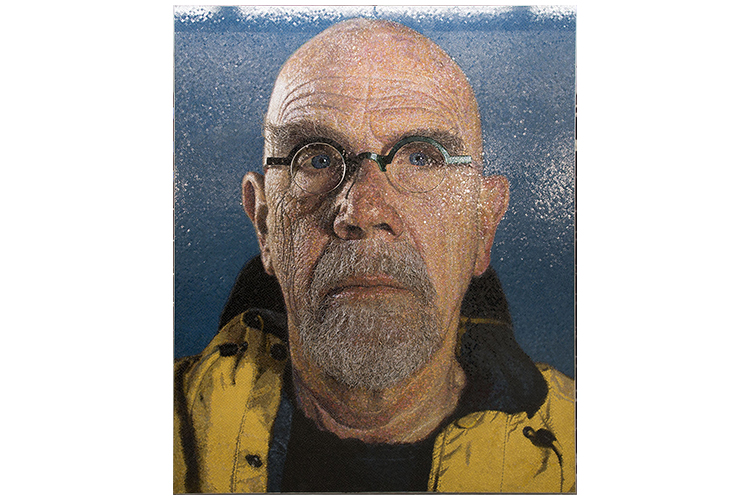
Chuck Close, 86thStreet:Subway Portraits, CC BY 2.0
Photorealism is also achievable in sculpture, but is often referred to as hyperrealism, as 'photo' generally refers to a 2D image. Ron Mueck is famous for achieving these hyper-realistic sculptures:
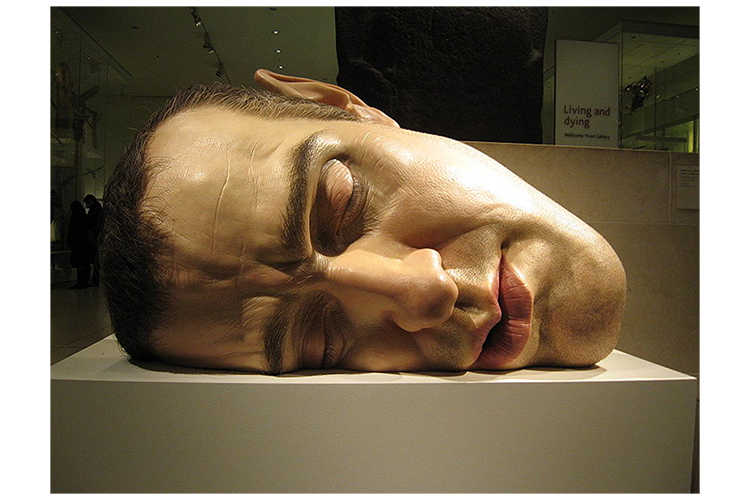
Ron Mueck, Mask II, 2001-2002
Photorealism Project
Photorealism in artwork is difficult to achieve, but it is possible through years of dedication and practice.
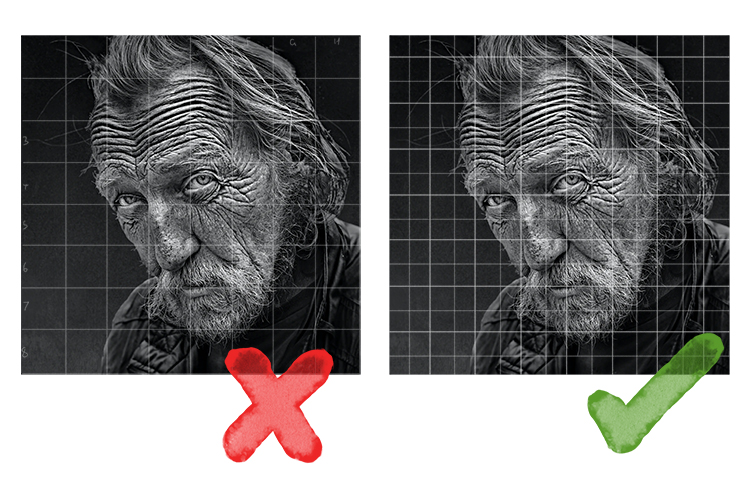
One way to edge your work closer to a photorealistic quality is to use the Mammoth Memory grid method but make it more intense.
Rather than using a grid with squares around 3cm square, use much smaller squares. This means that each square you are working on will relate to a smaller area of your reference image, allowing you to spend more time on a small part of your drawing, adding much more detail than you would on a larger grid.
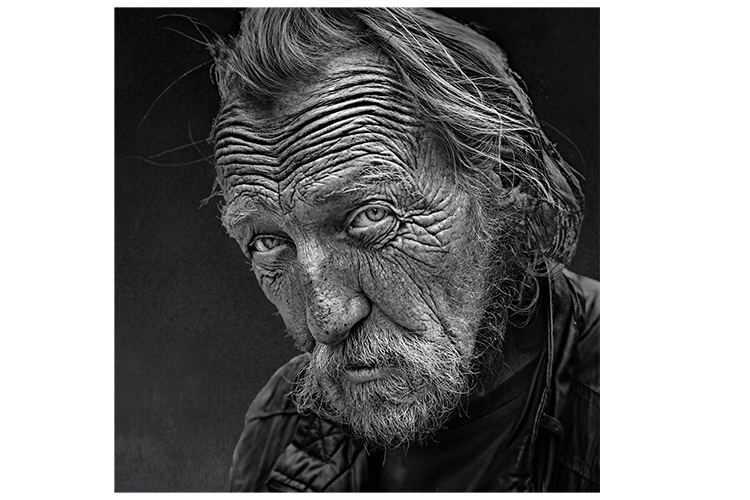
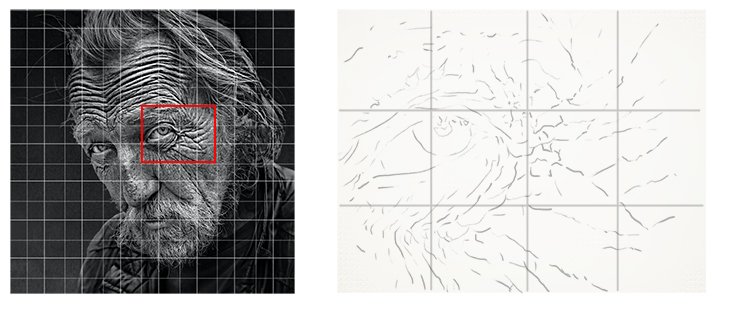
Start by finding a reference photograph, possibly in black and white to make it easier to translate into pencil. The more detailed and higher quality your reference image is, the more information you have to work with, and the better your work can be. Below is a photograph we have chosen to replicate:
Now grid up your drawing as you would with the grid technique, but with a much smaller grid:
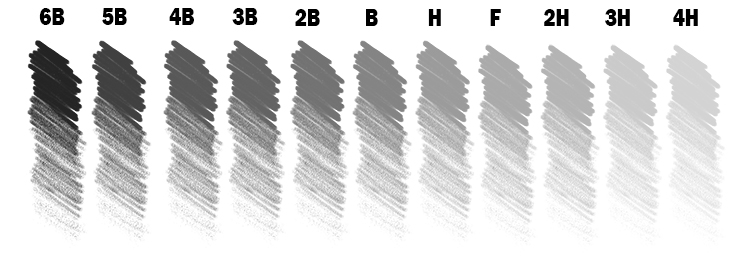
Before you start your artwork, it is important to familiarise yourself with what can be achieved with a pencil. There is more to it than picking up a pencil and scribbling away.
Know your tools by practising shading with different pencils. They all have different densities, hard to soft, therefore make different marks, dark to light. Shading lightly will produce a lighter mark and either pressing harder or shading over already shaded areas will create darker marks. Use the experiment as a future reference for your detailed photorealistic pencil drawings.
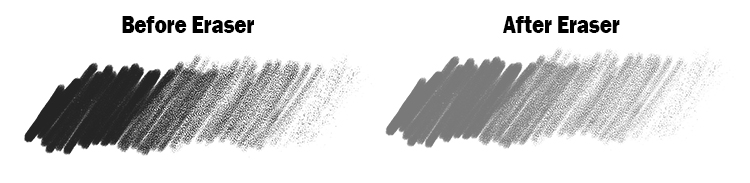
Become familiar with an eraser too. A putty eraser is best for detailed drawing, as you can knead it and mould it into a tiny piece to make white marks, or use it in larger clumps to erase larger areas:

You can also use an eraser to reduce brightness in an image, dulling-down the marks you have made:
You can also use a brush, rolled paper or your finger to smudge pencil to create a blended, smooth finish rather than seeing the grainy pencil marks:
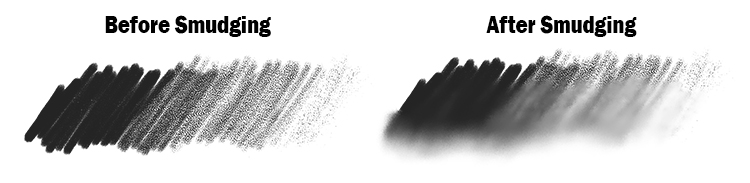
Smudging can be useful when drawing in a photorealistic style as you may wish to blur out an outline you have drawn. In real life, and therefore in photorealism, there are no outlines. Objects have edges that end with either a hard edge (where the shading ends abruptly) or a soft edge (where a slightly blurred, fuzzy edge is present. For example, rocks, buildings and solid forms tend to have a hard edge whereas materials, softer natural forms and hair will have a soft edge:

Now you are more familiar with the wide array of marks you can make with a pencil and eraser, you can begin your drawing.
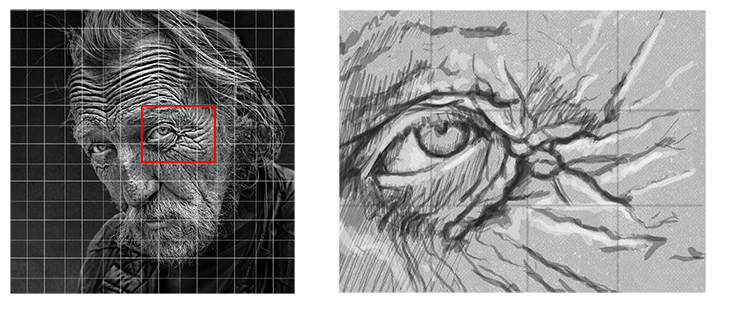
Draw you grid on your paper to match the the grid on your reference photo (for the purpose of the tutorial we will focus on a small section of the photo).
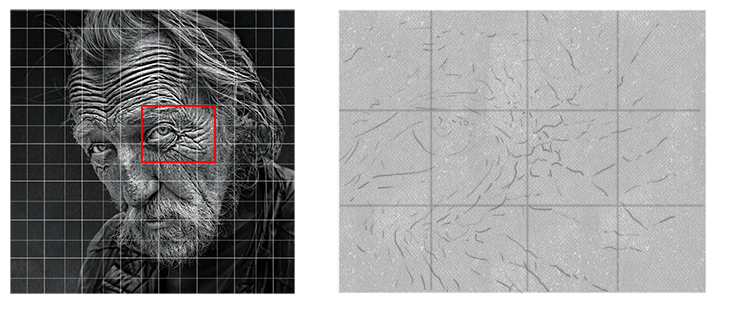
Begin by drawing in the outlines of any defining features in each square. Remember to do this lightly as with realism and photorealism, you don't want a visible outline.
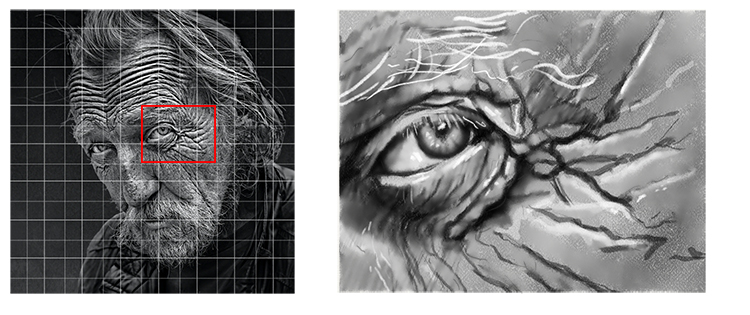
When working on a portrait, a good place to start shading is to apply a light layer of shading over the entire surface. It is very rare that you will see a brilliant pure white in a photograph, with the exception of a light source or a reflection of one, e.g. the light in someone's eye.
You can now use your guidelines to start blocking in the darker areas of your drawing.
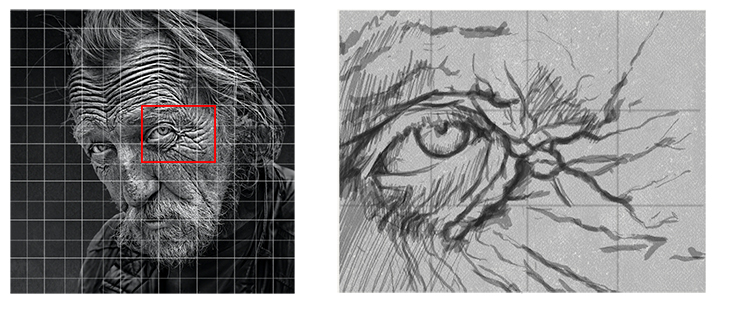
Now use your eraser to add the larger light areas.
Smudge them together and your basic form is in place:

Continue working on your drawing until you are happy with the result. Remember it may not be perfect first time – it takes a long time to perfect photorealism, but practice is the best way.
Photorealism.


