
Kantha – Quilted and embroidered cloth made from recycled fabrics often found in the textiles of India and Pakistan
(Pronounced can-thah)
To remember the meaning of kantha, recall the following:
Can't thank (kantha) her enough for giving me an embroidered quilt to keep me warm.
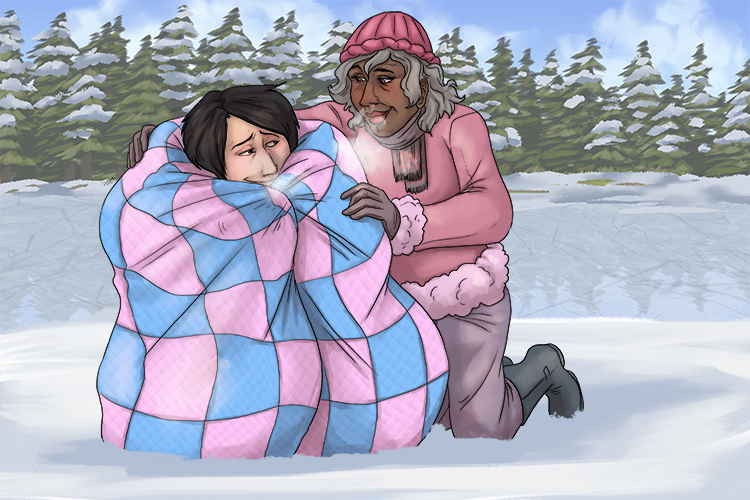
Note: In the Bengali region of India, it is a tradition for a grandmother to make each of the grandchildren a kantha quilt. Layers of old saris are cut into squares or rectangles to form patterns which are stitched onto large backing sheets.
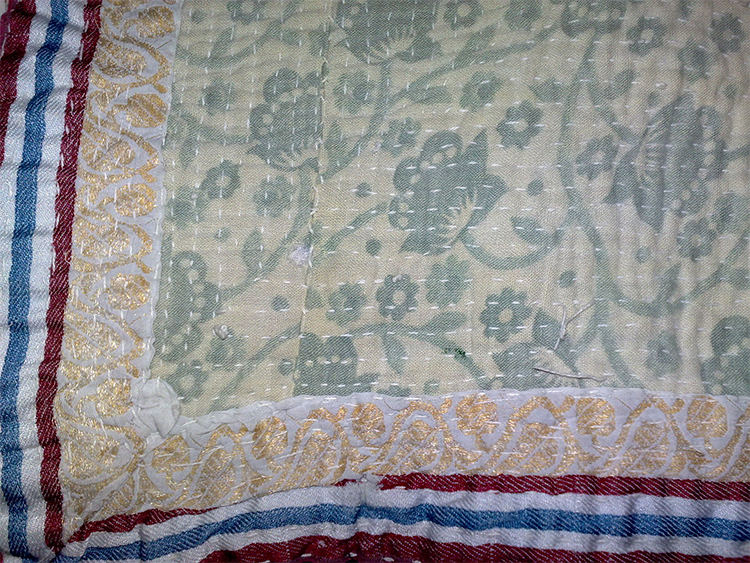
"You make your bed, you lie in it." by RubyGoes is licensed under CC BY 2.0
Kantha quilts and other items in the same style can be large and time consuming to make, so it's best to start small to and tackle bigger projects when you feel more comfortable with the technique.
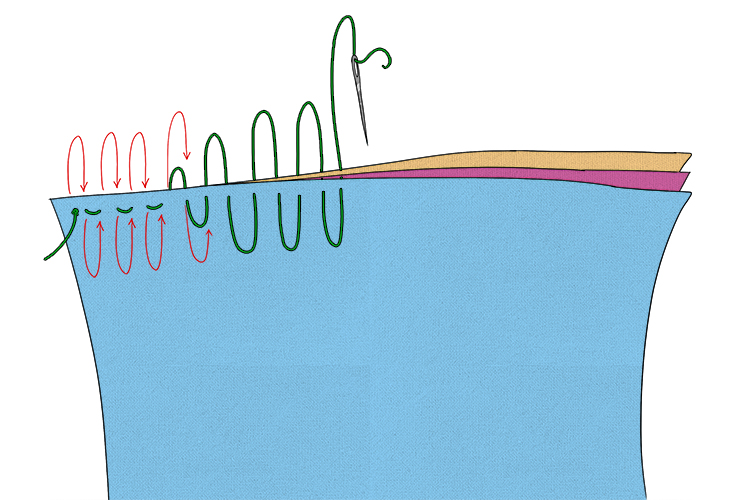
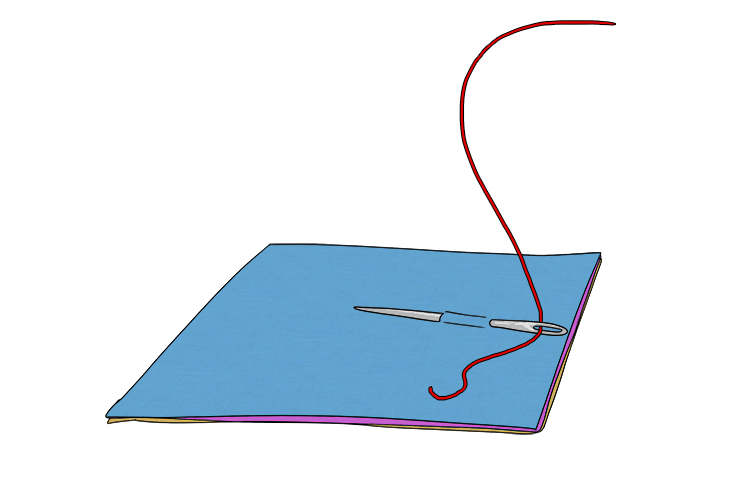
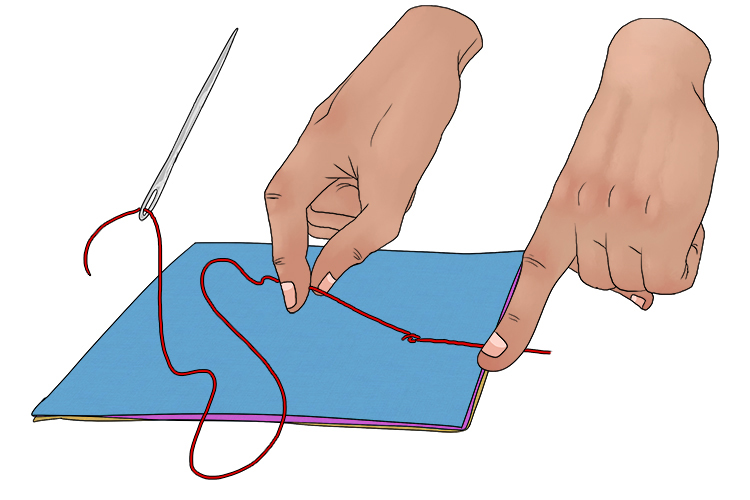
There are many different ways to kantha stitch, but nearly all of them involve a running stitch. A running stitch is where you pass the threaded needle through the fabric and back again over and over as below, as evenly spaced as possible, pulling it tight as you go.
At the start, tie a knot to prevent the thread slipping through when you pull it tight.
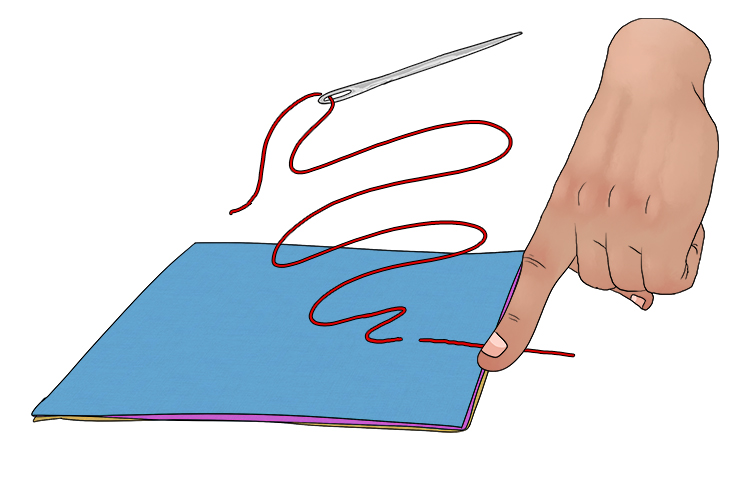
To create the knot, push the needle through the fabric.
Pull the needle and thread through (taking through at least enough thread for the piece you are stitching) but hold the end of the thread down so it doesn't pull all the way through.
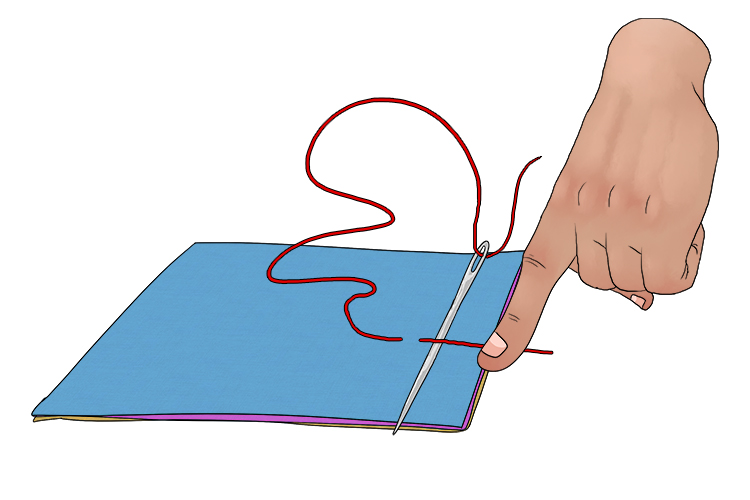
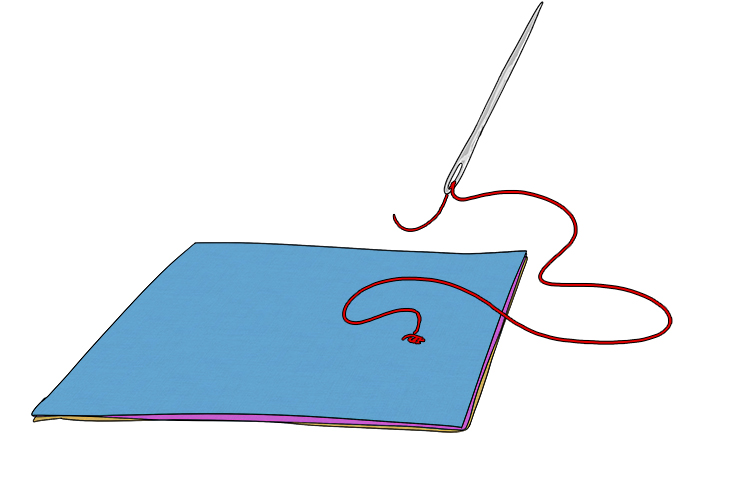
Pass the needle underneath the thread on the side which you are holding down.
Pass the needle through the loop you've created.
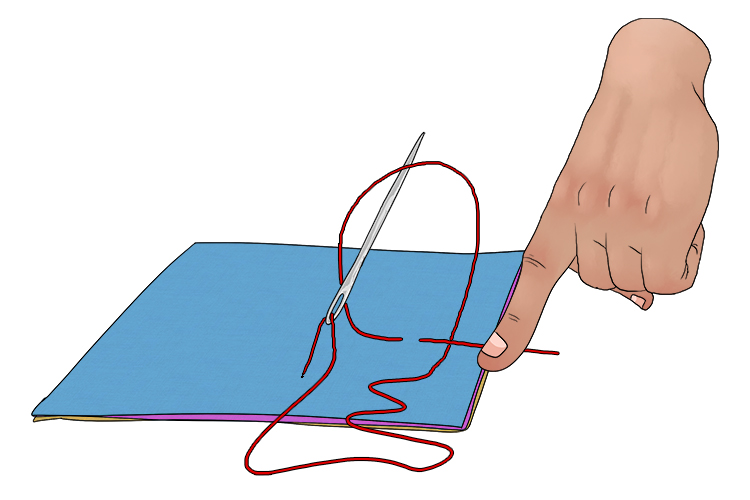
Pull the knot tight and repeat the 2nd to the 4th stages one or two more times to make sure the knot it absolutely secure.
Finally, cut the tail off. You can repeat this style of knot for the end too – just remember to snip the end closest to the needle instead!
Note: If you can, try and make the knot on the middle layer.
First Project
In this first project, we are making a small piece to practise the stitching style. You'll need several pins, embroidery thread, a needle and a minimum of three squares of fabric all cut to the same size to be layered one over the other and then stitched together (we recommend around 30cm/12 inches to practise with). Kantha focuses on recycled fabrics, so try to find fabric that's no longer used at home, or at a charity shop, rather than buying new.
Use the pins around all the edges to hold the three pieces of fabric together, with the two outer pieces facing outwards to show any pattern on the fabric. On the example below we are using plain material so you can see the stitching clearly.
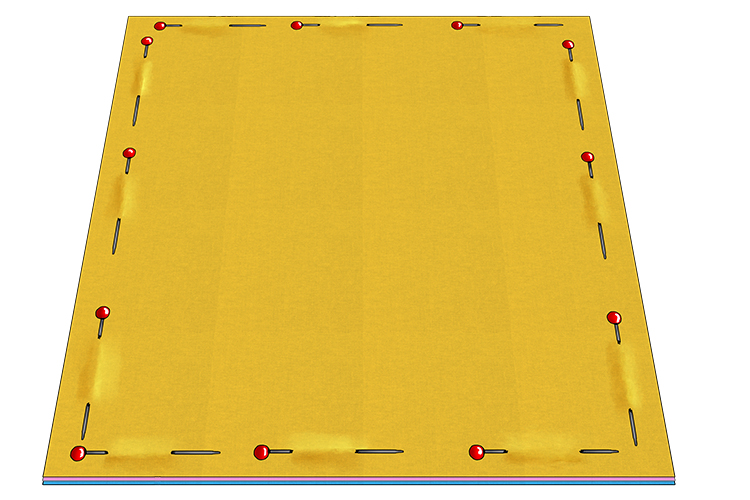
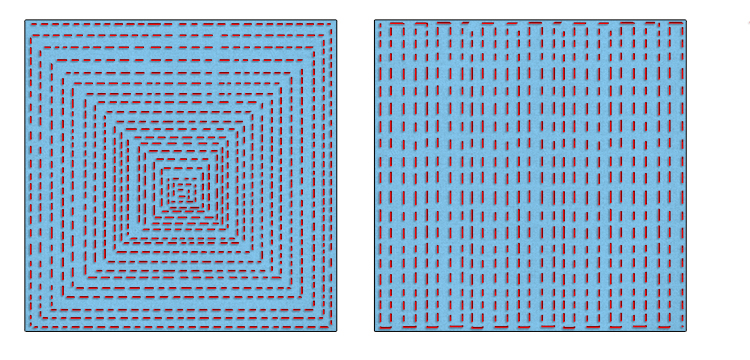
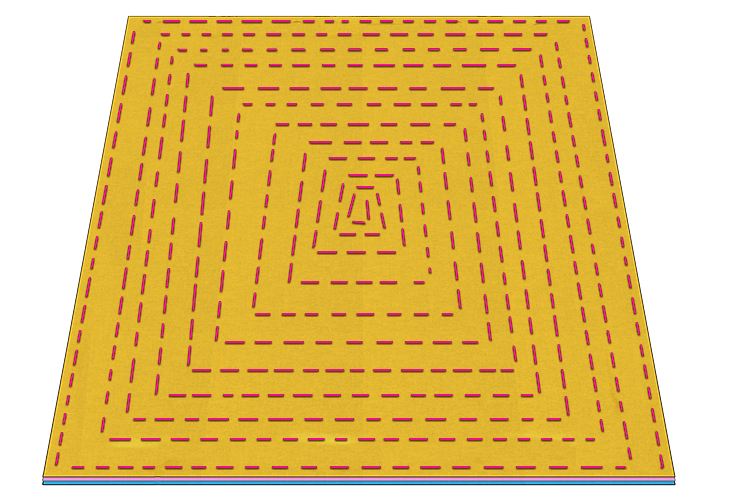
The most common kantha stitching patterns are a square which gets progressively smaller or lines made by simply going back and forth. How far apart you space your stitching is up to you. The closer, more densely packed the stitching, the firmer your square will end up. If you space your stitching out, the fabric will remain more flexible. Below are two examples of stitching patterns on plain blue material.
Continuing with the project, start off with a knot (as descried above) then carefully use the running stitch to cover the entire fabric, making sure the needle and thread go through all the layers. You can use one colour of thread or as many as you like! Make sure when sewing that the thread isn't loose, but equally isn't too tight as this will make the fabric bunch up and it won't lie flat. Finish the stitch with another knot in the end so it doesn't come loose. Finally take the pins out.
Note: Kantha stitching looks more attractive if you can line up the spacing and length of each stitch with the one above.
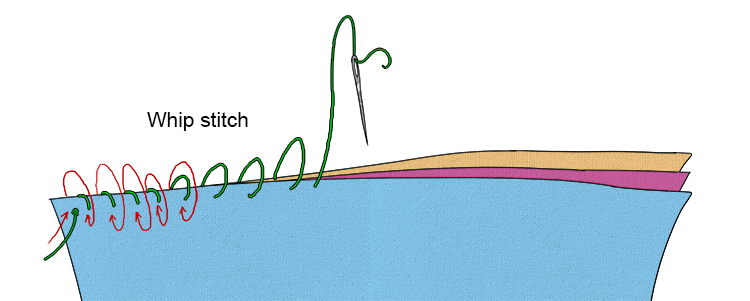
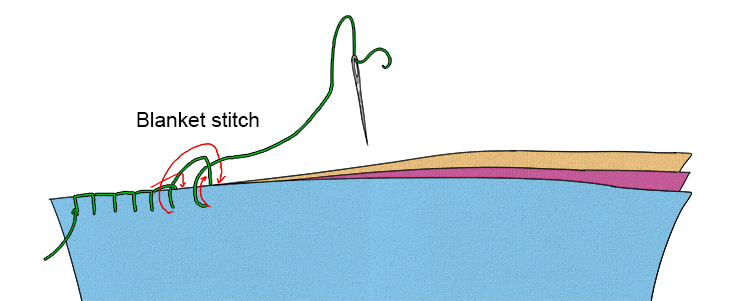
Smaller pieces like this make great mats for side tables for lamps or fruit bowls to sit on, but you will have to finish off the edges with a whip stitch or blanket stitch.
Kantha Project 2
Once you are comfortable with the kantha stitching technique, you can move on to larger and more complicated projects, for example, making a quilt.
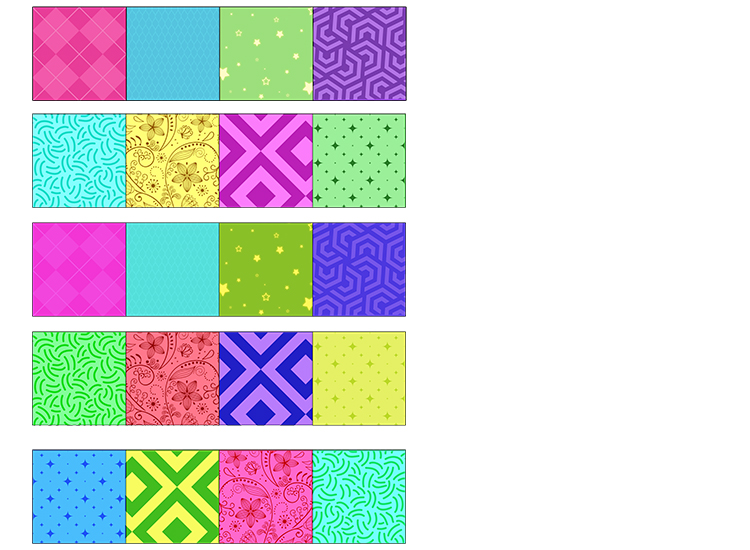
To do this you'll need several squares of patterned fabric (enough to make a rectangle, we recommend 20) as well as your pins, needle, embroidery thread and normal sewing thread.
You will also, later, need either one large quilting sheet and one large backing sheet (we recommend flannel fabric) or two large cotton sheets and one large backing sheet. These large sheets will be the same shape and size as all 20 patterned fabric pieces put together. The 20 patterned fabric sheets are best sewn together in a rectangle shape of five by four.
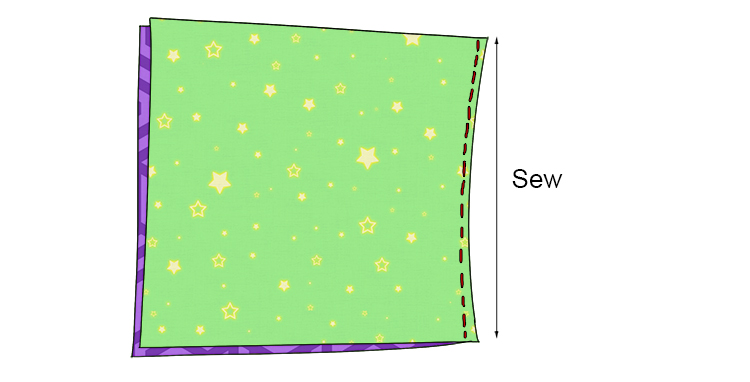
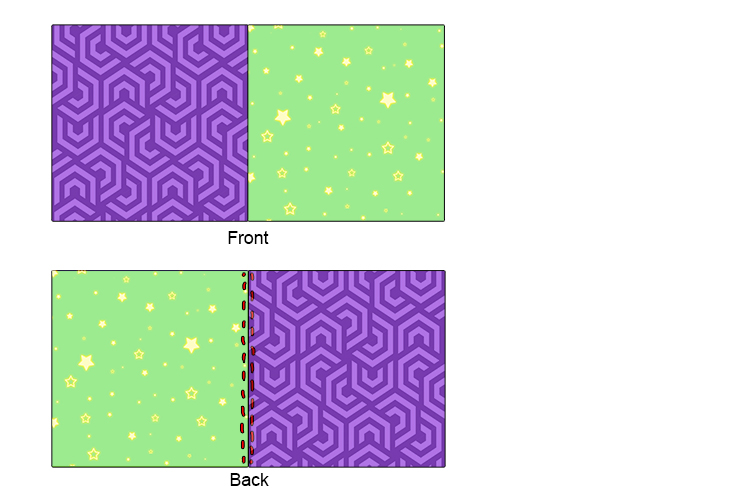
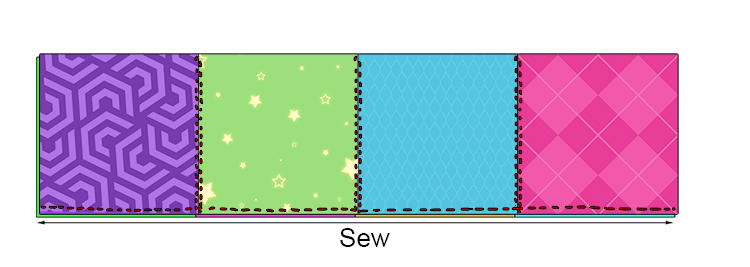
To start, sew the fabric squares together with the sewing thread. To do this, lay one square of fabric over another and sew along one edge (remembering to knot at the start and finish so it stays together).
Open the fabric up after you have sewn the edge.
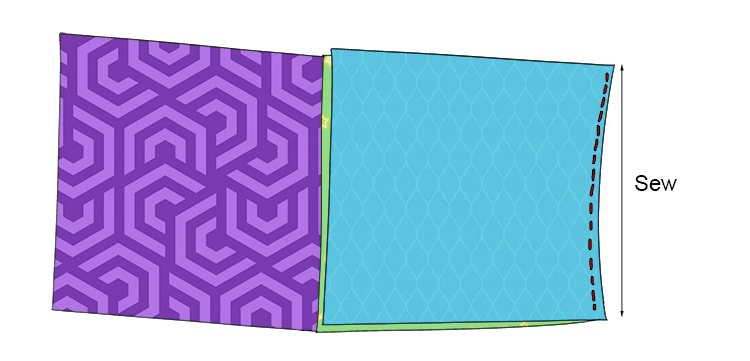
Now lay another piece over the top of one of the squares. Sew along the edge furthest away from the one you've already sewn.
Do the same again for the last piece.
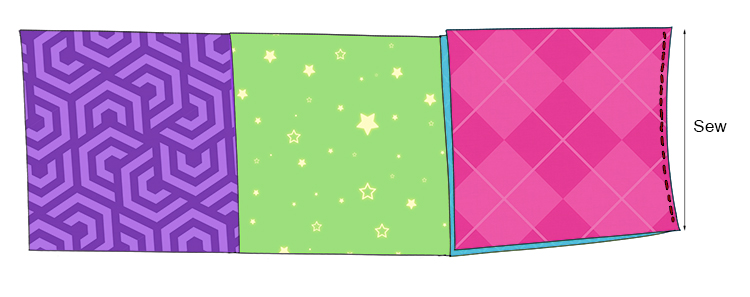
Now you have one strip of four squares sewn together.
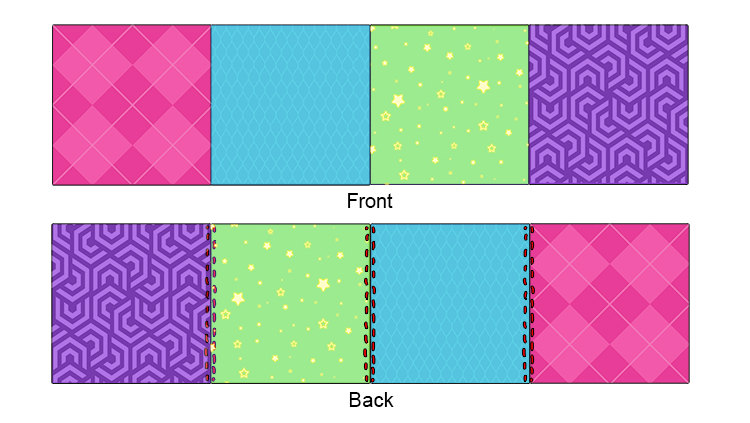
Repeat this process until you have five strips of four squares.
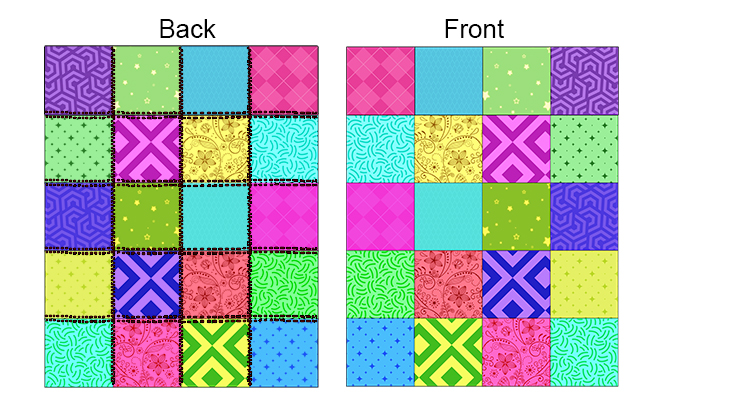
Now sew these strips together using the same technique you used to sew the squares together. Make sure all the sewn edges are the same way up so the stitching is only visible from the back. Below are the first two strips being sewn together.
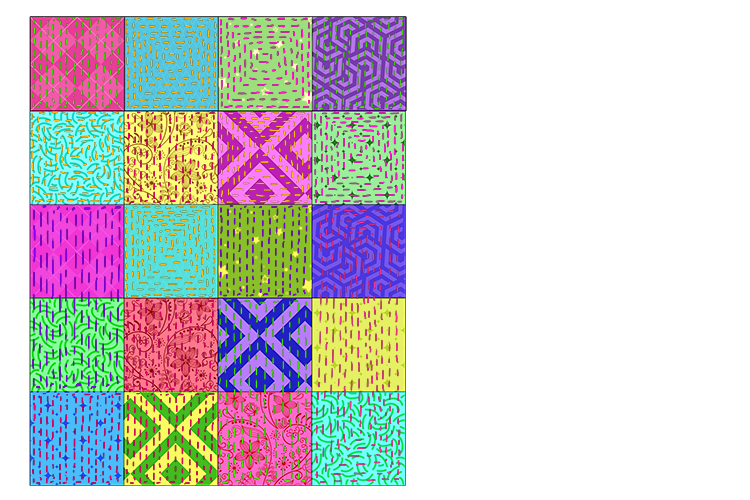
Below is the finished patterned fabric front panel from the front and back.
Now pin the patchwork rectangle to the two large cotton sheets.
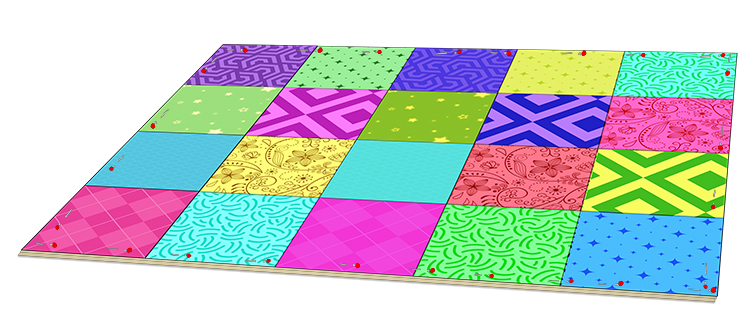
Use the embroidery thread to kantha stitch the three pieces together. You can use one kantha stitch style with one colour thread or be more adventurous and use several different contrasting colours and styles.
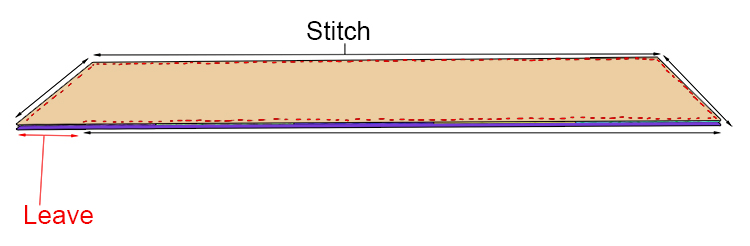
When these three pieces are kantha stitched all over, take the pins out and lay the beautiful front panel face down on the backing fabric. Once the outside edge has been sewn you will turn the two pieces inside out.
Sew around the edge but leave a gap of around 200mm (8inch) to turn it back the right way around at the end.
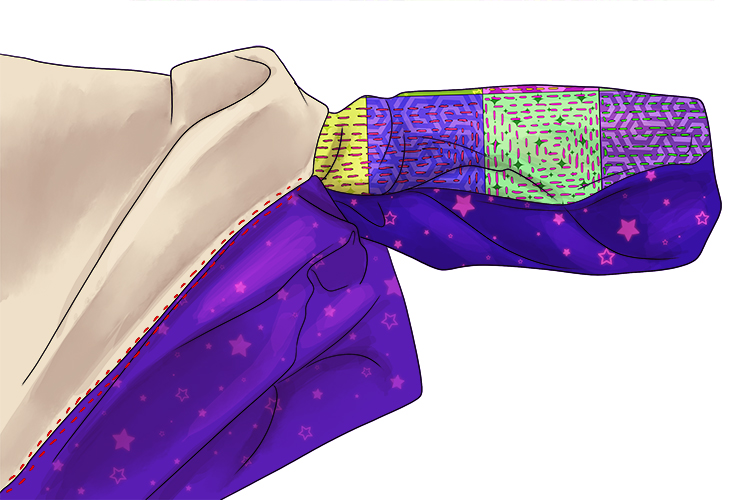
Now turn the two pieces inside out through the 200m (8inch) gap, so that most of the thread will be on the inside.
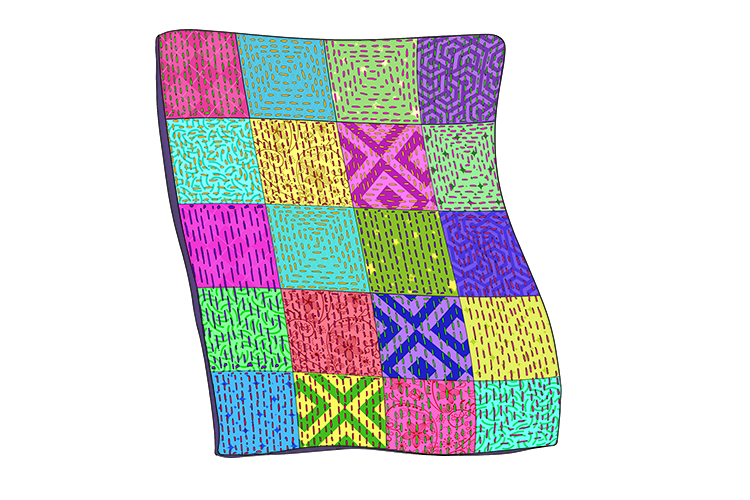
Finish by sewing up the 200mm (8inch) gap using a whip stitch or blanket stitch. Then you will have a beautiful kantha quilt.
Kantha.


