
Impasto – The technique of laying on paint or pigment thickly so that it stands out from a surface
(Pronounced im-pas-toh)
To remember the meaning of impasto, recall the following:
The image of the pasta and tomato (impasto) sauce looked so real and stood out so much, I could almost pick it up.

Impasto refers to the application of thick paint to a painting. The technique creates textured, almost three-dimensional paint on a surface, making an image appear to come out of the canvas.
Traditionally, oil paints were used to create impasto effects as it is extremely thick and slow drying, allowing liberal application and movement of the paint whilst it is on the canvas.
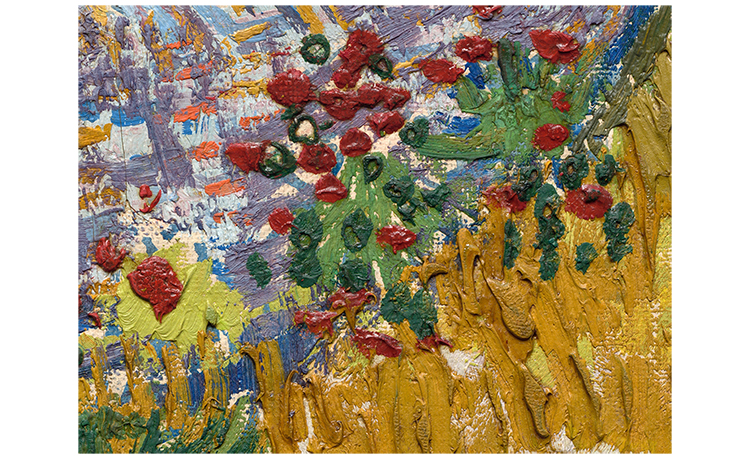
In Vincent van Gogh's Farmhouse in Provence painting, you can clearly see the thick impasto marks he made.
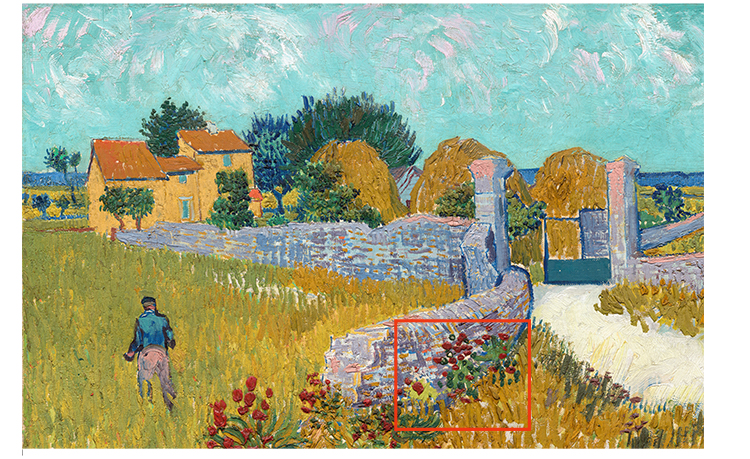
As you can see in the highlighted square, the application of impasto paint makes the flowers and grasses appear to burst forward from the canvas, adding a sense of depth:
Impasto Project
Many painters who work in an impasto style use a palette knife to create their work. The knife allows them to apply the paint thickly, without the fear of over-working or adding too much detail, keeping the marks fresh.
In this project we will get to grips with using a palette knife for this purpose.
You can use oil paints, but if you would rather use acrylic (for its fast-drying quality) you can use 'impasto gel' from arts shops that mix with the acrylic paint to make it thicker and more pliable in an impasto style.
For the project you will need your chosen paint type, a canvas and a palette knife.
This is what the average palette knife looks like:

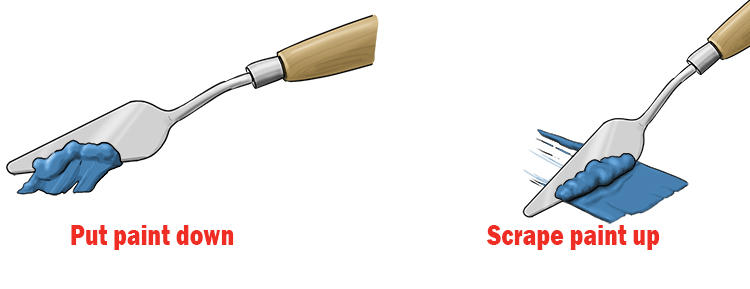
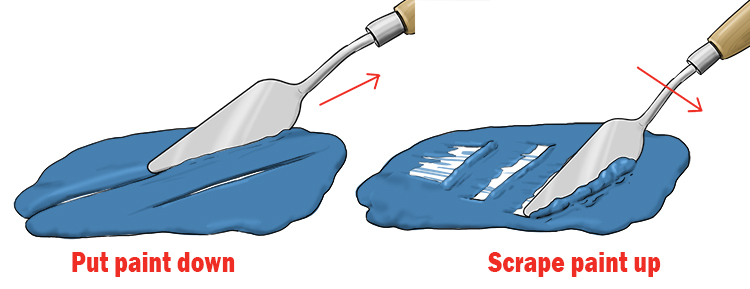
The most basic use of a palette knife is the ability to apply and remove paint in large quantities, scooping paint with the knife and dropping it onto the canvas, and then using the back of the knife to spread it around, applying a thick layer of paint. Scraping with the side of the knife allows you to lift the wet paint back off the surface easily.
Different parts of the pallet knife allow you to do different things.
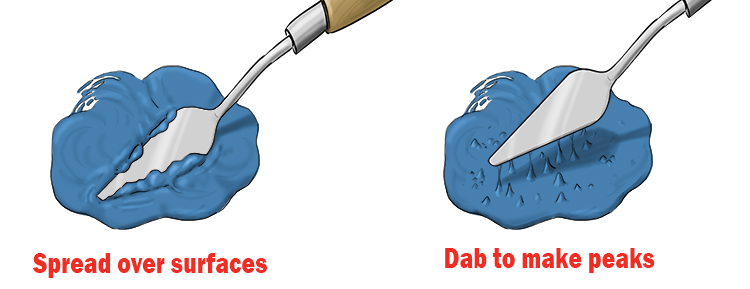
The flat back of the knife allows you to push paint over a wide surface, like spreading butter. You can also use the back of the knife to push and lift up the surface of the paint, with the paint left in stiff peaks that will dry in place.
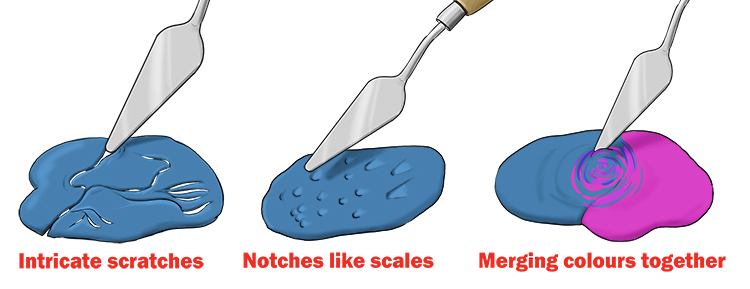
The thin, sharp sides of the knife that you use to scrape paint off a surface can also be used artistically. You can scrape thin lines into the work by dragging it lengthways or create voids of paint and build-up of excess paint into mounds by dragging it across widthways.
The pointed end of the knife is the most versatile and can be used for an array of marks. Pushing it onto the paint can leave indents almost like fish scales. It can be dragged around in any direction to create a more free-flowing line. It can also be used to drag one colour of paint into another, creating a more impressionist blend of colours rather than a perfectly merged blend of colours.
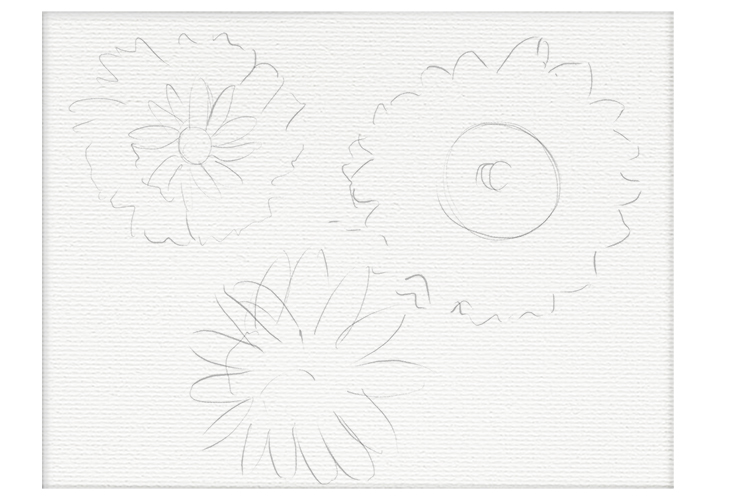
Now you are familiar with the effects achievable with a palette knife, you can prepare your canvas for painting.
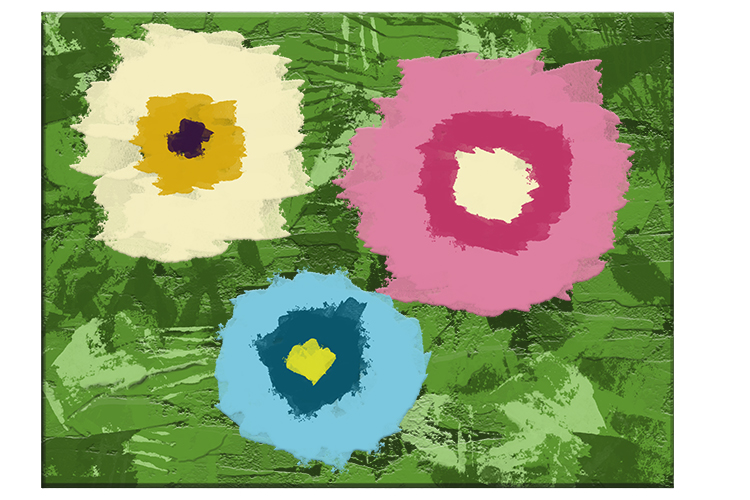
Draw in pencil an outline of a design you wish to paint. We have opted for a simple flower design.
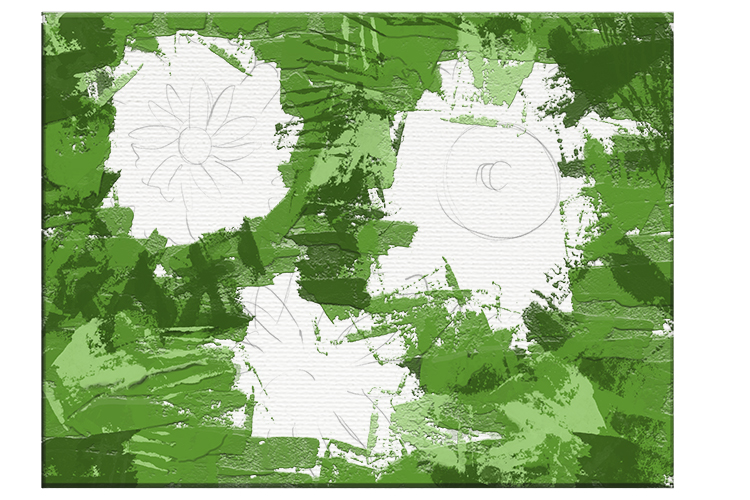
Use the edge of the palette knife to spread different greens over the background areas. Try not to paint over the flower sections as, with impasto painting, you aren't layering colours: each section is separate. Drag the different greens into each other to achieve an uneven, natural mix of colours.
Spread the colours of the flowers into place in blocks of colour.
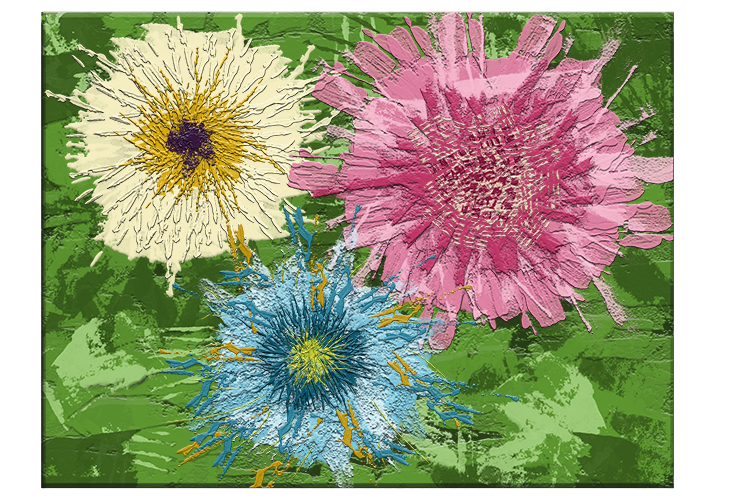
Use the techniques we looked at before to drag, push, scrape and smudge the details into the flowers. The more variation in thickness of paint, the better.
Impasto Project 2
To further exaggerate the impasto style, you can create almost sculptural forms with extremely thick paint application. Apply huge quantities of paint to a surface and then push, scrape and dig into the paint to produce an almost three-dimensional image.
This technique can be used to create simple yet effective portraits that protrude from the surface of the canvas.
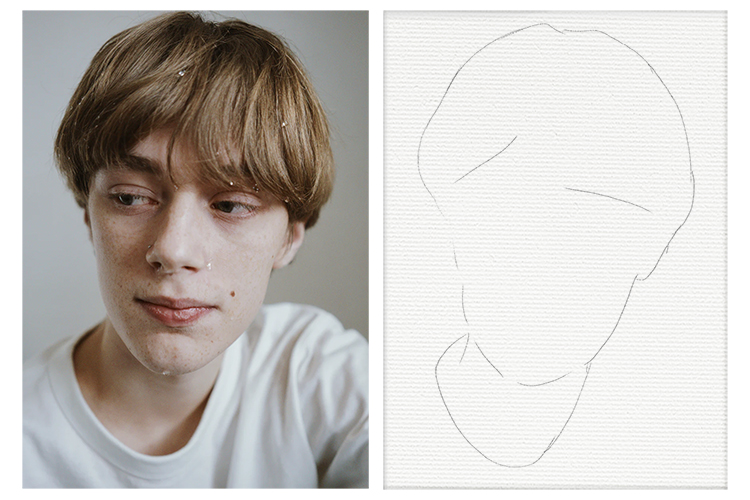
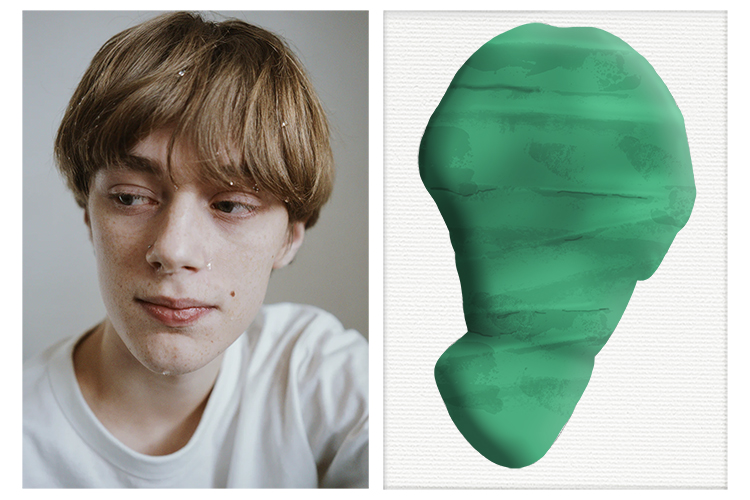
To start, draw a simple outline of the silhouette of your chosen portrait:
Apply a thick layer of paint blobs covering the silhouette. It doesn't have to be neat, just go for quantity of paint and stay within the outline to keep the correct shape.
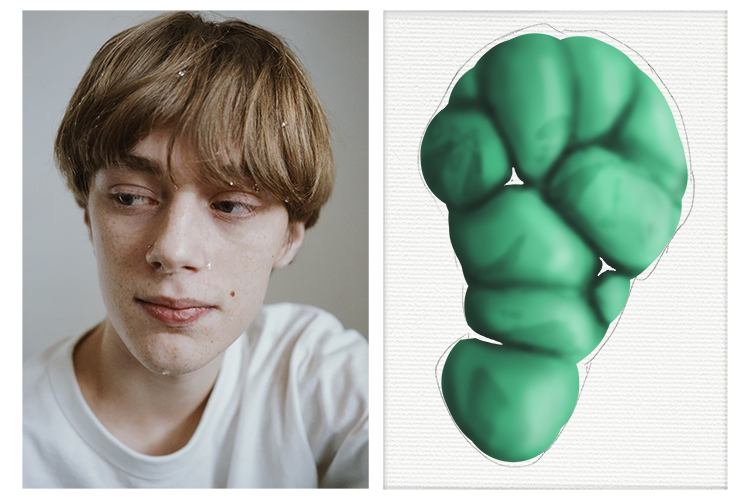
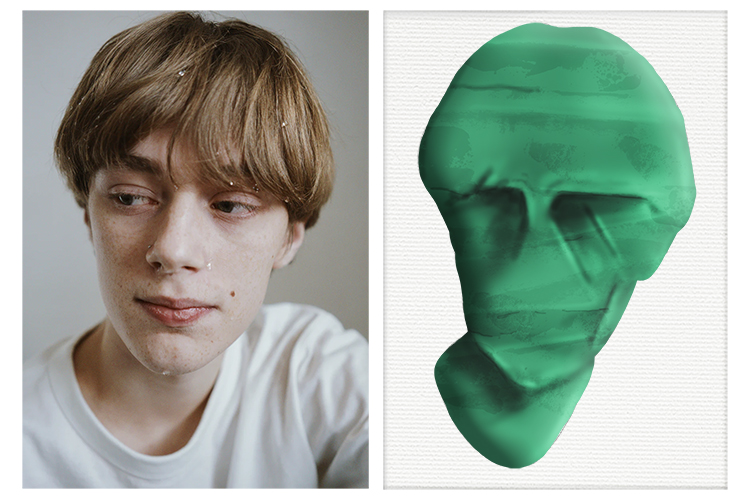
With your palette knife, smooth out the paint to meet the outline.
Use your palette knife to push down areas that are sunken such as the eye sockets, under the nose, under the lip and around the edges and hairline of the face.
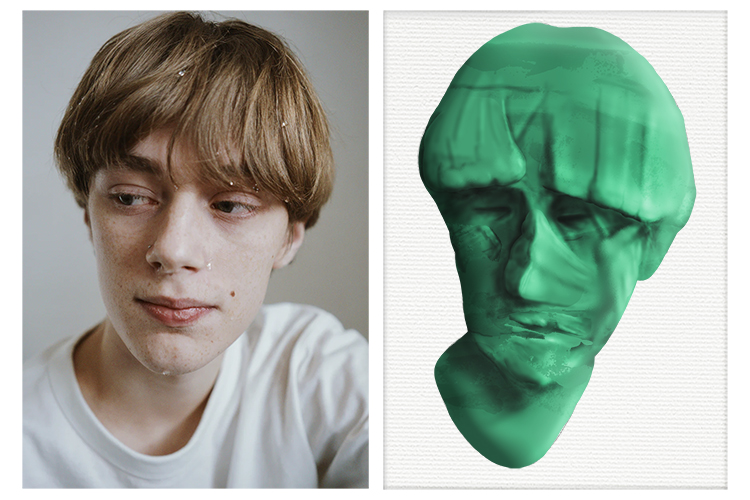
Now you can start to see the structure, in bold, singular swoops, add paint to the raised areas such as the nose, brow line, cheek bones, lips and chin.

Lightly, and in as few strokes as possible, mush the areas together to create a bit more detail but not too much; the fast, lively appearance of the knife marks add to the overall impasto effect.
Neatly paint the background of the canvas the same colour, but smoothly with a brush to create a flat surface, this will further emphasise the impasto elements of the painting and complete the artwork.
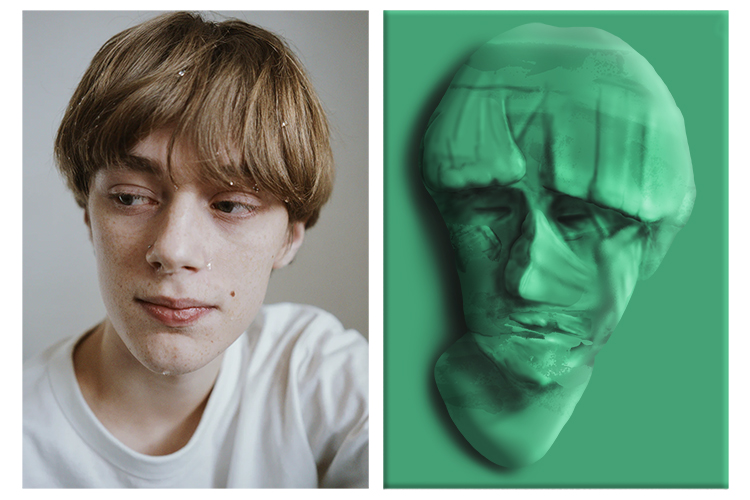
Impasto.


