
Decorative art – Art that is meant to be useful as well as beautiful. It includes crafts, such as ceramics, furniture, interior design, jewellery and textiles
(Pronounced dek-ruh-tiv)
To remember what decorative means, recall the following:
Over the past decade business has been lucrative (decorative) for her interior design firm and every item she uses is functional yet beautiful.

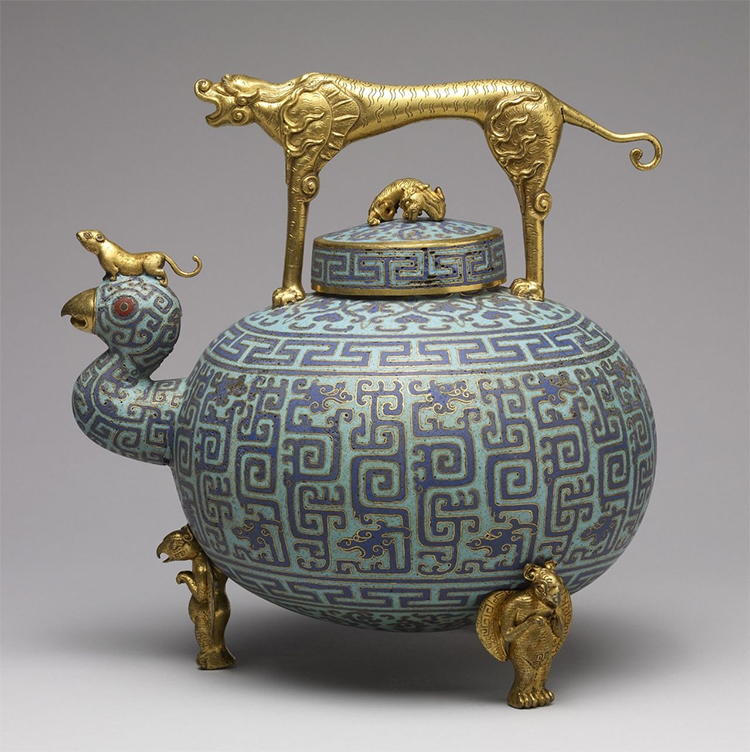
This wine pot from China is highly decorated but also functional.
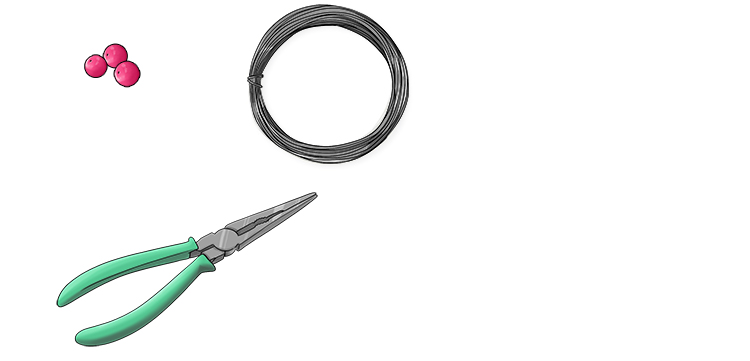
For our project we are going to create a decorative bracelet. You will need: a length of stiff 1mm wire, long-nose pliers, beads with a 1mm hole and masking tape.
Cut three lengths of wire to 10cm longer than your wrist circumference.

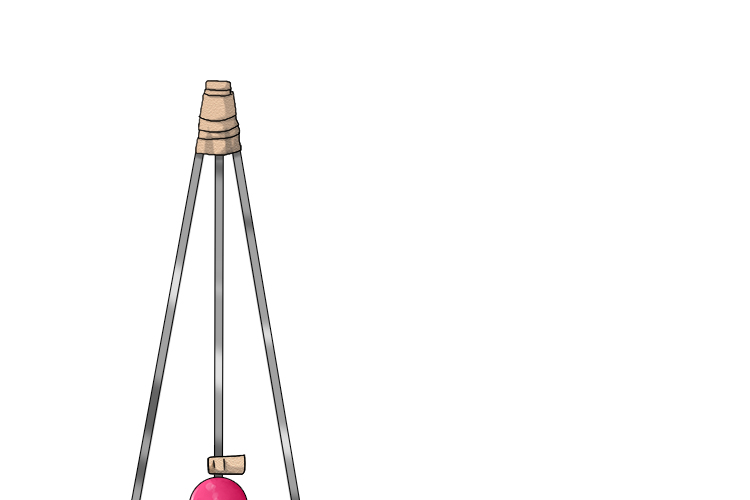
Thread the beads onto one of the wires and keep them roughly in the middle of by sticking a small tab of masking tape either side of them.

Use the masking tape again to stick and hold the three wires together.
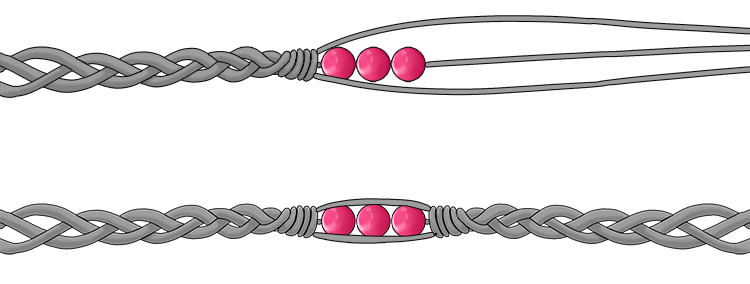
Plait the wire as tightly as you can. Take the outside right piece and bring it into the middle, then take the outside left piece and bring it into the middle. Split the wires apart and repeat the process. Below we have used coloured wire to make the process easier to see.
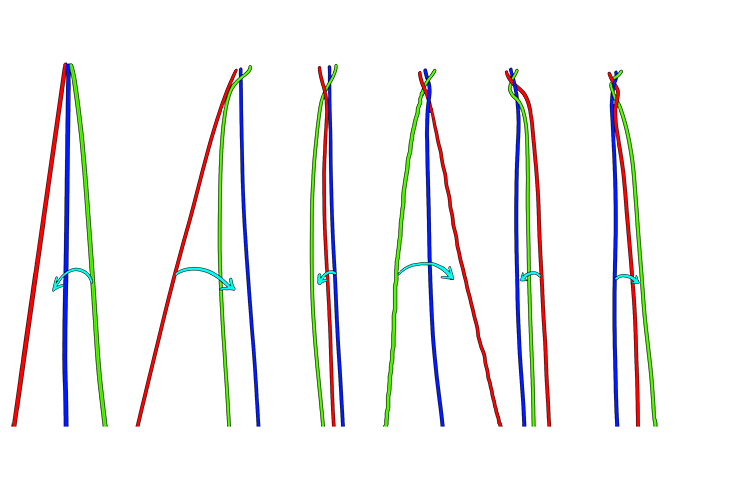
Continue pulling the right wire to the middle, then the left wire, When you reach the beads, stop plaiting and twist the two wires which do not have the beads on around the wire with the beads two or three times. Twist again after the beads. You can use the pliers to help get a tighter twist.
Plait until you reach the end. Using the pliers, bend the end couple of centimetres of both ends of the bracelet over and press them as hard as you can to hold them in place.
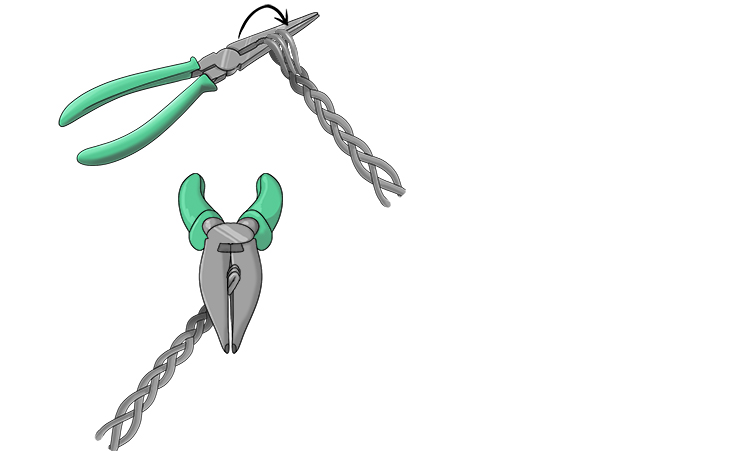
Wrap some spare wire around both ends and press with the pliers to keep secure.

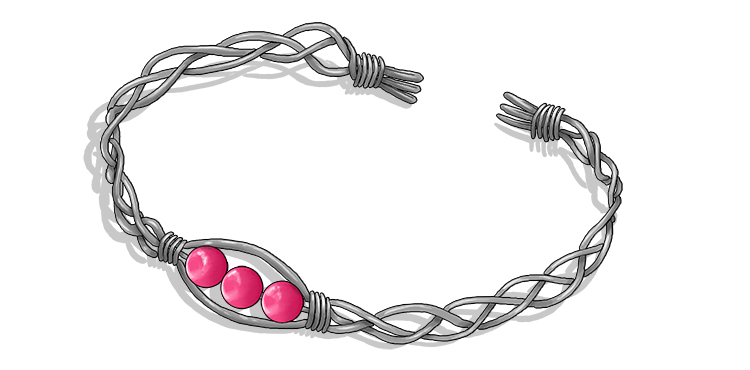
Bend the bracelet around a round object which is roughly the same circumference as your wrist.

As you are using stiff wire, the wire will keep its shape once bent, but have enough flexibility to easily put on and take off.
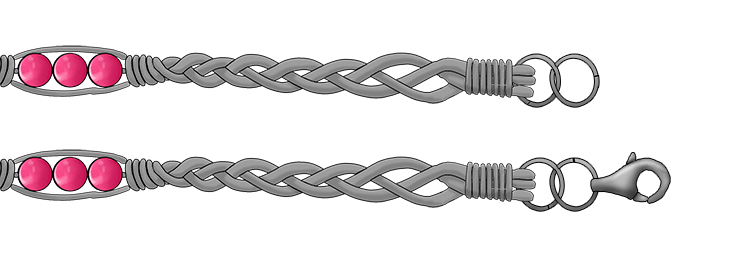
If you want a little more security, you can use a couple of split rings on each end to attach a trigger clasp.
Finally, your bracelet is ready to wear or display!
Decorative art.


